— 18 —
Message on LCD
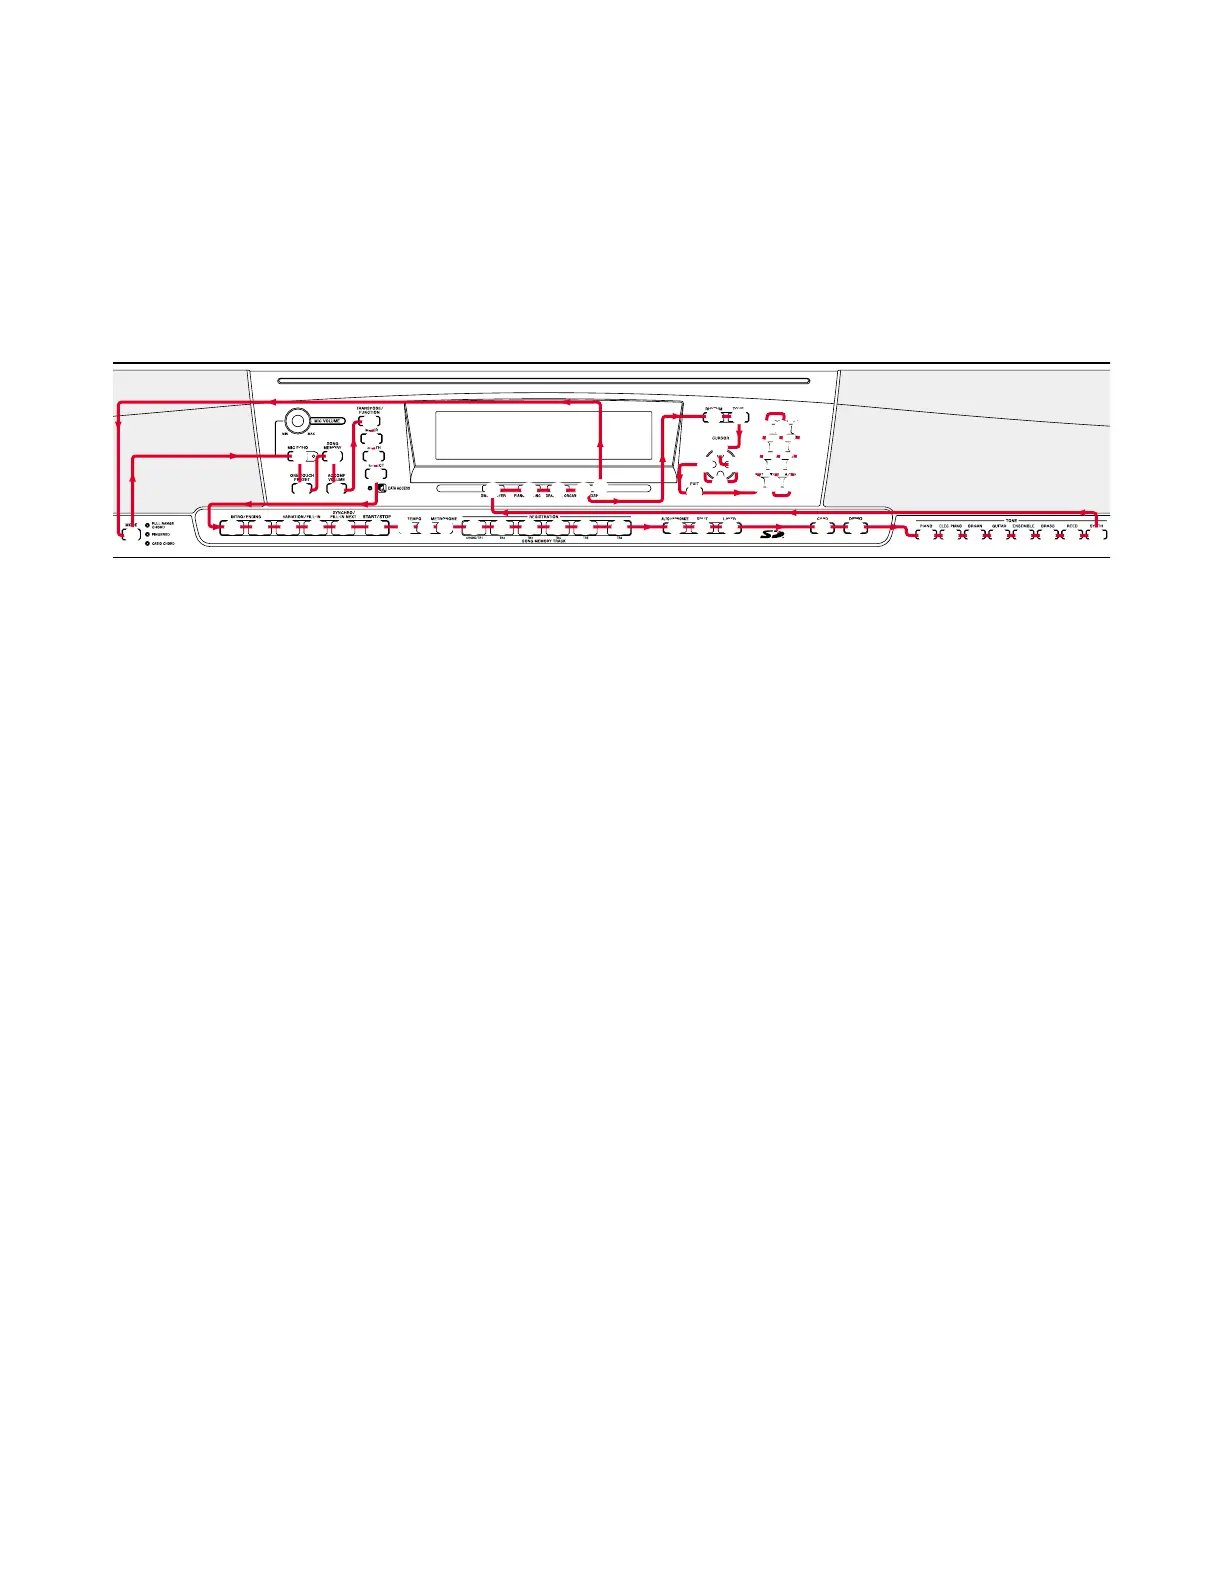
9. SWITCH check
1 Press “DSP” button.
2 Press the buttons in the following order. Button Name
* Confirmation sound sounds.
* The Button name appears on the LCD.
* A buzzer sounds if buttons are pressed in a wrong order, and “NG” appears on LCD.
* This check cannot be aborted in mid-course.
1
2
3 5
6
7
8
9
0
A B C D E F G HI J K L M N O
P Q R S T
U V W X Y Z [ \
] ^ a b
c d
e
g
i
j
k
l
m
q
p
o
n
r
s
t
u
fh
4
Message on LCD
10. BENDER check
1 Press “CHORD MODE” button. BEND_CHK
2 “BENDER” Dial “Turn up” 127BEND_CHK
3 “BENDER” Dial “Turn down” 000BEND_CHK
* Confirmation sound sounds.
4 “BENDER” Dial “Turn center” 064BEND_CHK
11. Pedal check (If there is no Pedal, this check can be skipped)
1 Press the “RHYTHM” button. PDLJ_CHK
2 Press the “SOFT” pedal. PDLJ_ON
* Confirmation sound sounds.
3 Press the “UPPER” button. DMPJ_CHK
4 Press the “DAMPER” pedal. DMPJ_ON
* Confirmation sound sounds.
5 Press the “RIGHT” button. DMP3_CHK
6 Press the “DAMPER” pedal.(HALF ON) DMP3_HLF
* Confirmation sound sounds.
7 Press the “DAMPER” button. DMP3_ON
* Confirmation sound sounds.
8 Press the “DOWN” button. SOS3_CHK
* Confirmation sound sounds.
9 Press the “SOSTENUTE” pedal. SOS3_ON
* Confirmation sound sounds.
0 Press the “LEFT” button. SOF3_CHK
A Press the “SOFT” pedal.(HALF ON) SOF3_ON
* Confirmation sound sounds.
 Loading...