— 11 —
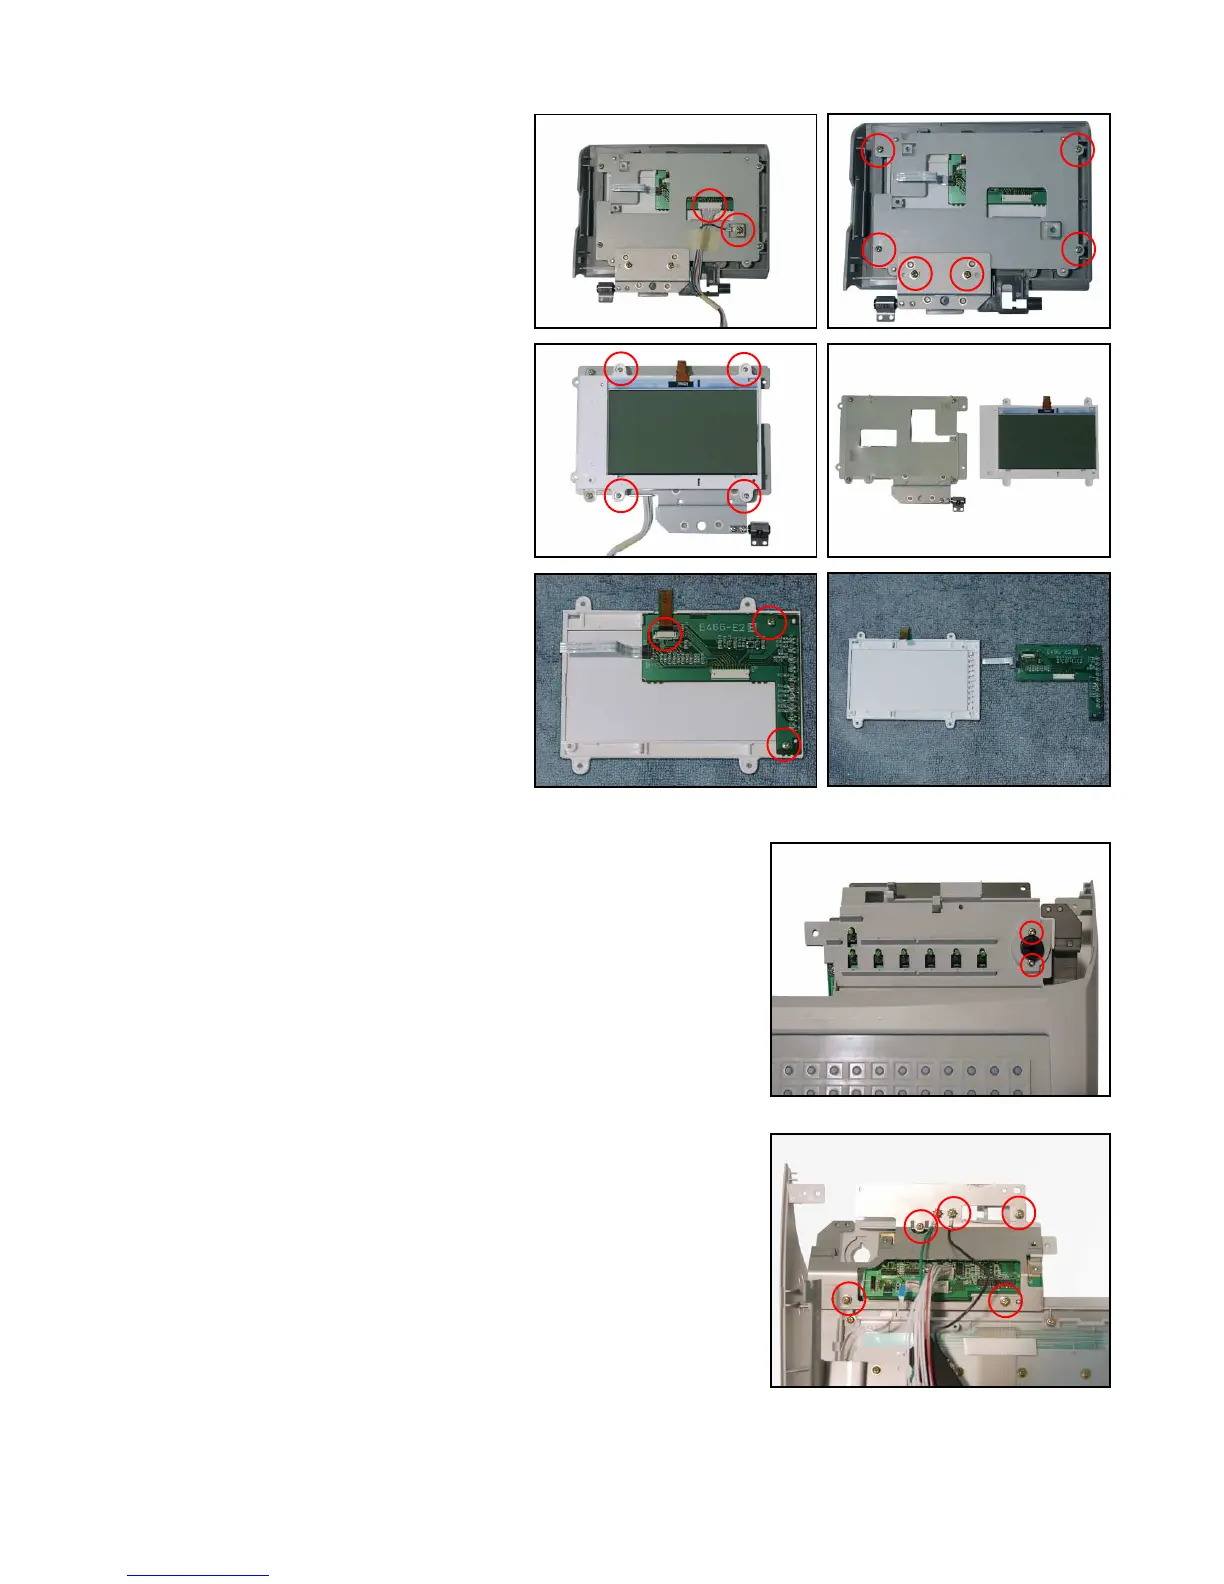
11. Turn over the LCD unit, and then remove
E466-E2 PCB (two screws and a connec-
tor) fixed on the back.
9. 1 Remove one screw and one connector.
2 Remove six screws, and then take out the
LCD unit (with chassis) from the display
case.
10.Remove four screws.
12
NOTE: Place a towel etc. under the LCD unit so
that the LCD surface will not be dam-
aged.
■ MODE KEY
1. Remove the two screws.
Remove the Mode key.
2. Remove the five screws.
 Loading...