V-R100
– 22 –
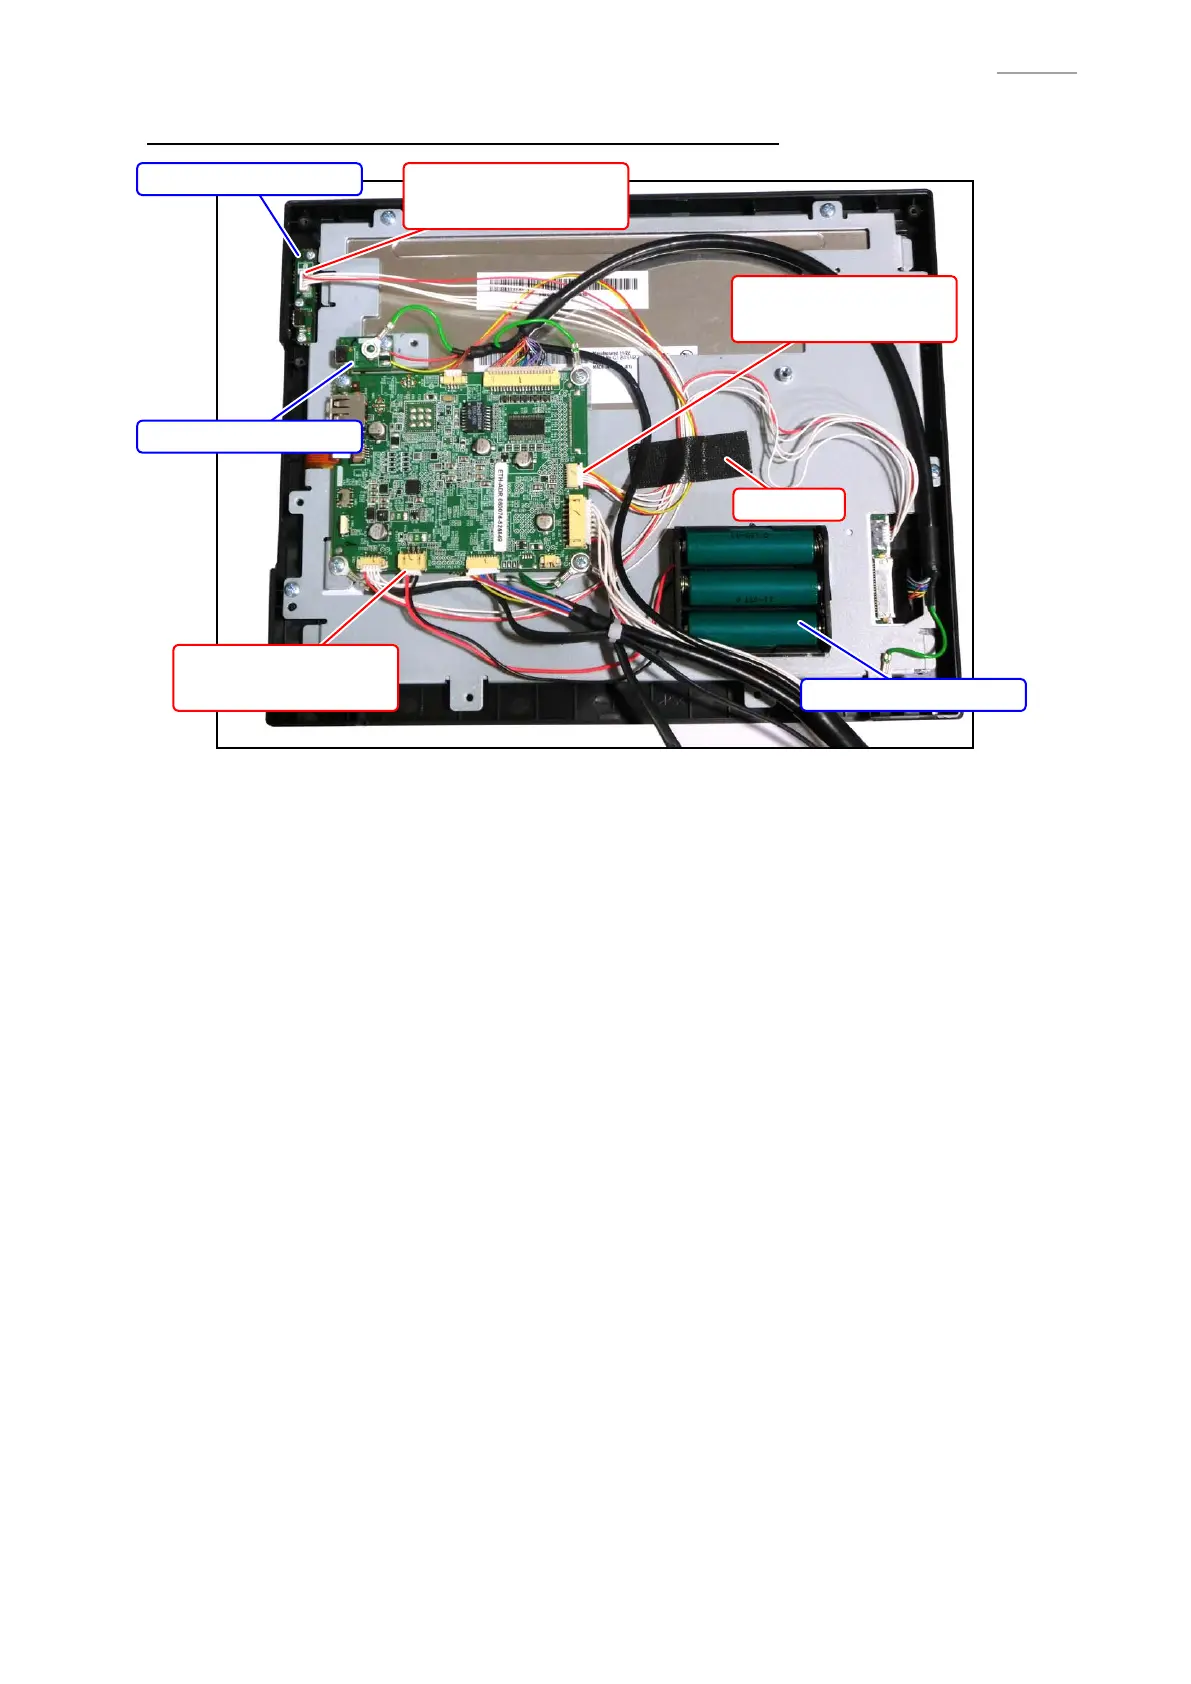
J. E840-E61 PCB / E840-E62 PCB / BAT-BOX-SUBASSY
J-1. E840-E61 PCB / E840-E62 PCB
1. Peel off the tape.
2. Undo three screws (S11) afxing E840-E61 PCB.
3. Dismount E840-E61 PCB.
4. Detach the connector on E840-E61 PCB.
5. Detach one connector (E840-E61/E62).
6. Undo one screw (S9) on E840-E62 PCB.
7. Dismount E840-E62 PCB.
J-2. E840-E61 PCB
1. Detach the connector.
2. Dismount BAT-BOX-SUBASSY.
Note: BAT-BOX-SUBASSY is glued by double sided tape.
E840-E62 PCB
BAT-BOX-SUBASSY
E840-E61 PCB
Connector
BAT-BOX-SUBASSY
Connector
E840-E61 PCB
Connector
E840-E61/E62
Tape
 Loading...