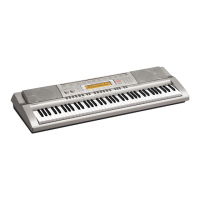
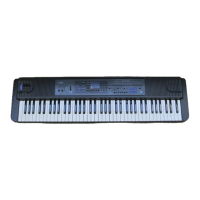
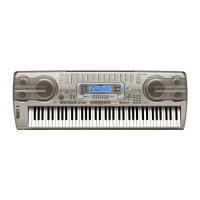
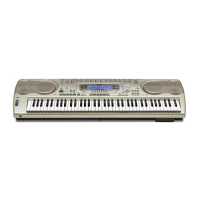
The provided document outlines operational guidelines for Casio EMI high-grade keyboards, specifically models AT-3, WK-7600, WK-6600, CTK-7200, and CTK-6200. These guidelines focus on two primary functions: the Song Sequencer for recording individual tracks and the Pattern Sequencer for creating rhythmic patterns. The manual also includes instructions for deleting tracks and songs.
Song Sequencer (Recording Individual Tracks)
The Song Sequencer feature allows users to record multiple individual tracks to create a complete song. This process involves setting up the recording environment, selecting tones, configuring the beat, and then recording each track sequentially.
Function Description:
The Song Sequencer enables multi-track recording, allowing users to layer different instrument sounds or voices to build a musical composition. It supports recording up to 16 individual tracks, providing flexibility for complex arrangements. The sequencer operates by recording musical input from the keyboard, along with selected tones and rhythmic settings, into designated song areas.
Usage Features:
- Entering Song Sequencer Mode: To begin, the user presses the C-5 (SONG SEQUENCER) button. This action transitions the keyboard into the dedicated song sequencer interface, where recording and editing functions become accessible.
- Initiating Recording: Once in sequencer mode, pressing the C-6 (RECORD) button prepares the system for recording.
- Tone Selection: Users can select their preferred instrument tones or voices for each track. This is achieved by pressing the Tone buttons (R1-R12) and then using the R-14 (-,+) buttons or the main dial to browse and choose from the available tones. For example, a "StereoGrand Piano" might be selected for the first track.
- Beat Configuration: Before recording, the beat settings need to be configured. This involves holding down the R-13 (FUNCTION) button and simultaneously pressing the C-17 (MENU) button to access the recording menu.
- Beat Setting: Within the menu, users can adjust the beat setting (e.g., 2/4, 8/4, 2/8) using the dial or R-14 (-,+) buttons.
- Metronome Control: The metronome can be turned "off" by navigating to the "Metronome" option using the R-17 (V) button and then adjusting with the R-14 (-,+) buttons.
- Precount Activation: The "Precount" feature, which provides a count-in before recording starts, can be turned "on" by selecting it with the R-17 (V) button and then using the R-14 (-,+) buttons.
- Exiting Menu: After configuration, the R-15 (EXIT) button is pressed to return to the main sequencer screen.
- Starting and Stopping Recording: The L-17 (START/STOP) button serves to initiate recording after the precount and to stop it once the desired segment is played.
- Multi-Track Recording: For subsequent tracks, the user presses C-6 (RECORD) again, then uses the R-17 (>) button to select the next track number (e.g., Track 2). A new tone can be chosen (e.g., "Bass" for Track 2), and the recording process is repeated. The L-17 (START/STOP) button is pressed to start the previous recording playing in the background while the current track is recorded, allowing for layering.
- Playback: After all tracks are recorded, pressing the L-17 (START/STOP) button allows the user to listen to the complete song sequence.
- Song Area Management: The keyboard allows users to select different song area numbers using the dial or R-14 (-,+) buttons, enabling the storage and recall of multiple compositions.
Maintenance Features:
- Deleting Tracks and Songs: The manual provides clear instructions for deleting recorded tracks or entire songs.
- Enter Song Sequencer Mode: Press C-5 (SONG SEQUENCER).
- Select Song Area: Use the dial or R-14 (-,+) buttons to select the specific song area from which data needs to be deleted. The display indicates if data recording is done for a particular song area (e.g., "User Song 1 *1").
- Access Delete Menu: Hold down R-13 (FUNCTION) and press C-17 (MENU) to open the "S.SEQ Menu."
- Select Deletion Option: Use the R-17 (V) button to choose between "Clear Track" or "Clear Song."
- Clear Track: If "Clear Track" is selected, use the R-17 (>) button to specify which track to delete. Then, press R-16 (ENTER) and confirm with R-14 (YES).
- Clear Song: If "Clear Song" is selected, use the dial or R-14 (-,+) buttons to select the target song (e.g., "[SONG] *1"). Then, press R-16 (ENTER) and confirm with R-14 (YES).
- Exit Menu: Press R-15 (EXIT) to exit the menu.
Pattern Sequencer
The Pattern Sequencer allows users to create and record rhythmic patterns, often used for drums or accompaniment.
Function Description:
The Pattern Sequencer is designed for creating custom rhythmic loops or patterns. It enables users to record drum sounds or other percussive elements, which can then be used as accompaniment for performances or further song sequencing. The sequencer operates within a defined measure loop, typically 16 measures, allowing for repetitive rhythmic structures.
Usage Features:
- Accessing User Rhythms: Start by pressing the L-9 (USER RHYTHMS) button. If no data is present, select "No Data" using R-14 (-,+) buttons or the dial.
- Entering Pattern Sequencer Mode: Press the C-4 (PATTERN SEQUENCER) button to enter the pattern sequencer mode.
- Initiating Recording: Press the C-6 (RECORD) button to prepare for recording.
- Beat Configuration: Similar to the Song Sequencer, beat settings need to be configured. Hold R-13 (FUNCTION) and press C-17 (MENU) to access the "Rec Menu."
- Quantization: Adjust the "Quant" setting (e.g., 4, 8, 8T, 16, 16T) using the dial or R-14 (-,+) buttons. This feature helps to correct timing inaccuracies in recorded performances.
- Precount: Set the "Precount" to "1" using the R-17 (V) button and R-14 (-,+) buttons.
- Play Chord: Select the "PlayChord" setting (e.g., C, C7, Cm) using the R-17 (V) button and R-14 (-,+) buttons. This feature might relate to how chords are interpreted or played back within the pattern.
- Metronome: Turn the metronome "on" by selecting it with the R-17 (V) button and adjusting with the R-14 (-,+) buttons.
- Exiting Menu: Press R-15 (EXIT) to exit the menu.
- Drum Tone Selection: Select desired drum sounds by pressing GM/Drum (R1-R12) and using R-14 (-,+) buttons or the dial to choose from available drum sets (e.g., "StandardSet1").
- Starting and Stopping Recording: Press the L-17 (START/STOP) button to begin recording after the precount. The system will record a 16-measure loop. Press L-17 (START/STOP) again to stop recording.
- Layering Parts (Bass, Chords):
- Bass Part: Press C-6 (RECORD), then R-17 (>) to select "PART: BASS." Choose a bass tone (e.g., "Fretless Bs1") using R-4 and R-14 (-,+) buttons or the dial. Repeat the recording steps (L-17 START/STOP).
- Chord Part: Press C-6 (RECORD), then R-17 (>) to select "PART: CHORD1." Choose a guitar tone (e.g., "Mute Guitar1") using R-4 and R-14 (-,+) buttons or the dial. Repeat the recording steps (L-17 START/STOP).
- Saving the Recording: After completing all parts, press R-15 (EXIT) to save the recording. Confirm by pressing R-14 (YES) and then R-16 (ENTER).
- Playback: Press L-17 (START/STOP) to play the pattern sequencer and use chords for accompaniment.
Maintenance Features:
- The document does not explicitly detail maintenance features for the Pattern Sequencer beyond the general saving and deletion processes. However, the ability to save patterns implies that they can be recalled and potentially edited later, contributing to the longevity and reusability of created content. The deletion process for songs and tracks, as described for the Song Sequencer, would likely apply to patterns as well, allowing users to manage their stored rhythmic data.
Overall, these Casio EMI keyboards offer robust sequencing capabilities, enabling users to compose multi-layered songs and create intricate rhythmic patterns. The interface, with its clearly labeled buttons and menu navigation, is designed to guide users through the recording and editing processes, making advanced musical creation accessible.