-50-
"BackupKlg.html" (given file)
Directory structure of the unzipped program
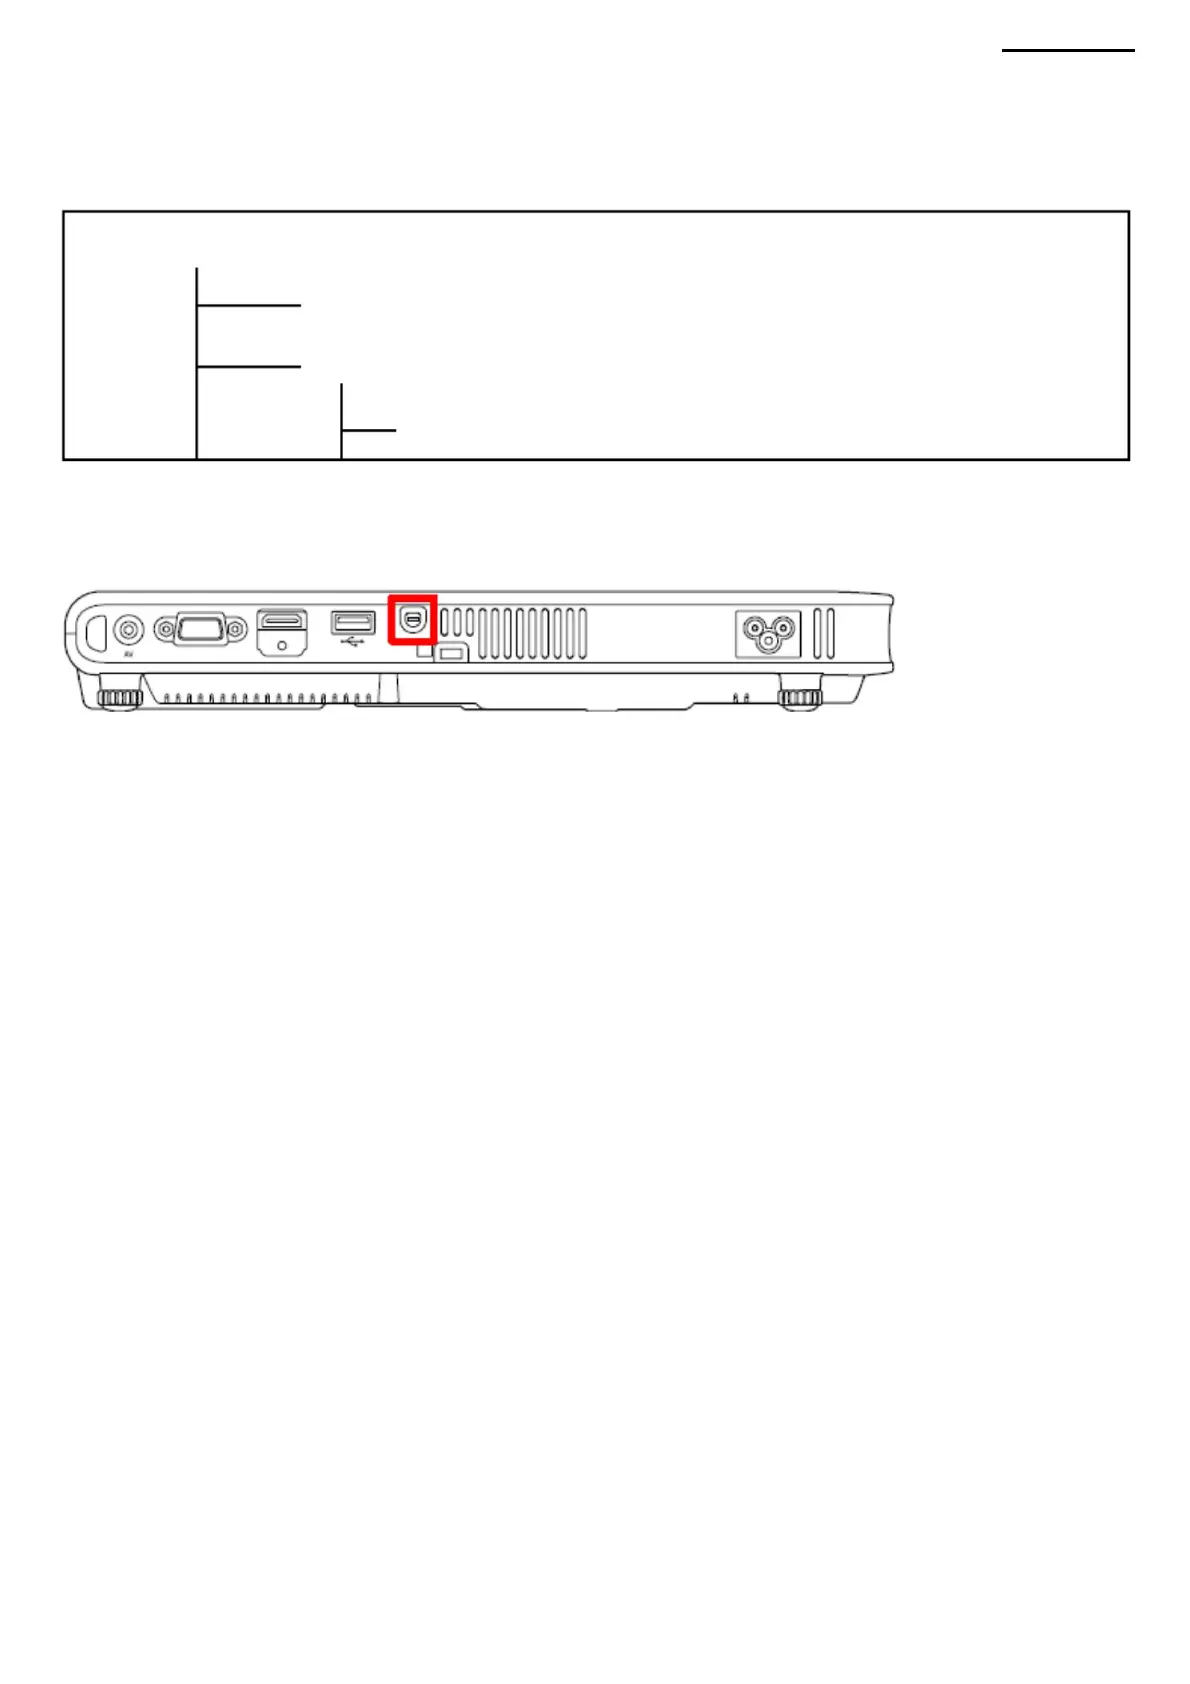
9-4. Connecting the projector (1)
Connect a PC and a separate RS232 cable (TY6571-010107 (B Type): D-sub with 9 pins on one side). (2) Connect the
projector and a separate RS232 cable (TY6571-010107 (B Type): D-sub with 9 pins on one side). (Indicated in red in the
figure).
"Current Folder"
9-5. Starting the program and setup screen (1) Connect
the projector to the host computer as described in “9-4. Connecting a Projector". Do not connect the power cable until the
host computer and projector are connected. (2) Connect the power cable to the projector, and wait until
the [POWER] LED lights up in yellow (Standby). (3) Press the projector buttons below to enable communication between
the projector and the host
computer (backup mode). NOTE: Perform the following procedure while in standby mode. Executing it in a different mode
may result in the inability
to enter the backup mode. Keep the [ESC], [FOCUS] and [AUTO] buttons pressed. Status of [POWER/LAMP/TEMP]
LEDs on the projector: [POWER]: Flashing green/ [LAMP/TEMP]:
Off (4) In standby mode, run the “KlgBkup.exe” file from the host
computer.
BackupKlg.exe (given application)
XJ-A240/A245
"ReadMe" (help file folder)
9-3. Installing the software Copy the file (BackupKlg.zip)
to an appropriate working folder and unzip it. This is all that needs to be done.
Machine Translated by Google
 Loading...