10. ADJUSTMENT
Step 1. Press the [ENTER] and [ ] buttons simultaneously.
Step 2 After pressing the buttons as described in step 1, press and hold the [INPUT] button for 2 seconds. (a total of 3
buttons must be held down).
to confirm the selection, and run diagnostics. • To return
to the previous menu level, press the [ESC] button. • To exit the diagnostic
program, move the cursor to "Diag Exit [ENTER]" and press the button
When replacing the main PCB (PWB-1 BOARD) or the OPM, perform the indexing delay setting.
[ENTER].
Step 3 Release all buttons except the [INPUT] button.
10.1 Startup procedure (1)
Connect the power cable to the projector and wait for the [POWER] LED to turn yellow. (2) Press the [ (POWER] button on
the
remote control or on the projector to turn on
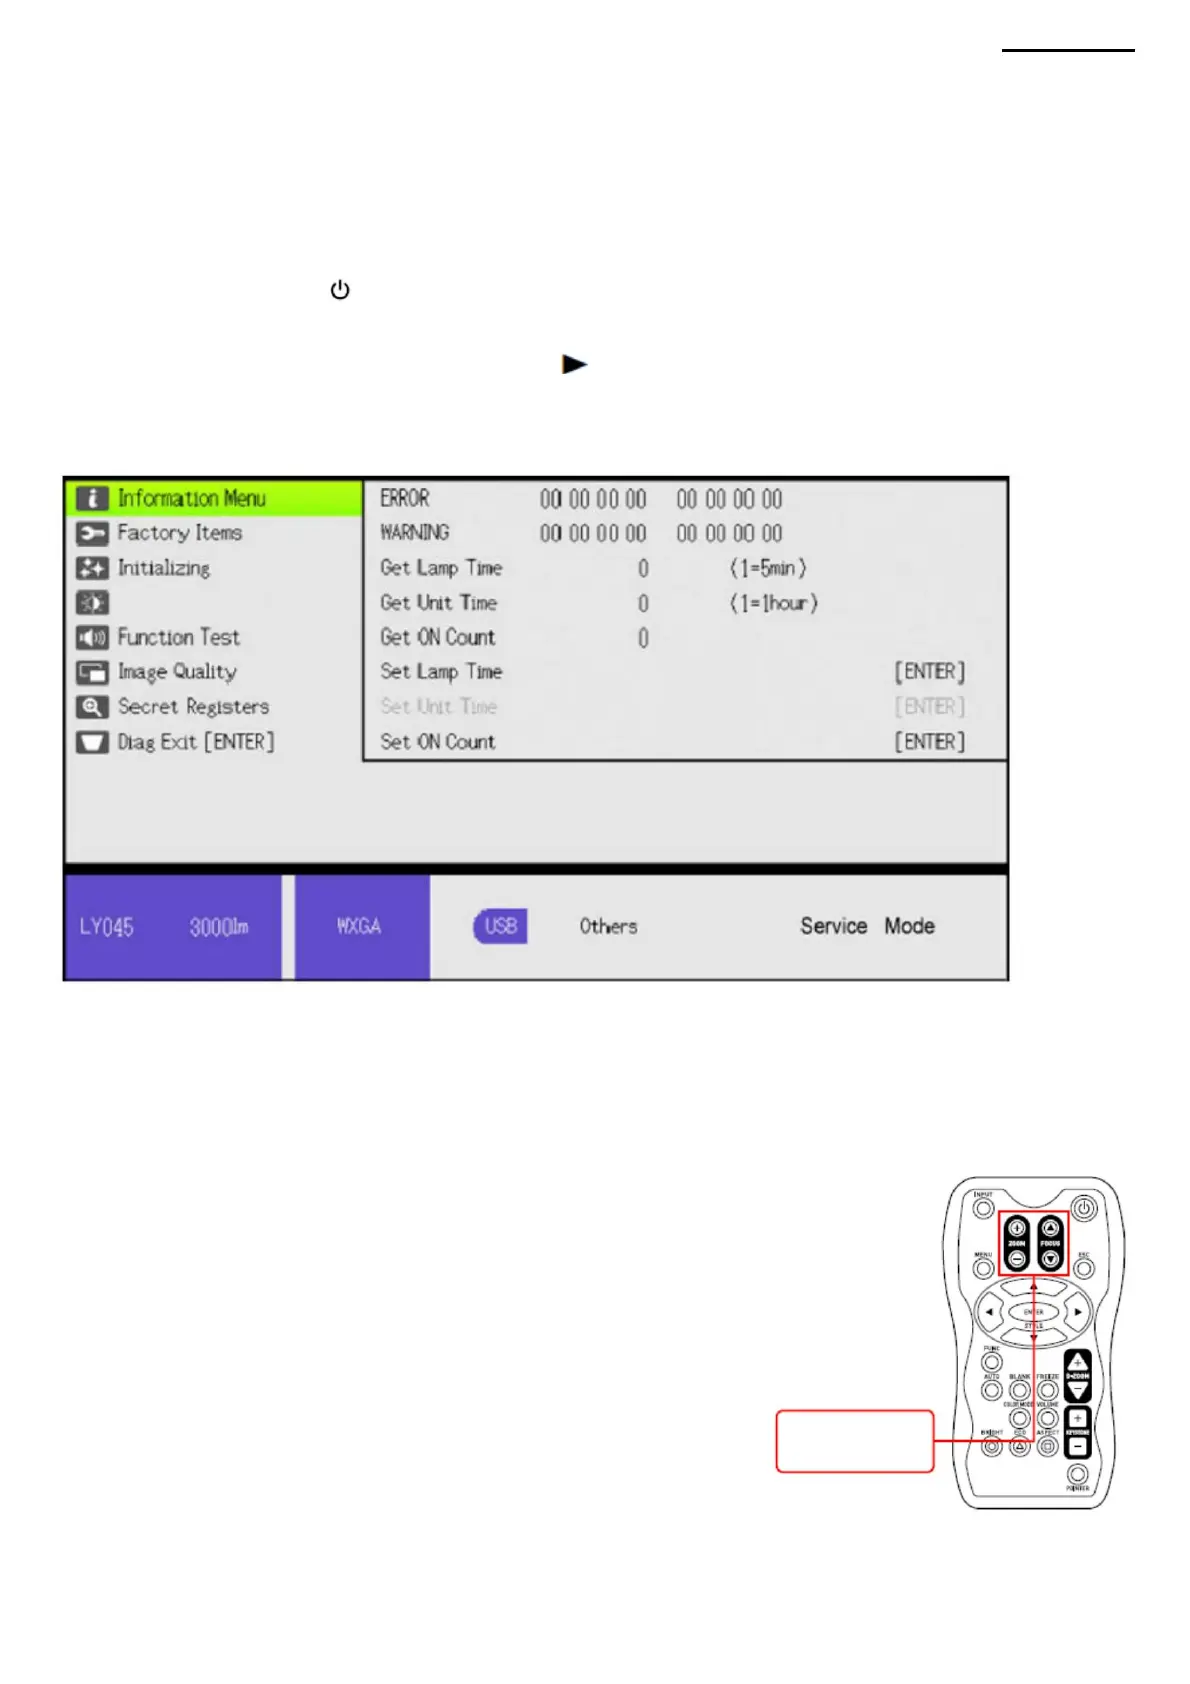
NOTE: While the diagnostic program is running, the [ZOOM] and [FOCUS]
buttons on the main unit are inactive. To change the image size or focus, use
the [ZOOM] and [FOCUS] buttons on the remote control, which remain active.
(4) The diagnostic program menu will appear.
his.
XJ-A240/A245
10-2. Procedure •
Use the cursor buttons to select the item to be diagnosed, then press the [ENTER] button.
(3) Follow the steps below to run the diagnostic program.
[ZOOM] button/
[FOCUS] button
-59-
Machine Translated by Google
 Loading...