EasyManua.ls Logo

Casit EQ2009 - User Manual

Default Icon
14 pages
Print Icon
To Next Page IconTo Next Page
Loading...
ISO 9001:2008
Cert. n. 3614/4
Quality System Certified
Cancelli Automatici Shed Infissi Telecomandati MADE IN ITALY
Page 1 of 14 EQ2009 R 1.6 1.8 Rev. 02 del 2/05/2011
Stab.: Strada Pietra Alta 1 C.a.p. 10040 CASELETTE (TO) Italy
Tel. +39 011 9688230170930 Fax +39 011 9688363
Partita IVA 0050659.001.7 Reg. Trib. Torino N.654/62
C.C.I.A.A. 333122 - M: T0024777 Web: www.casit-italy.com
Email: info@casit.it Email pec: direzione@pec.casit.it
EQ2009 R 1.6 R 1.8
CONTROL BOX GATE’S OPENING - 2 MOTORS SINGLEPHASE 230VAC WITH ENCODER
OPERATION PROGRAMS
With the combination of the mini DIP switches it is possible to program the gate’s operation and of the auxiliary services.
STEP BY STEP, SEMIAUTOMATIC, AUTOMATIC, DEAD-MAN, PEDESTRIAN, SHORT CLOSING IMPULS, TIMER, SLOW-
DOWN MOTORS, POWER STARTING, TEST PHOTOCELLS, MOTORS INDIPENDENT OR UNIFIED, MEMORISATION OF
WORK’S TIME, REVERSE, OPERATION TYPE B.
Warning ! To enter a new program, the control box must be zero set in order to allow the storage of the new instructions replacing
the previous one. For such purpose it is possible to follow two different procedures:
1) set the wanted instructions through the programming devices (DIP) cut out the supply voltage for a few seconds and then
switch-on the supply voltage. The control box must effect one cycle complete and then is ready.
2) set the wanted instructions and effect a new cycle complete. After the one cycle (opening-closing) the control box is ready.
FUNCTIONS:
STEP BY STEP (S2 DIP 2 OFF) at every impulsion of start the control box :open-stop-close-open
SEMIAUTOMATIC (S2 DIP 2 ON) at every impulsion of start the control box open.for the closing it is necessary another impulsion
of start. (S1 DIP1 OFF) or automatically (S1 DIP1 ON).
AUTOMATIC (S2 DIP 1 OFF, DIP 2 ON, S1 DIP 1 ON) At every impulsion of start the control box open.
Then close automatically After the adjusted time.
DEAD-MAN (S2 DIP 1 ON, S1 DIP1 OFF, DIP 3 OFF) push bottons separate. When the push bottons are pushed, the motors runs
when are released ,the motors stop. The limit switches are in function.
PEDESTRIAN it is possible to open, partially, the gate, (see the planning menu) and after the cycle is effected following the
program selected by the DIP. During the pedestrian closing the photocell opens the gate.The closing-time is equal to the total work’s
time,so that the gate can close fully.
SHORT CLOSING IMPULS (S1 DIP 6 ON) at every opening-start (when the gate is closed) the motors runs in closing (few instant)
to permit the easier release of the electrolock, then the motors runs in opening.
TIMER it possible to connect a timer to opening the gate for the time during the contact of the timer is activated S2 DIP 1 OFF, DIP
2 ON, S1 DIP 1 ON DIP 3 ON. ON.When the contact of the timer is released,the gate close after the time selected.
SLOW-DOWN-MOTORS it is possible to set the slow down motor in opening and closing during the planning , but 2 sec. before the
closing,the motors have max. power for an easy locking of the electrolock (S2 DIP 3 ON).
The speed of deceleration can be regulated with control power P6.
The moment in which the slow-down starts can be differentiated between the opening and the closure.
POWER STARTING at every impulsion of start the motors start at the max. power for 3 sec and then, runs at the power adjusted by
P1 e P4.
TEST PHOTOCELLS (S3 DIP 1 e DIP 2 PLUGS 32-33) at every cycles the control box verify if the photocell’s receiver is in
fonction.
MOTORS INDEPENDENTS OR UNIFIED (S1 DIP 5) the motors can have the work’s time independent (double sliding, double
barrier etc..) also the operation of the limit switches is independent of each (S1 DIP 5 OFF adjust P1 e P4), the pedestrian works
on 1 motor only. Or the motors can have the work’s time unified (2 motors on a garage door ,etc..).So, only one limit switch stop the
two motors (S1 DIP 5 ON adjust P1 ), the pedestrian works on both motors.
MEMORISATION OF WORK’S TIME the control box memorize the time of opening and closing. So, the motors runs for the right
time +few seconds. And if the gate re-open when is in closing the motors not runs for a long time.
REVERSE (S3 DIP 4 OFF) survey obstacle along the run of the gate (see chapter 10).
OPERATION TYPE B (S3 DIP 3 ON ) it trains the card for signal clinking and it changes the work formality of the input Safety
edge 1 and 2.
INSTALLATION 2 MOTORS IN THE ONE LEAF (ex.garage door-big swing):
To connect the 2 motors one to the plug M4 and the second to the plug M5. Select the Dip-switch S1 ON "working time unified for
the 2 motors on M1" and follow the program for one motor (chap. 8.1)
WORKS SHAFTS WITH ENCODER ( shafts dip-switch S4)
EMERGENCY MANOEUVRE working dead-man with the exception of safety (Chapter 12).
TECHNICAL SPECIFICATIONS
Control unit power: 230VAC Hz 50/60 Motor output: 2 x 500W (tryac 16A - Relais motor max 10°)
Accessories power: 24 VAC - 500 mA (the sum absorptions clamps 32-33-34 e 29-30)
Electrolock power: 12 VAC - 1 A Environmental operatine temperature: -15°C / + 60°C
Line fuse F1 5A, fusibile signal clinking F2 1A
Box standard version dimensions:255x200x105mm (size of the special version could change) IP Grad: 54
WARNING!
Do not use with motor over 350w: slow-down-motors, power starting, reverse.
When the control panel is used with the relays or teleruptors connected to the output motor for powers
motors up to 350W, regulate the push motor (P1 and P4) to the maximum power.
Before installing, thoroughly read this manual that is an integral part of this Kit. Casit declines any
responsibility in the event current standards in the country of installation are not complied with
GB
Question and Answer IconNeed help?

Do you have a question about the Casit EQ2009 and is the answer not in the manual?

Overview

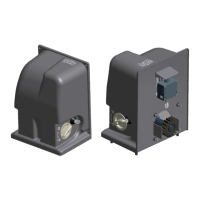
The EQ2009 R 1.6 R 1.8 is a control box designed for gate opening systems, specifically for two single-phase 230VAC motors with encoders. It offers a wide range of programmable operations and auxiliary services, configurable via mini DIP switches.

Function Description:

The control box supports various operational programs:

  • STEP BY STEP: Each start impulse cycles through open-stop-close-open.
  • SEMIAUTOMATIC: An impulse opens the gate, and a second impulse or automatic setting is required for closing.
  • AUTOMATIC: An impulse opens the gate, which then closes automatically after a set time.
  • DEAD-MAN: Motors run only while buttons are pressed, stopping when released. Limit switches are active.
  • PEDESTRIAN: Allows partial opening of the gate, with photocell opening during pedestrian closing. Closing time equals total work time.
  • SHORT CLOSING IMPULSE: At opening-start (when closed), motors briefly run in closing to ease electrolock release, then open.
  • TIMER: Connects a timer to open the gate for the duration of the timer's activation. The gate closes after the selected time when the timer contact is released.
  • SLOW-DOWN MOTORS: Allows setting slow-down for opening and closing, with maximum power for 2 seconds before closing for electrolock. Deceleration speed is regulated by P6. Slow-down start can be differentiated between opening and closing.
  • POWER STARTING: Each start impulse initiates motors at maximum power for 3 seconds, then runs at the power adjusted by P1 and P4.
  • TEST PHOTOCELLS: Verifies photocell receiver function at every cycle (S3 DIP 1 & DIP 2, plugs 32-33).
  • MOTORS INDEPENDENTS OR UNIFIED: Motors can have independent work times (double sliding, double barrier) and limit switch operation (S1 DIP 5 OFF, adjust P1 & P4). Pedestrian works on one motor only. Alternatively, motors can have unified work times (2 motors on a garage door), with one limit switch stopping both motors (S1 DIP 5 ON, adjust P1). Pedestrian works on both motors.
  • MEMORISATION OF WORK'S TIME: The control box memorizes opening and closing times. Motors run for the correct time plus a few seconds. If the gate re-opens during closing, motors do not run for a long time.
  • REVERSE: Surveys obstacles during gate operation (S3 DIP 4 OFF).
  • OPERATION TYPE B: Trains the card for signal blinking and changes input formality for Safety Edge 1 and 2 (S3 DIP 3 ON).

Installation for 2 Motors in One Leaf (e.g., garage door-big swing):

Connect motors to M4 and M5. Select Dip-switch S1 ON for "working time unified for the 2 motors on M1" and follow the program for one motor.

WORKS SHAFTS WITH ENCODER: Configurable via shafts dip-switch S4.

EMERGENCY MANOEUVRE: Allows dead-man operation, excluding safety features.

Important Technical Specifications:

  • Control unit power: 230VAC Hz 50/60
  • Motor output: 2 x 500W (triac 16A - Relay motor max 10°)
  • Accessories power: 24 VAC - 500 mA (total absorption from clamps 32-33-34 & 29-30)
  • Electrolock power: 12 VAC - 1 A
  • Environmental operating temperature: -15°C / + 60°C
  • Fuses: Line fuse F1 5A, signal blinking fuse F2 1A
  • Box standard version dimensions: 255x200x105mm (special version size may vary)
  • IP Grade: 54

Usage Features:

Programming:

To enter a new program, the control box must be zero-set. This can be done by:

  1. Setting desired instructions via DIP switches, cutting power for a few seconds, then switching power back on. The control box must complete one full cycle.
  2. Setting desired instructions and completing one full cycle (opening-closing).

Power Adjustment:

  • P1: Sets power for motor 1.
  • P2: Sets obstacle sensitivity for motor 1.
  • P3: Sets obstacle sensitivity during slow-down for both motors.
  • P4: Sets power for motor 2.
  • P5: Sets obstacle sensitivity for motor 2.
  • P6: Sets slow-down speed for both motors.

DIP-Switch S1 Functions:

  • DIP 1 (ON/OFF): Automatic closing after work time-break (ON) or without (OFF) for START input.
  • DIP 2 (ON/OFF): Automatic closing after pedestrian time-break (ON) or without (OFF) for PEDESTRIAN input.
  • DIP 3 (ON/OFF): Active command inputs as START and PEDESTRIAN (ON) or OPEN and CLOSE separate (OFF).
  • DIP 4 (ON/OFF): Radioreceiver RX1 works as terminal block START (ON) or step-by-step (OFF).
  • DIP 5 (ON/OFF): Same work time for both motors on M1 (ON) or separate/independent work time (OFF).
  • DIP 6 (ON/OFF): Motors work for 3 seconds after CLOSES limitswitch (ON) or only until CLOSES limitswitch (OFF).
  • DIP 7 (ON/OFF): Automatic closing after work time-break for radioreceiver RX1 (ON) or without (OFF).
  • DIP 8 (ON/OFF): SAFETY EDGE 2 stops movement and closes totally during opening (ON) or stops movement and closes for 2 seconds (OFF).
  • DIP 9 (ON/OFF): High (ON) or low (OFF) threshold for starting encoder.
  • DIP 10 (ON/OFF): Short closing impulse on (ON) or off (OFF).

DIP-Switch S2 Functions:

  • DIP 1 (ON/OFF): Dead man working (ON) or IMPULSIVE working (OFF).
  • DIP 2 (ON/OFF): Semiautomatic program (ON) or step-by-step (OFF).
  • DIP 3 (ON/OFF): Maximum power in closing for last 2 seconds (ON) or off (OFF).
  • DIP 4 (ON/OFF): Power starting motors on (ON) or off (OFF).
  • DIP 5 (ON/OFF): Photocell 1: In opening, closes after 2 seconds (ON). Standard work: gate not open if closed and foto 1 obscured. During closing, stops and reopens if foto 1 obscured. During opening, stops and reopens if foto 1 obscured (OFF).
  • DIP 6 (ON/OFF): If gate is closed, START opens if PHOTOCELL 2 obstructed (ON) or not (OFF).
  • DIP 7 (ON/OFF): Pre-alarm signal blinking 1 sec (ON) or 4 sec (OFF).
  • DIP 8 (ON/OFF): Output signal blinking intermittent (ON) or fixed (OFF).
  • DIP 9 (ON/OFF): Working with 2 motors (ON) or 1 motor on M1 (OFF).
  • DIP 10 (ON/OFF): Admittance to planning menu (ON) or control panel in work condition (OFF).

Planning Menu (8):

To enter the planning menu, remove current to the plant and set "Dip 10 S2 ON". The menu allows regulation of:

  • Time of work (opening/closing).
  • Time-break of work.
  • Pedestrian time-break. Speed deceleration must be set before memorizing the stroke. "Dip 9 S2" should be set according to the motors used (ON for two motors, OFF for one motor). Shaft models (with or without encoder/limitswitches) S4. After setting, put DIP 10 S2 OFF and fit the control panel. The push button PS3 selects parameters, and PS1/PS2 adjust values. PS1/PS2 can also be activated via external digipad connected to N.O. Open (26-28 PS1s) and N.O. Pedestrian (27-28 PS2s) clamps. Learning cannot be done via remote control. LEDs L14 (REV 1), L15 (REV 2), L16 (Set) visualize setting type. Short closing impulse: Press PS2 when gate is closed to get a closing push on M1 and open the electrolock (only with electrical limit switch in closing over-bridge or if not activated). Then use PS1 for work time memorization.

Survey Obstacle (10):

The EQ2009 has an independent obstacle survey circuit per motor. WARNING: Obstacle survey is not active during work time memorization. To activate, set S3 dip 4 OFF (ON to exclude). Sensibility is regulated by P2 (REVERSE M1) for motor 1 and P5 (REVERSE M2) for motor 2 during normal speed, and P3 during deceleration. Setting adjusters toward "-" (hourly sense) decreases sensibility (greater gate power), toward "+" increases sensibility (smaller gate power). P6 regulates slow-down speed. Reverse intervention causes a short red flash on REV 1 (motor 1) or REV 2 (motor 2). In opening, reverse causes arrest and 2-second march inversion. In closing, reverse causes arrest and complete re-opening. If a new obstacle is introduced during subsequent closing, arrest with 2-second inversion occurs. During the last seconds of the stroke, REV 1 and REV 2 turn green, signaling the last phase of maneuver, where reverse causes arrest without inversions. Before activating reverse, set push power (P1 for motor 1, P2 for motor 2) to acceptable levels, then activate reverse and regulate sensibility. If deceleration reverse setting is difficult, set reverse power adjuster to maximum to exclude it.

Contact Working Safety Edge 1 and 2 (11):

  • Without encoder: Safety edge contacts 1 and 2 work with N.C. contact.
  • With encoder: Safety edge contacts 1 and 2 read signals from encoder sensor. Obstacle survey from encoder:
    • In closing: completely reverses, waits 1 minute, then closes. Closing can be anticipated by a Start impulse.
    • In opening: completely reverses for 2 seconds, waits 1 minute, then closes. Closing can be anticipated by a Start impulse.
    • WARNING: REVERSE detects power absorption. Sensibility is adjustable. ENCODER detects motor speed variation. Sensibility is fixed. REVERSE E ENCODER can work in coupling or without.

Emergency Manoeuvre (12):

Allows maximum power operation of 2 motors in dead-man mode.

  • INACTIVE: Photocells, safety edges, electronic clutch, reverse amperometric and encoder.
  • ACTIVE: Limit switches, signal blinking, and possible final slowdown. Press and hold EMERGENCY MANEUVER (N.O. contact terminal board 11 terminals 42-33): Motors start to open in dead-man mode after 2 seconds. Releasing the button stops motors. Pressing a second time restarts motors in dead-man mode after 2 seconds. Releasing the button stops motors.

Pedestrian Mode with Timer (13):

Set S1: dip 1,2,3,4,7 ON. S2: dip 2,6,7,9 ON. S3: dip 4,5 ON. With pedestrian contact on, a timer and pedestrian door open. Use RX1 contact (35-41 of M12) for full opening of M1 and M2. Do not use START contact (26-28 of M10). RX1 opens both doors fully, and after pause, they close fully; then pedestrian door opens again (because pedestrian contact is closed by the timer). Same function if radio is used.

Motor with Encoder + Limit Switches on Motor Phases (14):

Limit switches are always connected to 20,21,22,23,24 of M9. To connect limit switches on motor phases: set Dip 2 of S4 ON, Dip3 of S4 OFF (during last 6 sec. of stroke, encoder/reverse stops gate without reverse), and short-circuit 20,21,22,23,24 of M9. Warning: With test-triac OFF (Dip 2 of S4 ON), use all security (photocells, safety edges) possible.

Maintenance Features:

Troubleshooting:

The manual provides a table of probable causes and solutions for common problems, such as:

  • 230 volt mains voltage absent: Check master switch.
  • Emergency STOP present: Check for STOP commands on input 25.
  • No jumper between 25 input and common: Check for jumper on 25 input if not used.
  • Burnt fuse: Replace fuse.
  • Motor power cable not connected or faulty: Check connection or replace cable.
  • Flashing LED L2 or L3 (triac TH1/TH2 damage): Remove current, then fit control panel.
  • Photocell obstructed or not functioning: Check, clean, or remove obstacle.
  • Photocell missing or no jumper between 18, 19 input and common: Check accessory connections and jumper.
  • Safety edge missing or bridge not present among 15, 16 entry and common: Verify connections and bridge.
  • Bridge missing among input 37-38: Verify bridge presence.
  • Motors limit switches missing or no bridge among 20, 21, 23, 24 input and common: Verify limit switches or bridge presence.
  • Key selector NC contact used instead of NO contact for 26 input: Check connections.
  • Radiotransmitter not memorized or broken/battery flat: Check/change battery, carry out acknowledgment procedure.
  • Electrical limit switch activates but motor does not stop: Check connections.
  • Opening/closing limit switches exchanged: Check connections.
  • NO contact used instead of NC: Check connections.
  • Gate moves then stops: Check if leaves are in axis, lubricate. Increase trigger threshold (P2 P3 clockwise). If not sufficient, increase P1 clockwise and reprogram.
  • Motor starts but gate does not move: Remove obstacles, restore hinges, replace/lubricate, fix motor fixing bracket.

N.B.: If problems persist, contact supplier or installer. WARNING: Before sending a radiotransmitter for repair, check batteries are flat. 50% of returned radiotransmitters only have flat batteries.

Warranty:

The product is warranted for 12 months from the date indicated in the sales document. The warranty is limited to the original purchaser and does not cover damage from improper use, accessories not conforming to the manufacturer's specifications, environmental factors, or third-party interventions. Products returned to Casit for repair will only be accepted if accompanied by a sales document. Casit will repair or replace the product. Any dispute will be submitted to the Court of Torino, Italy.

Casit EQ2009 Specifications

General IconGeneral
BrandCasit
ModelEQ2009
CategoryGate Opener
LanguageEnglish

Related product manuals