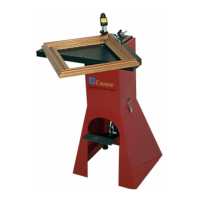
Second stapling position:
Inner side of the frame:
Move the sliding table backwards and
align the wedge outlet of the distributor
with the required stapling position.
Slide stop P1 (inner stapling stop)
against the sliding table, then lock it.
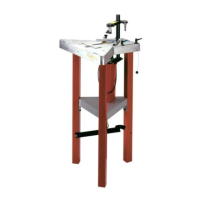
First stapling position:
Outer side of the frame:
Move the sliding table forwards and align
the wedge outlet of the distributor D with
the required stapling position. Slide stop
P2 (outer stapling stop) until its buffer
comes into contact with the sliding table,
then lock it.
Position the first moulding against stop
B1 and slide it up to stop B2.
5
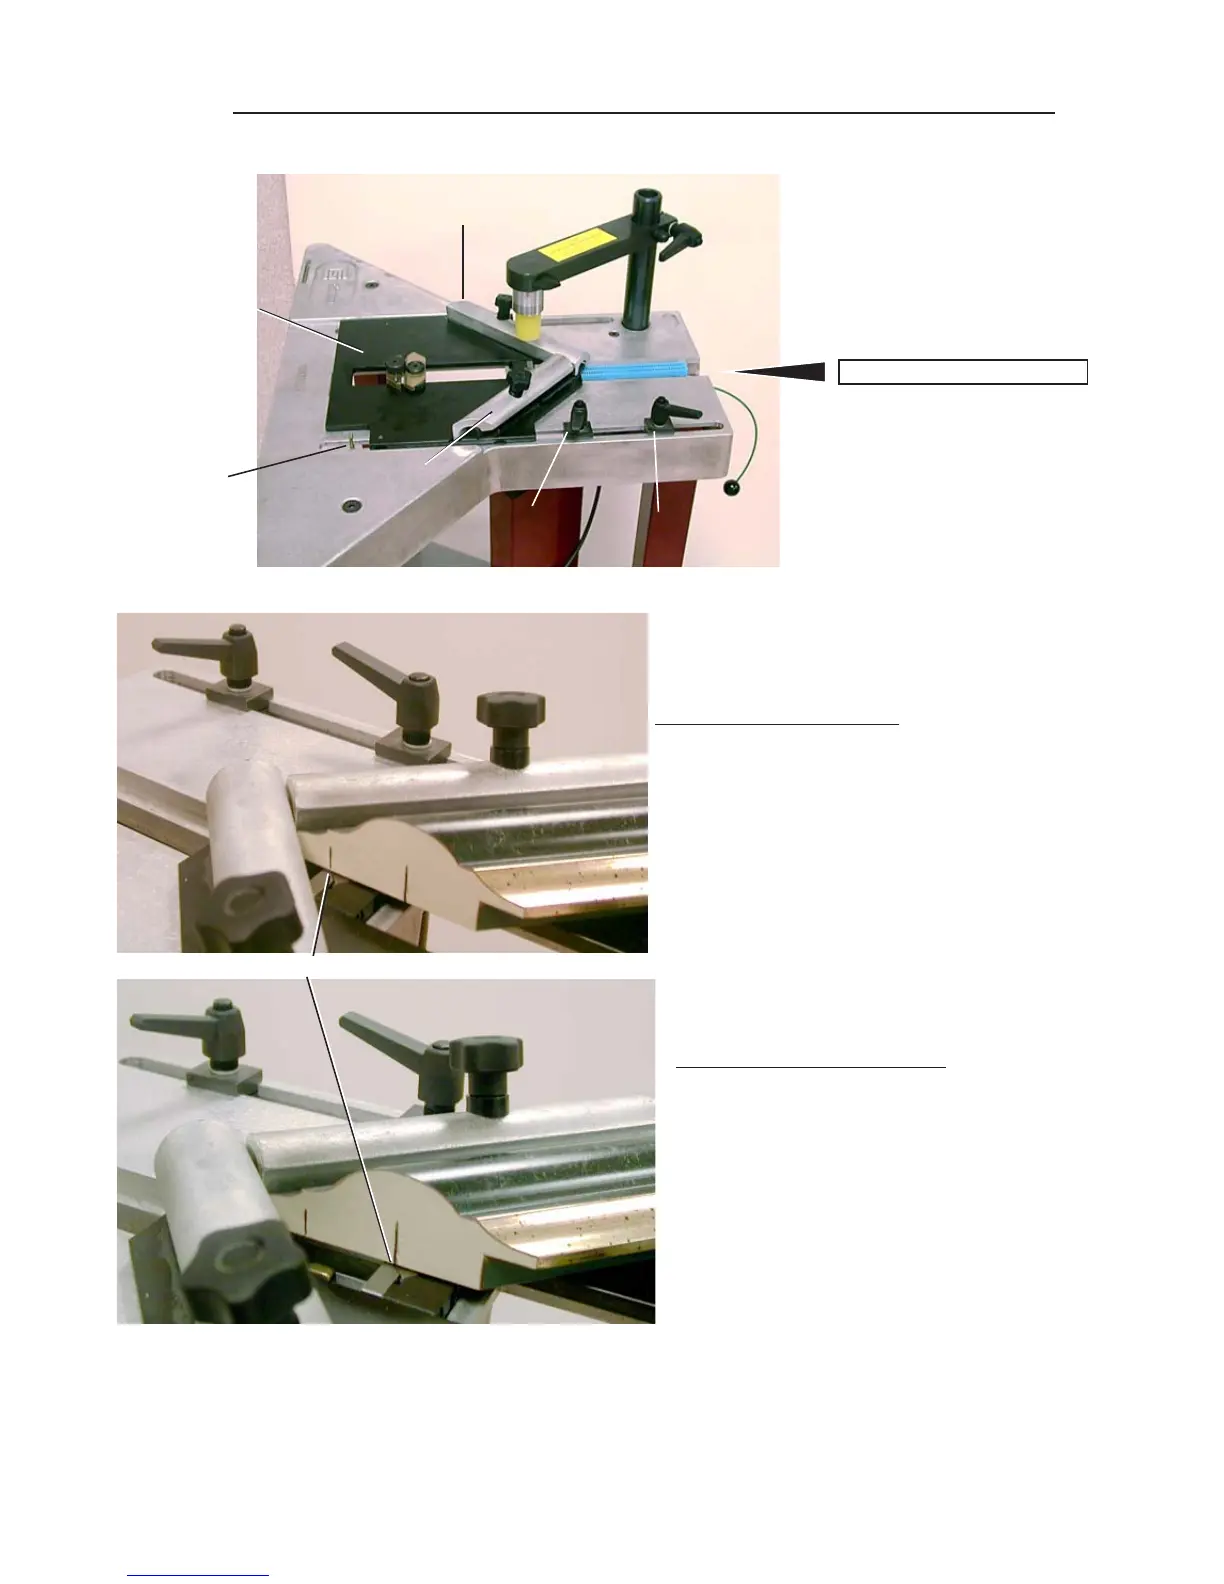
Release the stapling positioning stops, P1 and P2.
SETTING AND STORING THE STAPLING POSITIONS
P 1
P2
B1
REFERENCE POSITION
B2
B
1) UNDERPINNING WITH 2 STAPLING POINTS
WEDGE OUTLET
P2
P1
D
D
SLIDING
TABLE
2) UNDERPINNING WITH 1 STAPLING POINT
Position the right moulding against the self-adjusting backfence. Move the sliding table so that
the wedge outlet coincides with the required stapling point.
Lock the inner stapling stop P1. Then push the outer stapling stop P2 until its buffer B comes
into contact with the sliding table, then lock it.