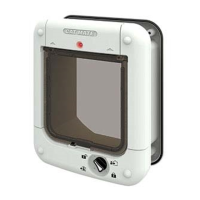
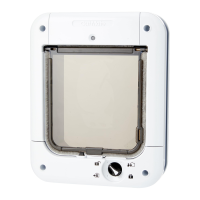
8. Fitting Instructions (See Figs. 6 to 10)
IMPORTANT:
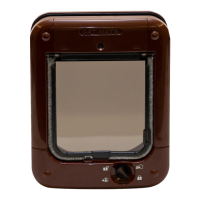
• Do not cut tunnel (B, Fig. 1) of cat ap.
• To check that your cat’s microchip is correctly positioned
and functioning, we strongly recommend you program
the cat ap for all your cats before installation (See
Section 3). Then check the cat’s microchip operates the
catch (C, Fig. 1) when the cat’s head is pushed gently
against the ap as shown in Fig. 2.
• For UPVC / metal doors thicker than 35mm (1
3
/8”) use a
Cat Mate Cat Flap Adapter Kit (Ref. 361).
• For UPVC / metal doors it is essential to retune the cat
ap after tting (see below).
UPVC / Metal Doors
Doorsconstructedwithmetalpanelsmayreducetherangeof
themicrochipreader.Youmaytestformetalpanelsbydrillinga
smalltrialholeinthemiddleoftheintendedcataplocation.
For correct operation it is important to ensure correct cut
out size is made.
ForUPVC/metalpanelsthickerthan35mm(1
3
/8”) use a Cat
MateUPVC/MetalDoorAdapterKit(availableseparately).
ForUPVC/metalpanelsupto35mm(1
3
/8”)thickproceedas
forWoodenDoorsbelow.
Aftertting,ensuretheapistunedtothemetalpanelby
pressingthePROGRAMbutton(G)for5secondsuntilLED(A)
lights.After10secondspressthePROGRAMbuttonagainto
completeretuning.
Wooden Doors
8.1Placetheexteriorframe(framewithoutswingap)in
desiredpositiononpanelanddrawroundtheinsideof
thetunnelsectionasshowninFig.6.Werecommendthe
bottomoftheholeisapproximatelylevelwithyourpet’s
stomach.
8.2Useanelectricjigsawtocut5mm(
3
/16”)outsideofdrawn
line.Becarefultocutholesquaretothedoor,particularly
withthickerdoors.Ensureframesarefree-ttinginhole.
8.3Determinethicknessofdoorpanel.
8.4 For door panels 3mm (
1
/8”) - 25mm (1”) thick:
8.4.1 Positionexteriorframeonoutsideofdoorandmarkfour
screwpositions(Fig.7).
8.4.2 Removeframeandcarefullydrillscrewclearanceholes
squaretopanelat6mm(
1
/4”)diameter(Fig.8).
8.4.3 Forpanelslessthan17mm(
5
/8”)thick,carefullycut
excesslinerfromexteriorframe(F)asshowninFig.9
withahacksaworplasticcuttingdisc.
8.4.4 Fitseal(I)toexteriorframe.Positionexteriorframeon
outsideofdoor.Screwinteriorframetoitbyusing37mm
(1
1
/2”)screws.Finally,tscrewcaps(Fig.10and11).
8.5 For door panels 25mm (1”) + thick:
8.5.1 Carefullydrilloutfourholesininteriorframetoallow
closeclearanceonscrews(recommendeddrill5mm
(
3
/16”)diameter)asshowninFig.12.
8.5.2 Fitseal(I)toexteriorframe.Screwexteriorframeto
outsideofdoorusing13mm(
1
/2”)screws.
8.5.3 Screwinteriorframetoinsideofdoorusing22mm(
7
/8”)
screws.Finally,tscrewcaps.
Walls / Glass Panels
Foreasyinstallationyouwillrequireanadapterkitavailable
fromyourcatapsupplierordirectfromPetMate(Product
Ref.361).
9. Troubleshooting
9.1Cat’smicrochipwillnotprogram
•Yourcat’smicrochipmightbefaultyorpoorlypositioned.
ContactPetMateCustomerServicesoruseaCatMate
I.D.Disc.
9.2RedLED(A)ashing
•1ashevery30secondsindicatesneedtoreplace
alkalinebatteries.
9.3Flapdoesnotopeninresponsetoprogrammedmicrochip
orI.D.Disc
•Checkcatch(C,Fig.1)movesfreelyupanddownwhen
cat’sheadispushedgentlyagainsttheapasshownin
Fig.2.
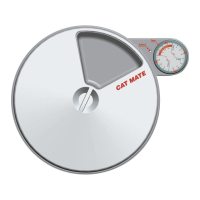
•Check4WAYlockissettopermitaccessinthechosen
direction.
•CheckI.D.Disc,ifused,iscorrectlyttedtocat’scollar.
•Ifpossible,tryoperationwithanotherprogrammed
microchip/I.D.Disctoascertainifthereisafaultwitha
particularmicrochip/I.D.Disc.
•ForUPVC/metalpanelsover35mm(1
3
/8”)thickcheck
cataphasbeenttedcorrectlywithadapterkitand
circularcutout.
•ForUPVC/metalpanelscheckcataphasbeenretuned
aftertting(SeeSection8).
•Checkbatteriesarecorrectlyorientatedandnotinneed
ofreplacement(SeeSection6).
•Checkcatapismountedatcorrectheight(See
Section8).
•Ifallabovefails,removeonebatteryandwaitaminimum
of1hour.Retbatteryandthencheckifapfunctions
correctly.IfnotperformaFACTORYRESET(See
Section7)beforereprogramming(SeeSection3).
•Itispossiblethatyourcathasa‘lowpower’microchip
andtheaprequiressettingtolowpower.Thecatapis
suppliedtosuitthevastmajorityofstandardmicrochips.
Tochangefromstandardmicrochipsettingtolowpower
settingpleasecontact:
Pet Mate Customer Services on +44 (0)1932 700 001 ·
N America (936) 760 4333 or email info@pet-mate.com