3-2 FH100 Precision Variable-Speed Peristaltic Pump System Operating Manual Cole-Parmer
Section 3
Operation
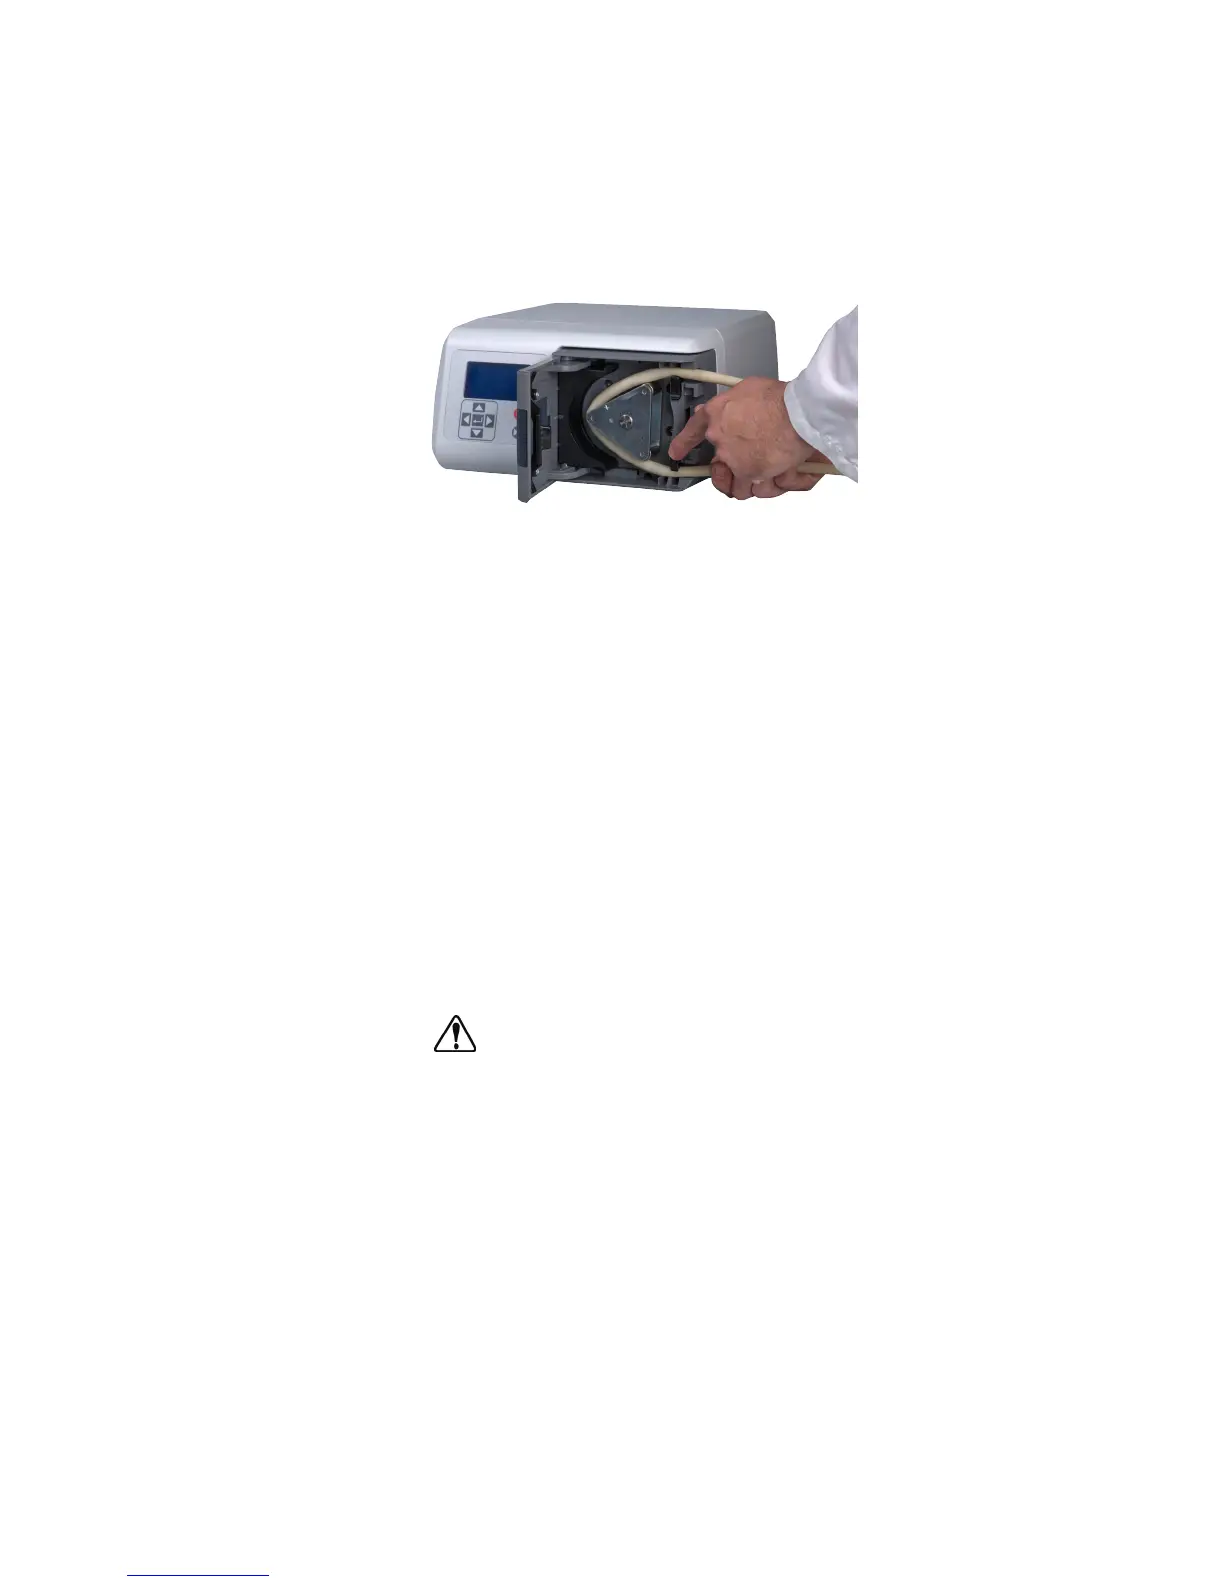
5. Install the tubing around the rotor, going with the natural curve or lay
of the tubing and center the tubing on the rollers.
6. Open the lower retainer by using just one finger to open the retainer
and insert the tube and release the retainer.
Figure 3-2. Tube Loading Lower Retainer
7. The tubing should be snug against the rotor, but not tight.
8. Close the Pump Head door. Verify that the door is securely shut or the
pump will not spin.
Tubing should be inspected periodically and checked for tears, cracks, cut
marks, abrasions, inability to hold pressure, bubbles in the flow stream and
reduction or loss of flow.
Tubing life may be extended by periodically moving the worn tubing
inside the occlusion bed of the pump to the outside of the occlusion bed
to the suction side of the pump. This will avoid excessive tubing wear at
any specific point.
Always move the worn tubing to the suction side of the pump.
CAUTION: When changing flow direction, allow the pump to
come to a complete stop before starting again. Failure to do so
could cause permanent damage to the motor.
1. Make sure the speed is set to the minimum setting.
2. Turn the power switch ON. Increase the speed to start the pump
action. The higher the rpm, the faster the speed of the pump.
3. The Pump Systems are self-priming. To begin pumping, select a flow
direction with the flow direction button, insert the intake and output
tubing into a reservoir, and turn the unit ON. Prime the tubing for
at least 5 minutes. If accurate flow control is important, allow the
pump to prime for approximately 20 minutes for more stable
flow conditions.
Inserting Tubing
(continued)
Tubing Inspection and
Replacement
Pump Controls