ENG
FR
9
Q
R
N
5 mm
5 mm
Q
N
R
T
M
Phillips screwdriver
Tournevis Philips
Sensor screw
Vis de capteur
Spoke
Rai
Crank
Manivelle
Left view
Détails côté gauche
Indication line
Ligne d'indica-
tion
Top view
3. Ajustez les positions du capteur sans fil
et de l'aimant, et attachez-les solide-
ment.
• Assurez-vous que le centre de chaque aimant passe
la ligne d'indication de chaque bras du capteur.
• Montez solidement le corps principal du capteur
sans fil avec des attaches en nylon.
• Attacher solidement l'aimant de cadence
R
au bras
la manivelle avec un collier de nylon
S
.
• Ajustez une intervalle de 5 mm entre chaque bras du
capteur et son aimant correspondant et fixez-les en
serrant la vis du capteur.
4. Montez l'attache.
Fixez l'attache
M
à la droite de la tige du guidon, en
utilisant la garniture en caoutchouc
T
comme spacer.
Attachez solidement l'attache en position permettant
une bonne visibilité.
Attachez l'ordinateur à l'attache par un glissement sur
la gauche jusqu'à ce que vous entendiez un 'clic '.
Retirez l'ordinateur par un glissement sur la gauche.
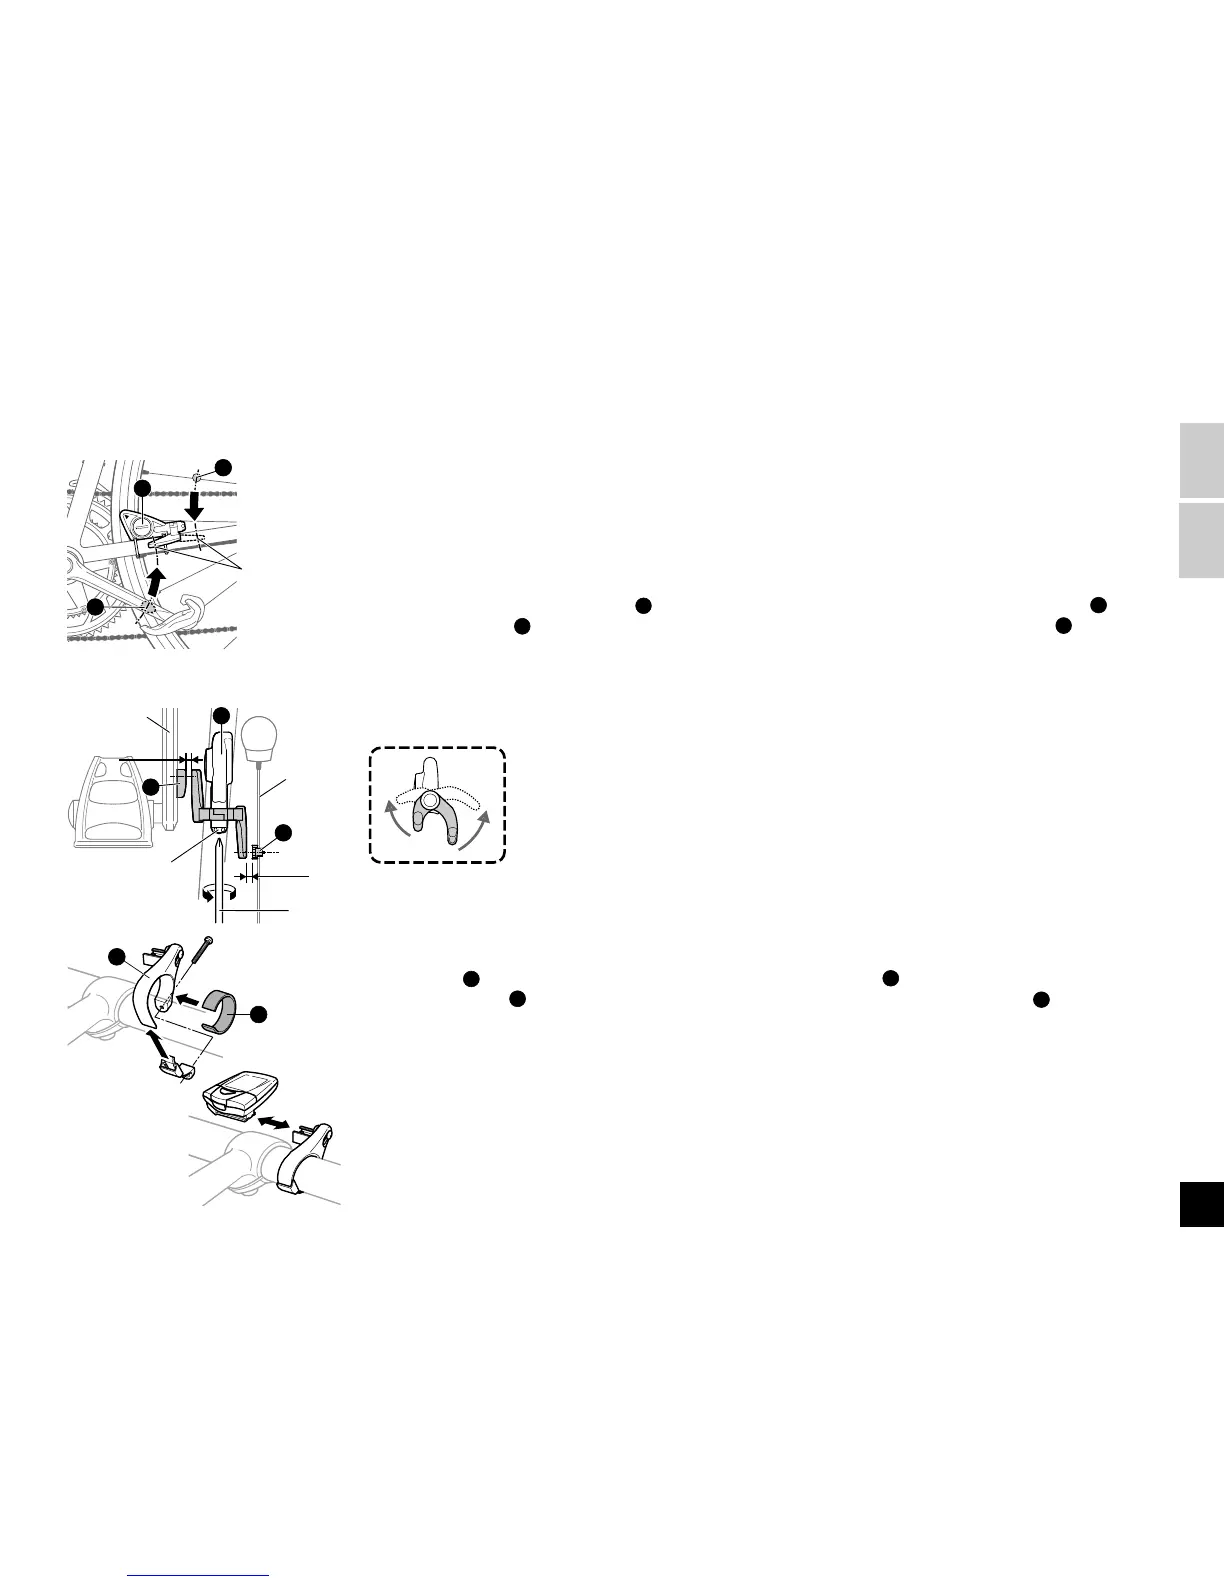
3. Adjust the positions of the wireless sen-
sor and the magnet, and attach them
securely.
• Make sure that the center of each magnet passes the
indication line of each respective sensor arm.
• Fix the wireless sensor main body firmly by tighten-
ing nylon ties.
• Securely fasten the cadence magnet
R
to the crank
arm with a nylon tie
S
.
• Adjust the gap between each sensor arm and its cor-
responding magnet at 5 mm and fix them by tighten-
ing the sensor screw.
4. Mount the bracket.
Fix the bracket
M
to the right of the handlebar stem,
using the rubber pad
T
as a spacer. Securely fasten
the bracket in a position that provides good visibility.
Attach the computer to the bracket by sliding from the
left until you hear a 'click'. Remove the computer by
sliding to the left.
Vue supérieure
 Loading...