TIRE SIZE L(cm) TIRE SIZE L(cm) TIRE SIZE L(cm)
dimension du pneu dimension du pneu dimension du pneu
Radgröße Radgröße Radgröße
bandenmaat bandenmaat bandenmaat
dimensione del pneumatico dimensione del pneumatico dimensione del pneumatico
Tamaño de rueda Tamaño de rueda Tamaño de rueda
タイヤサイズ タイヤサイズ タイヤサイズ
20 x 1.75 150 26 x 1.40 200 650 x 38B 211
24 x 1 175 26 x 1.50 199 700 x 18C 207
24 x 3/4 Tubular 178 26 x 1.75 202 700 x 19C 209
24 x 1-1/8 Tubular 179 26 x 1.95 205 700 x 20C 209
24 x 1-1/4 191 26 x 2.00 206 700 x 23C 210
24 x 1.75 189 26 x 2.1 207 700 x 25C 211
24 x 2.00 192 26 x 2.125 207 700 x 28C 214
24 x 2.125 196 26 x 2.35 208 700 x 30C 217
26 x 1(559mm) 191 27 x 1 215 700 x 32C 216
26 x 1(650c) 195 27 x 1-1/8 216 700C Tubular 213
26 x 1.25 195 27 x 1-1/4 216 700 x 35C 217
26 x 1-1/8 Tubular 197 27 x 1-3/8 217 700 x 38C 218
26 x 1-3/8 207 650 x 35A 209 700 x 44C 222
26 x 1-1/2 210 650 x 38A 212
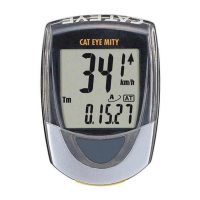
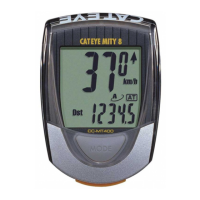
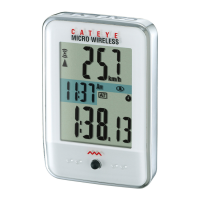
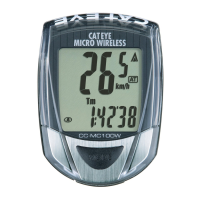
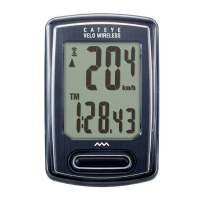
CYCLOCOMPUTER
Model CC-MT200
Specifications/Caracteristiques techniques/Technische daten/Specificaties/
Caratteristiche tecniche/
Especificaciones
/仕様
Controller/
Calculateur
/Controler/Controleur/Elaboratore/
Contador
/制御方式
----------------------------------- 4-bit 1-chip Microcomputer (Crystal Controlled Oscillator)
Display/
Affichage
/Anzeige/Display/Visualizzazione/
Pantalla
/表示方式
---------------------------------------------------------------------------------- Liquid Crystal Display
Sensor/
Détecteur
/Sensor/Sensor/Rivelatore/
Sensor
/検知方式
------------------------------------------------------------------------- No Contakt Magnetic Sensor
Operating Temperature Range/
Température d’utilisation
/zulässige Betriebstemperatur/Toegestane temp./Temperatura di utilizzo/使用温度範囲
----------------------------------------------------------------------------- 0°C - 40°C(32°F - 104°F)
Setting Values Cross Reference Table (The tire size is marked on both sides of the tire.)
Table de Correspondance des Valeurs de Réglage
(La dimension du pneu figure de chaque côté du pneu)
Wertetabelle zur Einstellung des Radumfanges (die Radgröße entnehmen Sie der Aufschrift des Reifens)
Tabel voor het bepalen van de wielomtrek (de bandenmaat staat vermeld aan beide zijden van de band)
Tabella delle Corrispondenze dei Valori di Regolazione (La dimensione del pneumatico figura su ogni lato del pneumatico)
Tabla de Valores (El tamaño de la rueda está marcado al lado de la llanta)
タイヤ周長ガイド(タイヤサイズは通常タイヤの側面に記載されています)
U.S. Pat. Nos. 4636769/4642606/5236759/5226340 and Design Patented
Copyright© 1995 CATEYE Co., Ltd.
CCMMT2-981120 Printed in Japan 0687350
7
#169-6160/#169-6165
Bracket Sensor Kit/(Long)
Kit Support Unité Principale et Détecteur/(Long)
Halterung+Radsensor Ausrüstung für Vorderradmontage/(Lang)
Bracket en sensorkitset/(Lang)
Element da montare : Supporto Unità principale e Sensore/(Lungo)
Conjunto de soporte y sensor/ (Largo)
ブラケットセンサーキット/(ロング)
#169-6168
Bracket Sensor Kit for Aero Bar
Kit de Montage du Collier de Détecteur pour Barre Aero
Halterung und Radsensor für Aero-Lenker
Sensor bevestiginset voor Aero Stuurbocht
Kit di Montaggio del Collare del Sensore per Barra Aero
Kit abrazadera de sensor para manillares Aero
エアロバー用ブラケットセンサーキット
#169-6167
Center Mount Bracket Kit
Kit de montage central del l´unité principale
Halterung für Montage en der Lenkermitte
Stuurbocht Bevestinging Set
Kit di Montaggio al Centro del manubrio
Kit Soporte para Montaje Central
センターマウントキット
#169-6169
Stem Mount Bracket Kit
Kit de montage de l´unité principale sur la broche du guidon
Halterung für Montage en der Lenkerstange
Stuurpen Bevestiging Set
Kit di Monyaggio sull´ attacco manubrio
Kit Soporte para Montaje en Tija
ステムマウントキット
#169-9731
Heavy Duty Wire and Bracket Sensor Kit
Kit de Fil Renforce et Supports d'Unité Principale et de Détecteur
Nachrüstset mit Halterung, Sensor und verstärktem Sensorkabel
Extra sterke kabel en bracket sensor set
Filo Ultra Resistente e Attacco Completo
Kit Soporte del Sensor y Alambre de Servicio Pesado
ヘビーデューティワイヤ&ブラケットセンサーキット
#169-6170
Attachment Kit
Kit de Gamitures
Befestigungsmaterial
Kabelbevestigingset
Guarnizioni da montare
Elementos de fijación
アタッチメントキット
#169-6280
Universal Sensor Band
Garniture Universelle pour Détecteur
Universal Befestigungsband
Universele Sensor klemstrip
Guanizione Universale per Sensore
Banda del Sensor Universal
ユニバーサルセンサーバンド
#166-5120 #169-6180
Wheel Magnet Lithium Battery (CR1620)
Aimant pour roue Pile au lithium
Radmagnet Lithium-Batterie
Wielmagneet Lithum Batterij
Magnete ruota Bateria al Litio
Iman de la rueda Bateria de Litio
ホイールマグネットリチウム電池
CO
.,LTD.
CO
.,LTD.
CO
.,LTD.
CO
.,LTD.
CO
.,LTD.
CO
.,LTD.
LIMITED WARRANTY
1-Year Warranty for Main Unit Only
(Accessories/Attachments and Battery Consumption excluded)
If trouble occurs during normal use, the part of the Main Unit will be repaired or replaced free of charge. The service must be
performed by Cat Eye Co., Ltd. To return the product, pack it carefully and remember to enclose the warranty certificate with
instruction for repair. Please write or type your name and address clearly on the warranty certificate. Insurance, handling and
transportation charges to our service shall be borne by person desiring service.
(Address for service)
2-8-25, Kuwazu, Higashi Sumiyoshi-ku, Osaka 546-0041 Japan
Attn.: CAT EYE Customer Service Section
Service & Research Address for United States Consumers:
CATEYE Service & Research Center
1705 14th St. 115 Boulder, CO 80302
Phone: 303-443-4595 Toll Free: 800-5CATEYE
Fax: 303-473-0006 e-mail: CatEyeUSA@aol.com
GARANTIE LIMITÉE
1 An de Garantie sur l'Unité Principale Uniquement
(Les accessoires et la pile sont exclus de la garantie)
En cas de problème en cours d'utilisation normale, l'unité principale sera réparée ou remplacée gratuitement. Par
Cat Eye Co., Ltd. Lors du renvoi du produit, il y a lieu de l'emballer soigneusement et de joindre le certificat de
garantie avec les instructions de réparation. Les nom et adresse de l'acheteur doivent figurer de manière lisible sur
le certificat de garantie. Les frais d'assurance, de manutention et d'envoi à notre Service Réparations seront suppor-
tés par le demandeur de la réparation.
Adresse Service Réparations
2-8-25, Kuwazu, Higashi Sumiyoshi-ku, Osaka 546-0041 Japan
Attn.: CAT EYE Customer Service Section
BEGRENZTE GARANTIE
1-Jahr-Garantie: Auf den Computer
(Ersatzteile/Zubehörteile sowie Batterie nicht eingeschlossen)
Falls während des normalen Gebrauchs Fehler auftreten, wird das entsprechende Teil kostenlos repariert oder
ersetzt. Die Reparatur muß von CAT EYE Co., Ltd. durchgeführt werden, und das zu reparierende Produkt
muß direkt durch den Händler an CAT EYE Co., Ltd. gesandt werden. Bei der Rückgabe des Gerätes zur
Reparatur packen Sie es sorgfältig anbei. Achten Sie darauf, Ihren Namen und Ihre Anschrift klar und deutlich
lesbar auf die Garantiekarte zu schreiben, damit das Gerät so schnell wie möglich nach Beendigung der
notwendigen Reparatur/Einstellung an Sie zurückgesandt werden kann.
Anschrift bei Garantieansprüchen
2-8-25, Kuwazu, Higashi Sumiyoshi-ku, Osaka 546-0041 Japan
z. H.: CAT EYE Kundendienstabteilung oder wenden Sie sich bitte an den entsprechenden Importeur.
GARANTLEBEPALINGEN
1 jaar garantie, alleen geldig op de computer (accessoires, aansluitingen en
gebruik van batterij uitgezonderd)
Mochten er problemen optreden gedurende normaal gebruik, dan geschiedt reparatie of vervanging kosteloos. Dit doent door
de fabrikant Cateye Co., Ltd. uitgevoerd te worden. Bij terugzending van de computer moet deze zorgvuldig verpakt worden en
dient het garantiebewijs en een beschrijving van het probleem meegezonden te worden. Vermeld duidelijk uw naam en adres in
blokletters of getypt op het garantiebewijs. Verzekerings- verzend- en transportkosten zijn voor rekening van de koper.
Service adres:
2-8-25, Kuwazu, Higashi Sumiyoshi-ku, Osaka 546-0041 Japan
ter attentie van: Cateye klantenservice
GARANZIA LIMITATA
1 Anno di Garanzia soltanto sull'Unità Principale
(Gli accessori e la pila sono esclusi dalla garanzia)
In caso di problema durante l'impiego normale, l'unità principale verrà riparata o sostituita gratuitamente da Cat Eye Co., Ltd.. Al
momento del ritorno del prodotto occorre imballarlo con cura allegandovi il certificato di garanzia con le istruzioni per le riparazioni. Il
nome e l'indirizzo dell'acquirente devono essere presenti in modo leggibile sul certificato di garanzia. Le spese di assicurazione, di
manutenzione e di spedizione al nostro Servizio Riparazioni saranno a carico del richiedente la riparazione.
Indirizzo Servizio Riparazioni
2-8-25 Kuwazu, Higashi Sumiyoshi-ku, OSAKA 546-0041, Giappone.
Att:Dipartamento Assistenza Clienti
GARANTIA LIMITADA
Se garantiza por un año únicamente el grupo central
(Los accesorios, aditamentos y el consumo de la pila están excluidos)
Si ocurriera alguna avería durante el uso normal, se reparará o sustituirá la pieza o el grupo central. Cat Eye Co., Ltd. deberá
realizar la reparación. Para devolver el producto, envuélvalo cuidadosamente y no olvide incluir el certificado de garantía y las
instrucciones para repararlo. Rogamos escribir claramente a mano o a máquina su nombre y dirección. Los gastos de seguro,
manipulación y transporte serán a cargo de la persona que solicite la reparación.
Dirección para las reparaciones:
2-8-25, Kuwazu, Higashi Sumiyoshi-ku, Osaka 546-0041 Japan
Attn.: CAT EYE Customer Service Section
製品保証について
1年保証:コンピュータのみ(付属品及び電池の消耗は除く)
正常な使用状態で万一故障した場合は無料で修理・交換いたします。保証書にお客様のお名前・ご住所・ご
購入日・故 障状態をご記入の上、製品と共に当社宛て直接お送りください。お送りいただく際の送料はお客
様にてご負担願います。修理完了後、当社より郵送にてお届けさせていただきます。
[宛先] 製品サービス課
〒546-0041大阪市東住吉区桑津2丁目8番25号
TEL:(06)6719-2631FAX:(06)6719-2362
*アクセサリーパーツを別途販売していますのでご利用ください。