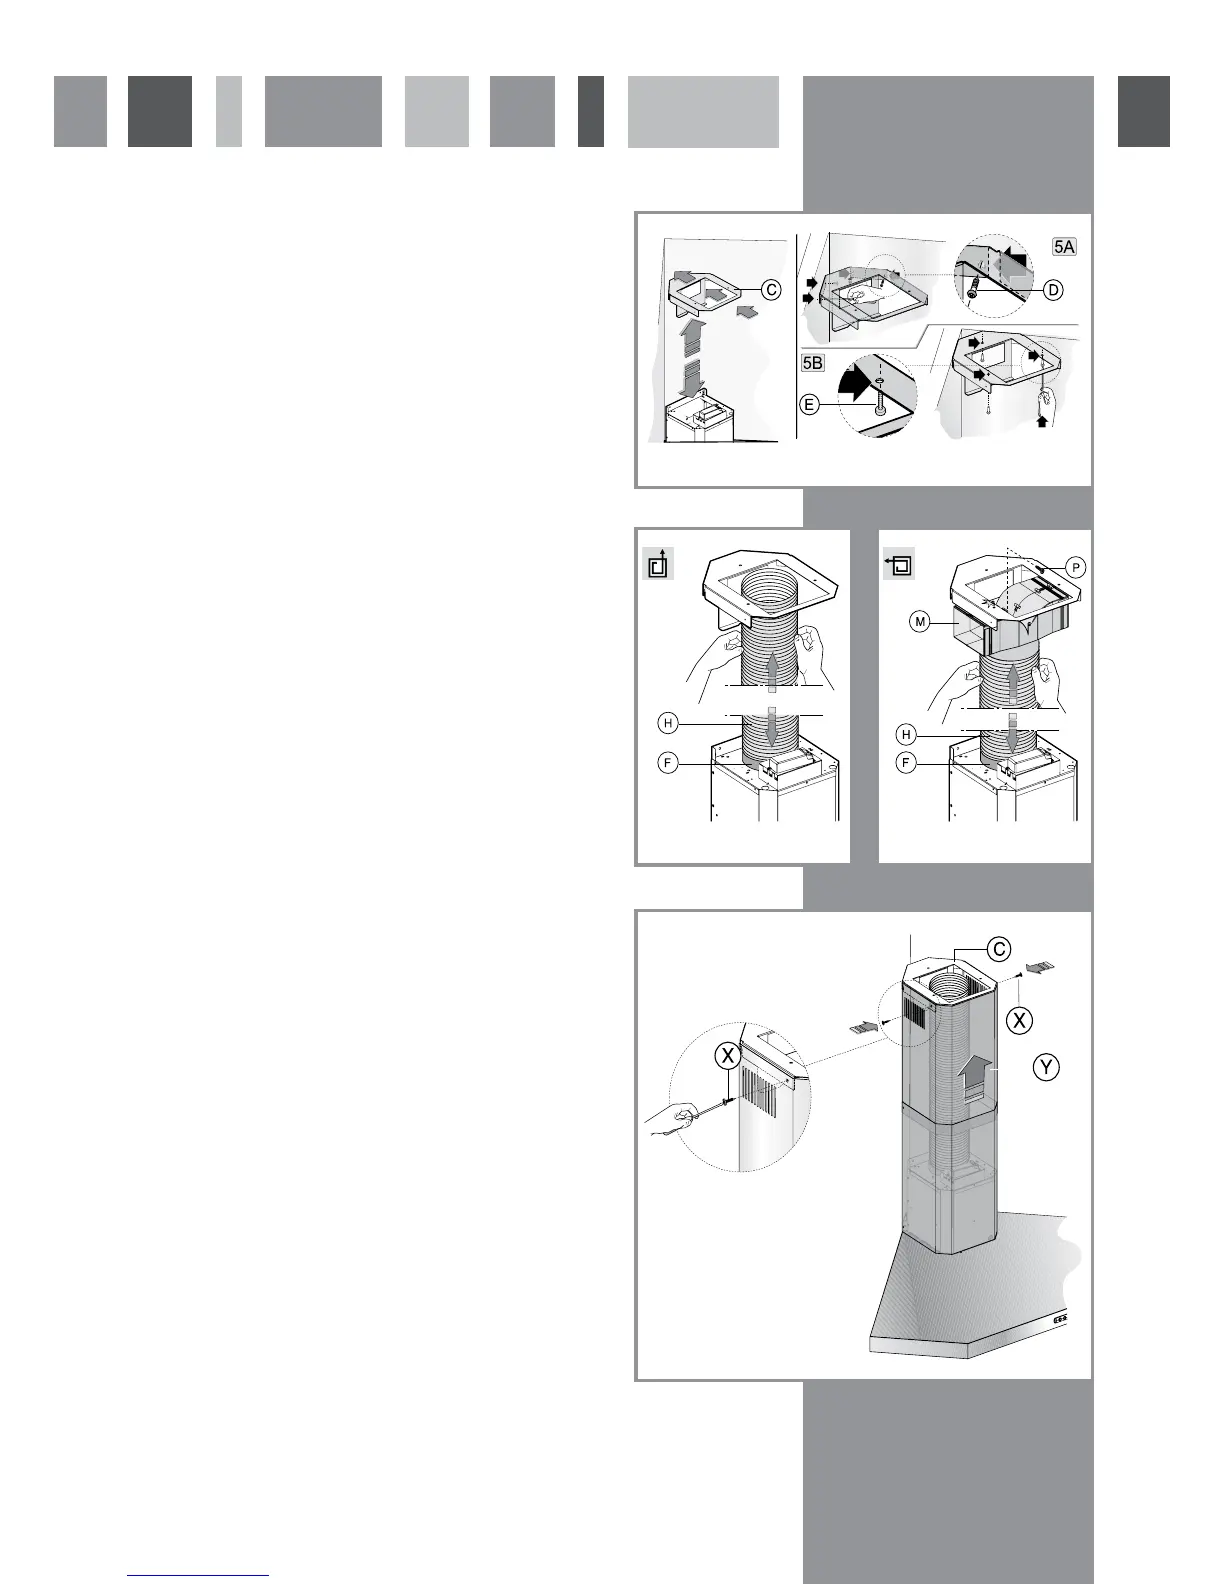
9
Fig. 9
Installation
5. Using the chimney top support bracket as a guide, mark
the hole positions on the wall and ceiling at the required
positions (Fig 9 5A & B), drill and fit the bracket to the
wall and ceiling, using appropriate fixings (D & E).
6. If venting the extractor outside, connect the vent
adaptor to the ducting pipe as shown if (Fig 10); If using
the extractor as a re-circulation device, assemble the vent
diverter and connect the ducting and vent adaptor as
shown in Fig 11.
7. Fit the chimney sections (Y) and secure to the chimney
support bracket (C) using the two provided screws (X) as
shown in Fig 8.
8. Drill and insert 2 plugs suitable for use with the wall type
into the holes and fix the bracket with 2 screws.
9. Fit the chimney section and secure to the mounting
bracket with the supplied screws (fig 12).
Fig. 10
Fig. 12
Fig. 11