13
Installation
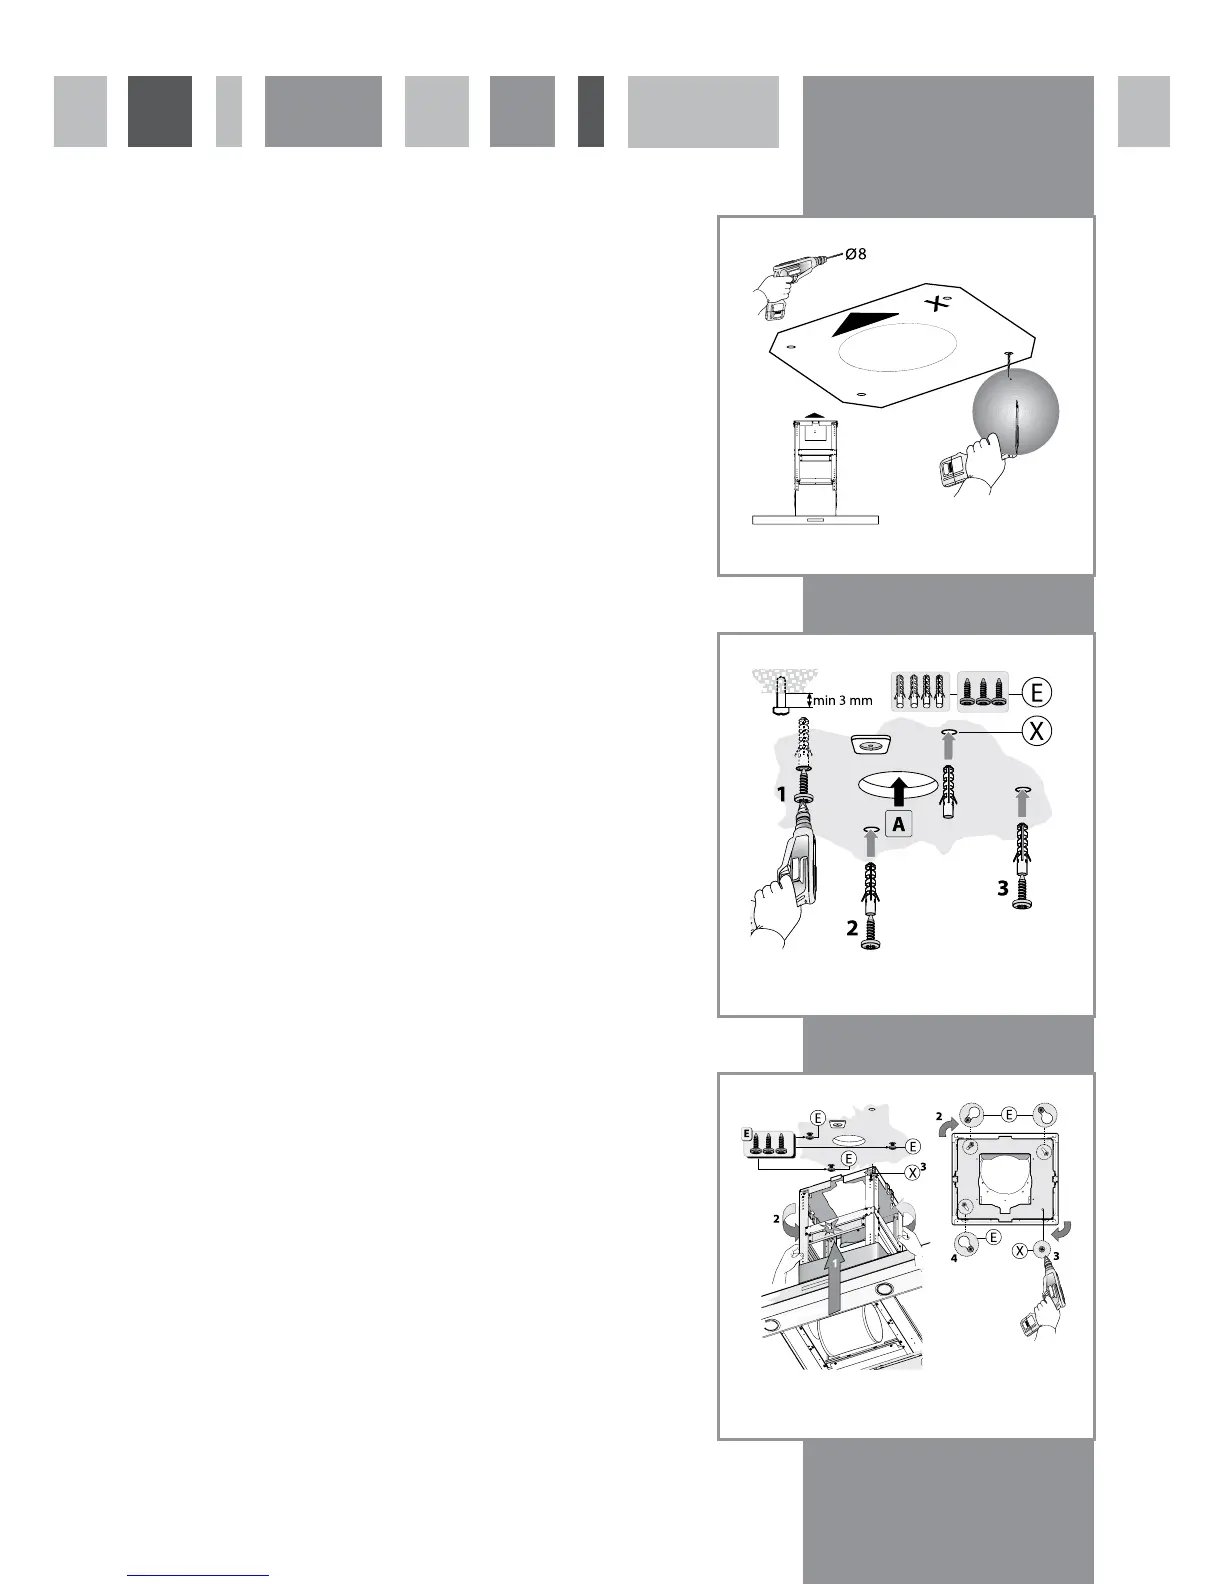
Mounting the extractor to the ceiling:
1. Using the supplied template, drill four holes in the ceiling and fit suitable
wall plugs into the holes, if required. Note that plugs may not be required
if the extractor is to be mounted directly to the ceiling joists. Ensure that
the wall plugs used are suitable for the intended purpose. See fig 15
2. Fit three screws into the holes (or direct to the joists) leaving at least
3mm standing proud, as shown in fig 16. Note that a screw should not be
fitted in the hole marked X on the diagram.
3. Using the help of another individual, locate the extrac tor on the three
exposed ceiling screws and rotate into position. Tighten the three screws
and then secure the whole assembly in position using a screw in hole X.
The extractor should be free standing at this point. See fig 17 below.
Fig. 15
Fig. 16
Fig. 17
 Loading...