14
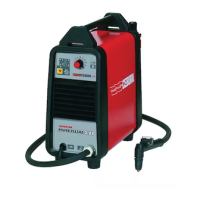
After pressing the knob B return is made to the previous
display page (PROCESS PARAMS).
Fe 0.8mm Ar 18 2CO
Process SHORT
Start Mode 2T
Spot OFF
Process Params
Fe 0.8mm Ar 18 2CO
Fe 0.8mm 2CO
Fe 0.9mm Ar 18 2CO
Fe 0.9mm 2CO
Wire selection
Fe 0.8mm Ar 18 2CO
Process SHORT
Start Mode 2T
Spot OFF
Process Params
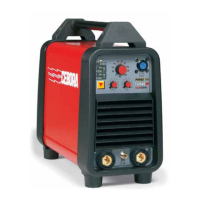
Use knob Btochooseorconrmaweldingmodebyse-
lecting and pressing Short or Pulsed for at least 2 seconds.
Short indicates that the short synergic welding mode is
selected.
Pulsed indicates that the pulsed synergic welding mode
is selected.
• Welding mode (Start Mode).
To choose the welding start mode 2T, 4T or 3L, select
one of the 2 modes by means of the knob B and
press the knob Bforlessthan2secondstoconrm
the choice. This operation always returns us to the
previous display page (PROCESS PARAMS).
Mode 2T, the machine starts welding when the torch
button is pressed and stops when this is released.
Mode 4T, to start welding, press and release the torch
button. To complete welding, press and release again.
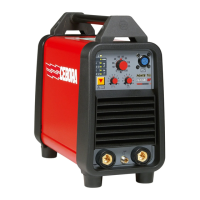
Mode 3L Specially well suited to weld aluminium.
3 currents are available that can be used in welding by
means of the weling torch start button. The current and
the slope time values are set as follows:
Start Curr, starting current, adjustable from 10 to
200% of set welding current.
Slope time, possibility of adjusting from 0.1 to 10
seconds.Denestheconnectiontimebetweenstarting
current (Start Curr) and welding current and between
weldingcurrentandcraterllercurrentorcraterlling
at the welding end (Crater Curr).Possibility of adjusting
from 10 to 200% of the set welding current.
Welding starts at the welding torch button pressure.
The named current will be the starting current Start
Curr. This current is kept as long as the welding torch
button is held down; when the welding torch button is
released the starting current connects to the welding
current, which is kept as long as the welding torch
button is held down. When the torch trigger is pressed
again, the welding current will connect to the crater-
ller current(Crater- Curr) and it will be maintained
until the torch button is released.
Start Mode 3L
Start Curr 135%
Slope Time 0,55
Crater Curr 60%
Process Params
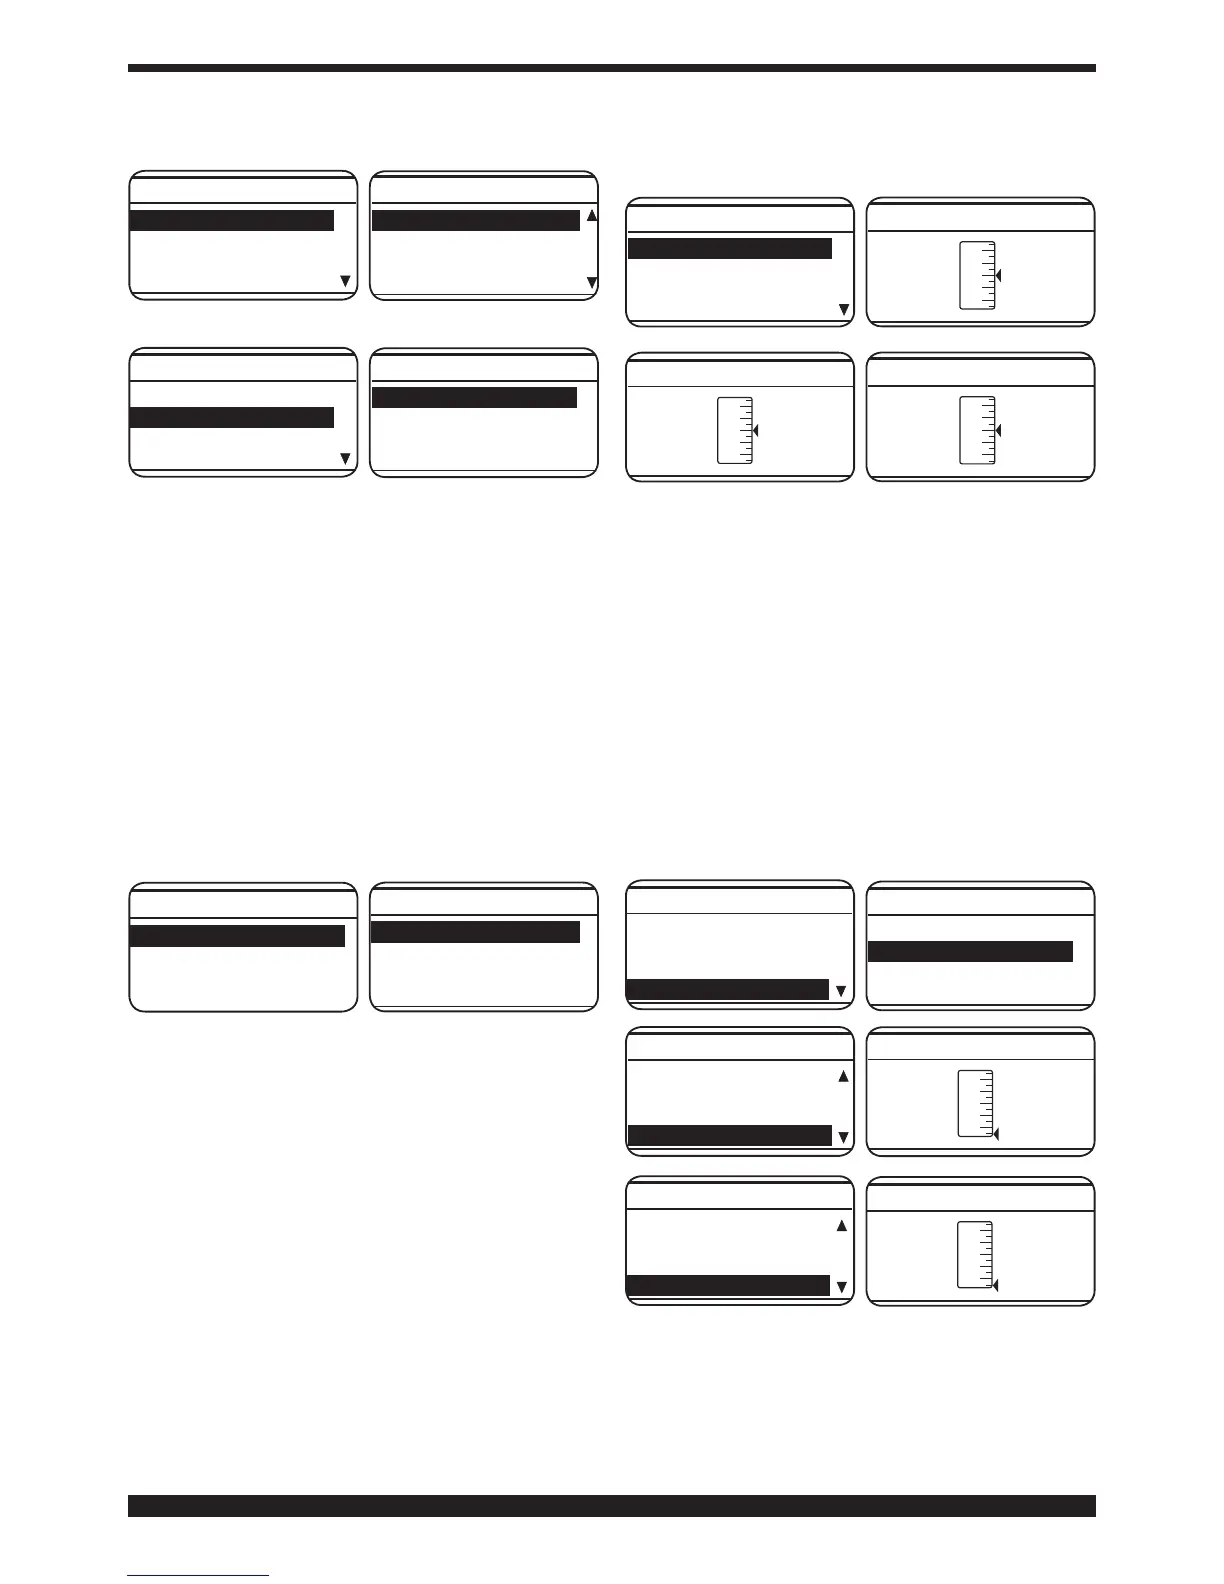
• Spot and pause time (Spot).
This function is blocked when function 3L is activated.
If we select the spot ON time, the Spot Time function
appears on the display screen. If we select this, we
can adjust it from 0.3 to 25 seconds by means of
the adjustment bar. Besides this function, the display
screen also shows Pause Time. If we select this, by
means of the adjustment bar, we can regulate the
pause time between one welding point or section and
another. The pause time varies between 0 (OFF) and 5
seconds.
To access the Spot Time and Pause Time functions,
press the knob B for less than 2 seconds. Adjustment
is always made by means of the knob B.Toconrm,
simply press it for less than 2 seconds. Once the
choicehasbeenconrmed,returnisalwaysmadeto
the display page (PROCESS PARAMS).
Fe 0.8mm Ar 18 2CO
Process SHORT
Start Mode 2T
Spot OFF
Process Params
Process SHORT
Start Mode 2T
Spot ON
Spot Time 1.0s
Process Params
Start Mode 2T
Spot ON
Spot Time 1.0s
Pause Time OFF
Process Params
• HSA (Automatic Hot Start).
This function is blocked when function 3L is activated.
Once the function has been enabled, the operator may
adjust the starting current (Start Curr) from 10 to 200%
of the welding current (Default 130%). The duration
of this current (S.C. Time) may also be adjusted from