ENGLISH
• CEDIMA
®
• Technical Documentation • All rights reserved as per DIN 34 • Subject to modifications due to progressive development •
4-1
Installation and operation
4.0.1 To be checked on delivery
Please check first the completeness and intactness of
your CEDIMA
®
joint cutter CF-12.4 E-TR. You will find
the scope of delivery in the chapter „Technical data and
accessories“.
The joint cutter can be put into operation without spe-
cial effort or installation. However, when setting up and
operating the machine the following notes as well as
the general safety instructions and the safety instruc-
tions for operating the engine have to be observed.
4.1 Preparing the joint cutter
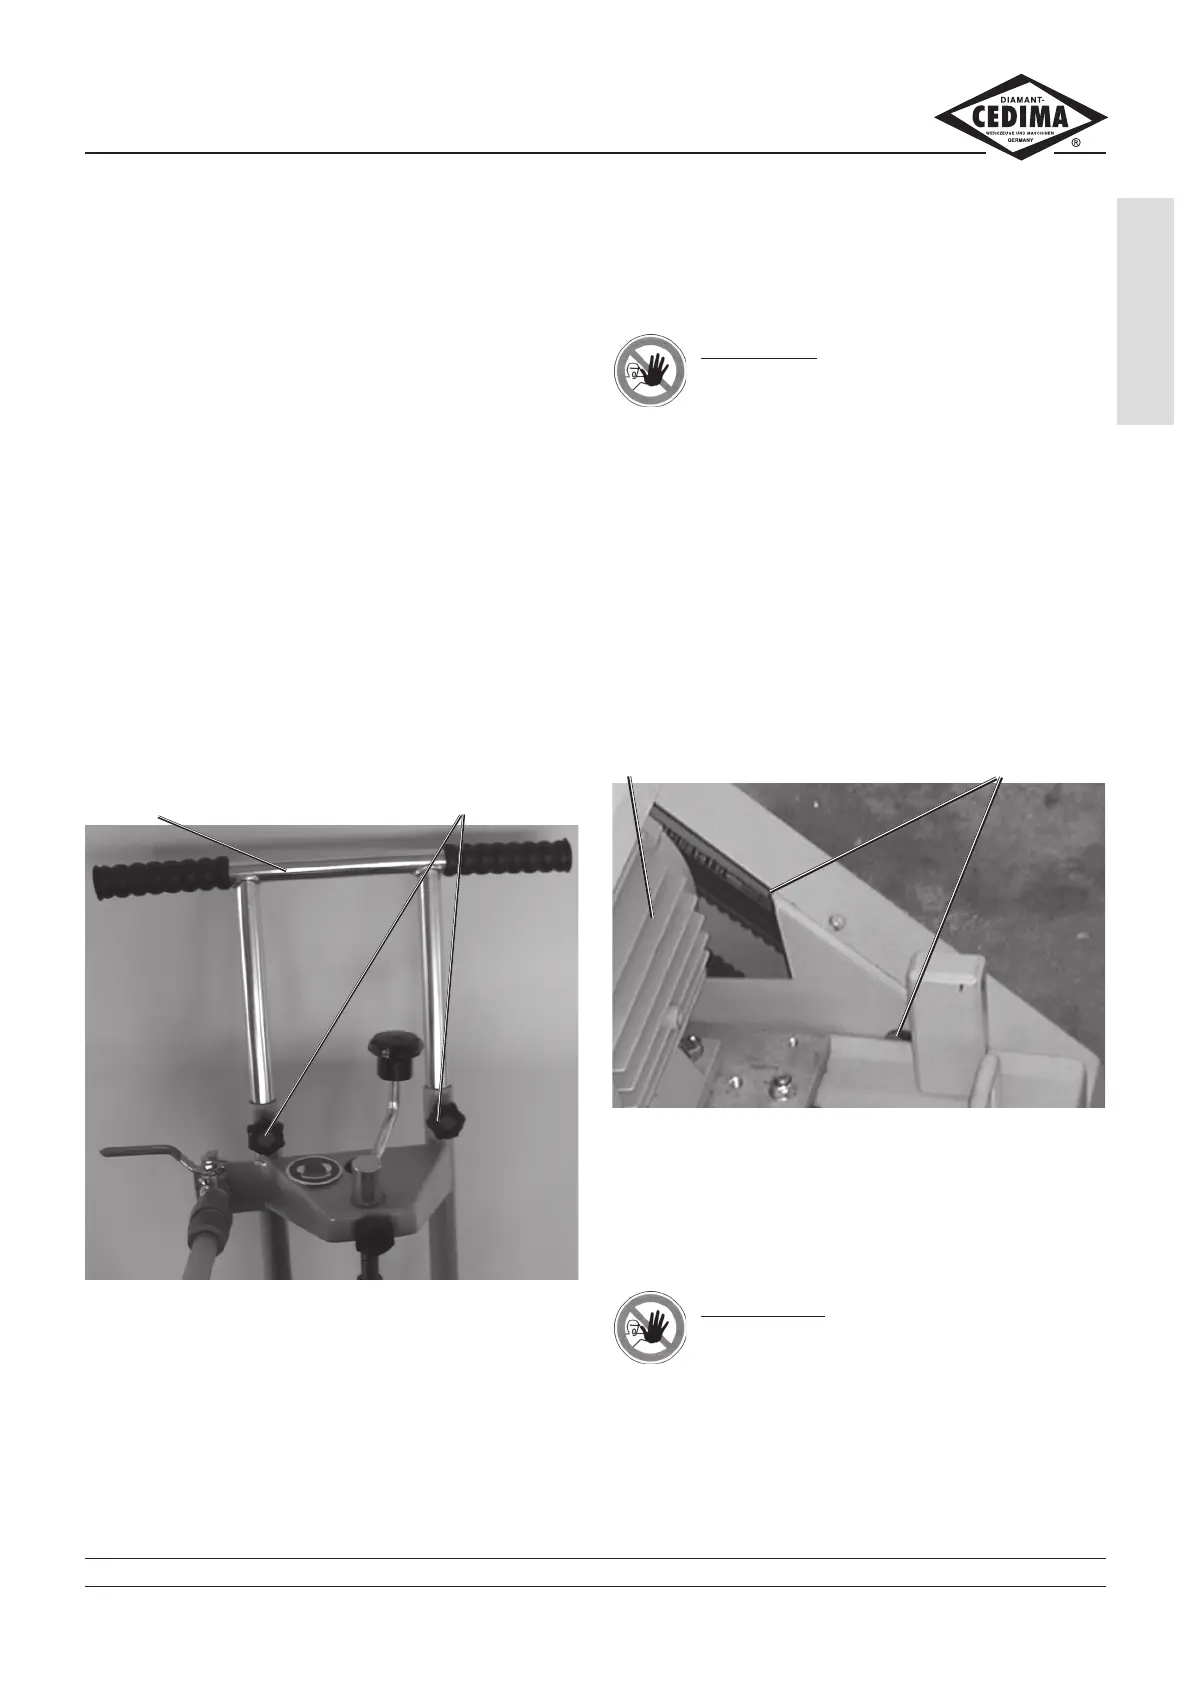
4.1.1 Adjusting the push handle
– Loosen the star knob screws and pull out the push
handle, according to your body height, allowing you
to move the joint cutter in a comfortable posture
(fig. 4.1).
Fig. 4.1
push handle star knob screws
– Afterwards tighten the push handle by means of the
star knob screws.
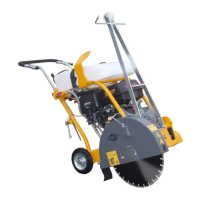
4.1.2 Checking the tension of the V-belts
WARNING
Danger of injury! Switch the engine off!
(consider the engine operating manual)!
Secure the joint cutter against unintentional start-
ing and rolling away!
For checking the tension of the V-belts you don’t have
to remove the V-belt protective cover, as there is a
service opening in it (fig. 4.2).
Check the tension of the V-belts as follows:
– Reach through the service opening and press down-
wards the 3 V
-belts. The belts must only be pressed
by approx. 10 mm. If you can deflect the belts by
more they require re-tensioning.
For tensioning and replacing the V
-belts please refer to
the chapter “Maintenance and care”
.
CF-12.4 E-TR, front Fig. 4.2
motor service opening
4.2 Mounting the diamond saw blade
4.2.1 General notes on mounting
WARNING!
Shut the engine off. Separate the joint cut-
ter of the mains by pulling the plug!
While mounting or dismounting the saw blade
make sure that the joint cutter cannot be started
unintentionally or might roll away
.
The drive unit and the cutting shaft’s speed are de-
signed in a way to provide optimal conditions for cutting
with CEDIMA
®
-dry-cutting diamond blades.
4.0 Installation and operation