ENGLISH
• CEDIMA
®
• Technical Documentation • All rights reserved as per DIN 34 • Subject to modifications due to progressive development •
5-4
Maintenance and care
5.6 Maintenance works
ATTENTION!
Observe all safety notes of this operating
manual and all safety notes regarding
all devices operating together with the joint cutter
(vacuum cleaner)!
ATTENTION!
Read all operating manuals with care!
Read and observe this operating manual and
the operating manuals of the devices operating with/at
the joint cutter
, e.g. dust suction unit (professional
vacuum cleaner)
ATTENTION!
Only use original parts!
Only original components (parts) will ensure
the operational security of the CF-12.4 E-TR!
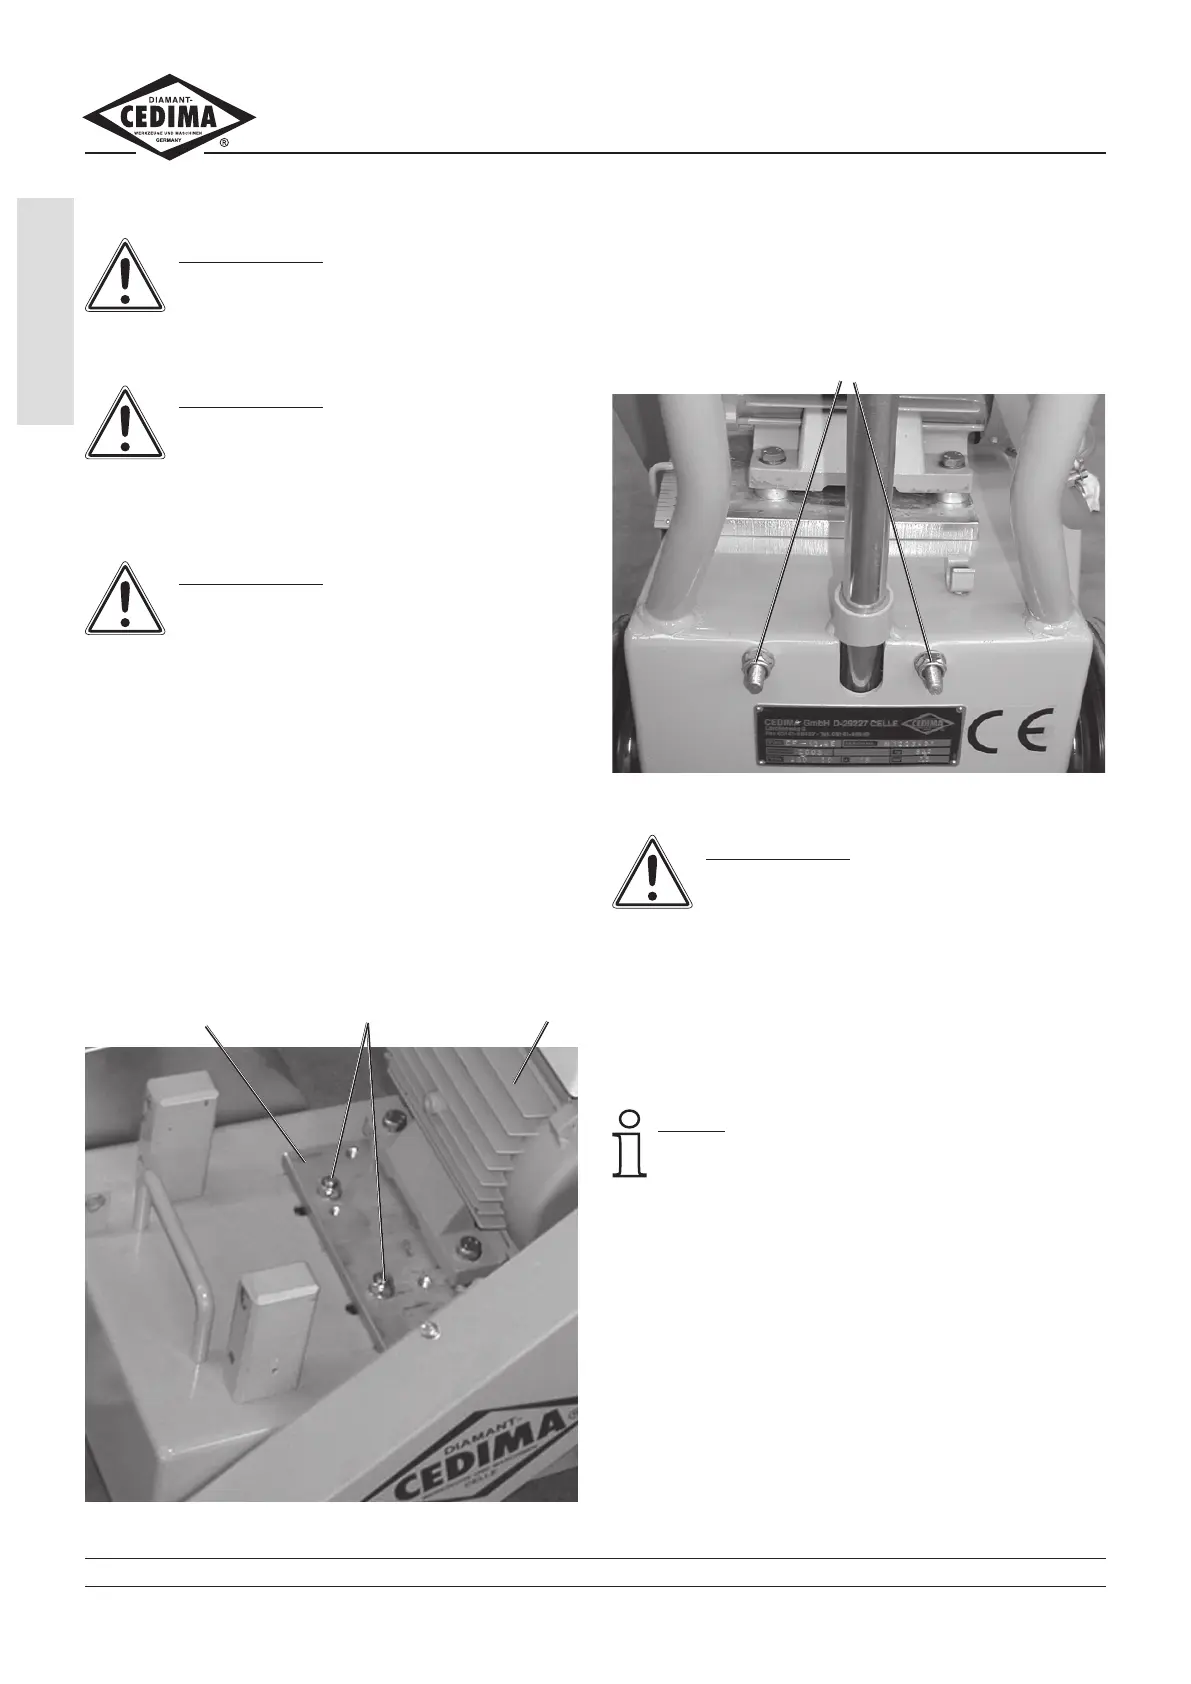
5.6.1 Adjusting the tension of the V-belts
The motor of the CF-12.4 E-TR can be displaced
(lengthwise) on the joint cutter’s frame. In the front part
of the joint cutter’s frame there are 2 parallel slots that
guide the fixing screws with clamping nuts of the motor
suspension plate (fig. 5.1).
For tensioning the V-belts of the cutting shaft proceed
as follows:
–
Loosen the two clamping nuts of the motor suspen-
sion plate (fi
g. 5.1).
CF-12.4 E-TR, front Fig. 5.1
motor suspension plate clamping nuts motor
In the rear part of the joint cutter’s frame there are two
parallel clamping screws for displacing the motor sus-
pension plate (with motor) (fig. 5.2).
– For tearing apart motor and cutting shaft, i. e. for
tensioning the V-belts, tighten equally the two nuts of
the clamping screws.
CF-12.4 E-TR, rear Fig. 5.2
nuts with camping screws
ATTENTION!
Tighten the nuts of the clamping screws
evenly!
Unevenly tightened screws might lead to canting
of the motor suspension plate and consequently of
the motor and V
-belt pulleys on the motor shaft. The
V-belts are running at the edges of the V-belt pulleys
and wear more quickly. A sudden rupture with negative
consequences for the diamond saw blade and the
motor cannot be excluded!
NOTE
An even tightening of the clamping screws nuts
can be obtained by turning the nuts alternately
each one turn!
– Check the tension of the V-belts (refer to section
4.2.2).
–
Re-tighten the two clamping nuts at the motor
suspension plate. (fig. 5.1).