Every care has been taken to ensure the accuracy of the information contained in this publication, but due to continuous development and improvement the right is reserved to supply products
which may dier slightly from those illustrated and described in this publication.
9
- Ensure correct suction pipe sizes - see Tables 3.0, 3.1 and Chart 1.0
- Ensure that suction pipe is completely lled with water
- Ensure inlet and outlet pipes are correctly installed and tightened
Only once pump has been lled it has a self-priming capacity. Please ensure that pump has been suciently lled as
dry-running causes damage to the pump!
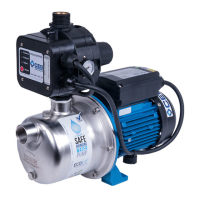
INSTALLATION FOR LIFT SUCTION
Flood suction from tank above ground
Leaks of any size, large or small will cause the pump to cycle and not function correctly and may void the warranty!
- Ensure suction pipe has non-return valve (provided) tted to the discharge of the water supply,
or tted to the bottom end of the suction pipe
- Ensure the non-return valve is installed in the correct direction
- Open main discharge valve
- Plug pump into main socket
- Run the highest and furthest valve/tap from the pump for 2 minutes (e.g. shower or garden tap on opposite side of
house)
- Close the discharge valve once excess air has evacuated the system
- Check for any leaks around the inlet/outlet pipes and the pump while the pump is still running
- Unplug the pump from main socket
- Check for any leaks around the inlet/outlet pipes and the pump when the pump is turned o
- If leaks are present, please tend to appropriately
- If no leaks are present, plug in pump to begin use of your ECOJET
- Check to ensure that a sucient water level is available in the supply tank or bore
- Ensure that the ECOJET is securely fastened to stop any vibration that may cause slow wear of the pump
- Ensure that the pump is unplugged
Flood suction from tank above ground
Non-return valve
Recommended installation
Not recommended installation
Non-return valve
Valve
Tee w/plug
Screen
Valve
Valve
Non-return valve
Drawing 5.0
Drawing 4.0
Drawing 4.1
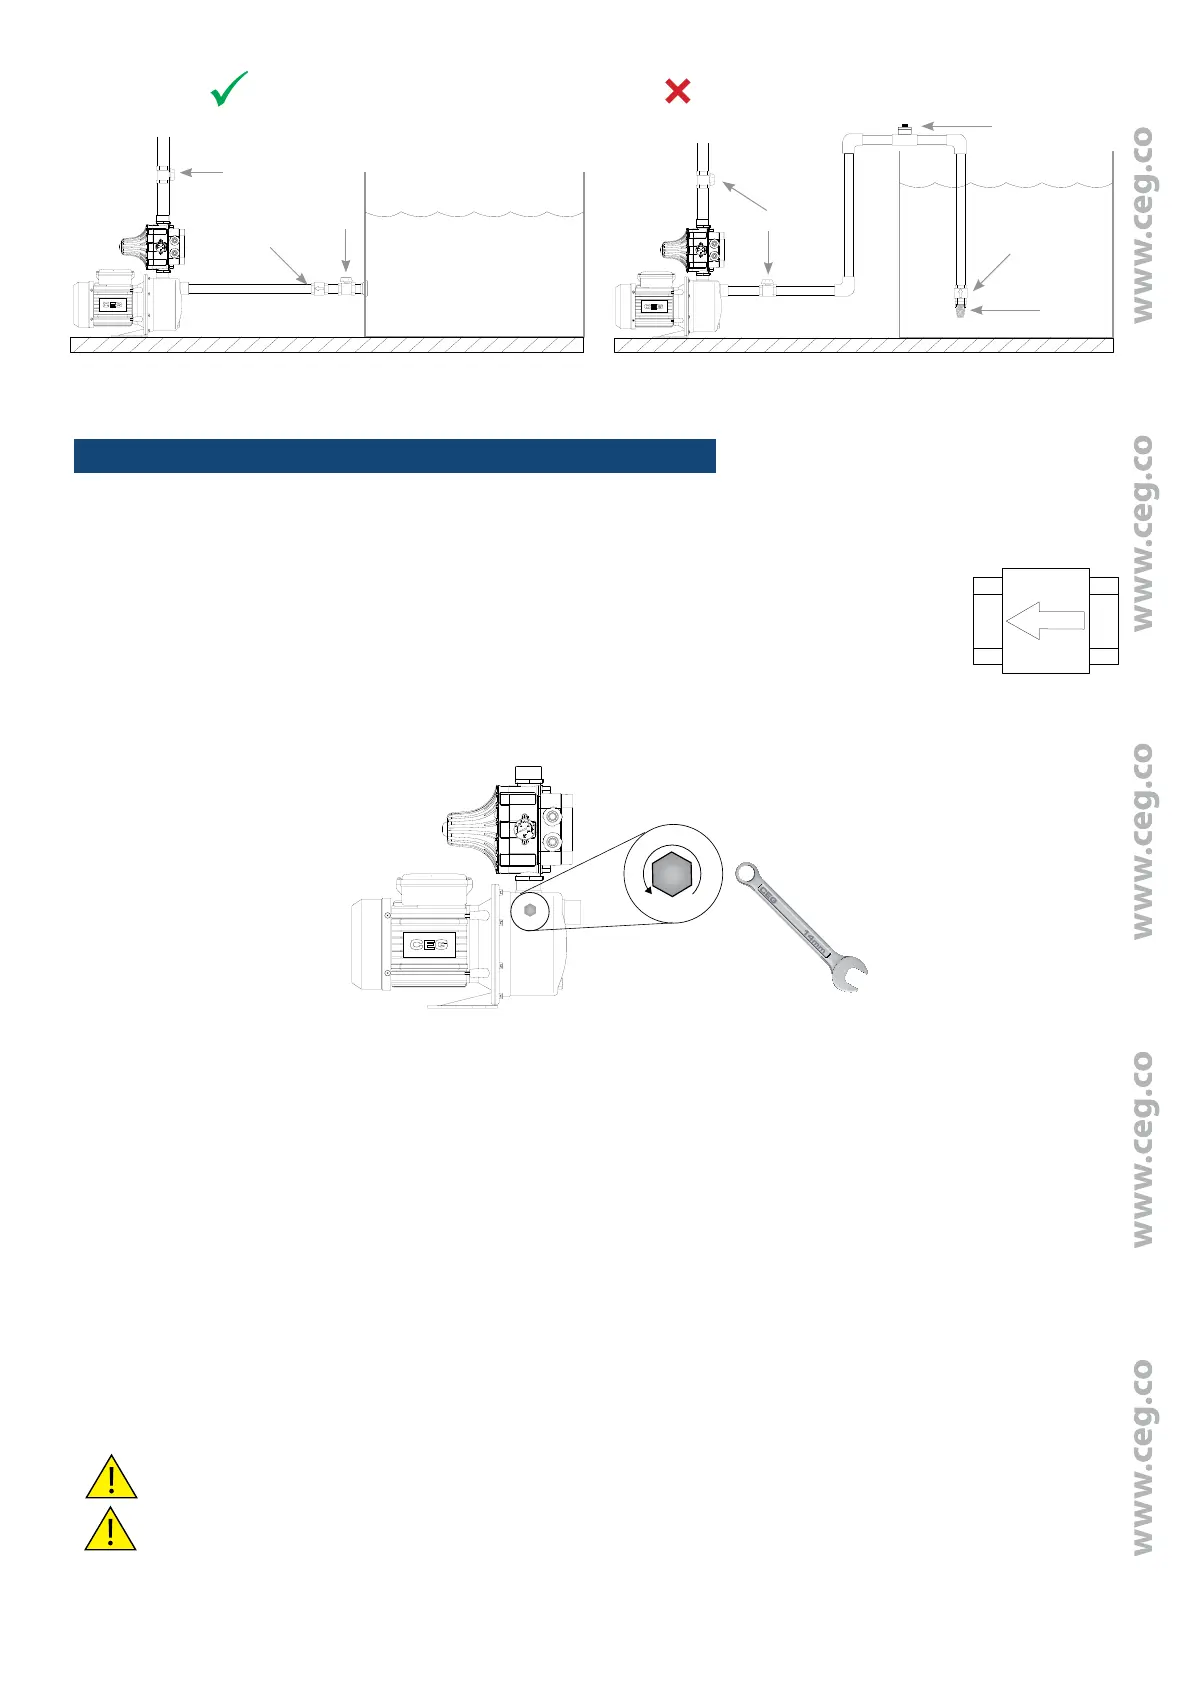
- Remove top priming plug completely, ll pump body completely with water. This will take some time as it is a small
inlet and takes around 2L of water to ll the pump. Once full water will begin to spill over, fasten the priming plug with
a 14mm ring spanner