9
SETTING UP THE SCREEN WITHOUT A BRACKET
You can also place the screen free-standing on the oor or on furniture. Care-
fully set the screen down using the transport handles on the side. There are 4
levelling feet on the underside of the screen. Align the screen horizontally in all
directions using the levelling feet. The image should always be aligned using
the adjustment options on your projector rst.
If necessary, you can also correct the image alignment using the levelling feet
of the screen. All 4 levelling feet must always be in contact with the oor.
Note: If you do not need the levelling feet for reasons of space in your installa-
tion, you can unscrew them completely from the housing.
Ensure that the screen is always level and rests on the outer and centre sup-
port points or adjustable feet.
This completes the basic installation of your screen. Finally, check again that
all parts to be fastened are tight (hand-tight, no cordless screwdriver!) and
the screen is secure and the brackets are rmly attached to your supporting
structure.
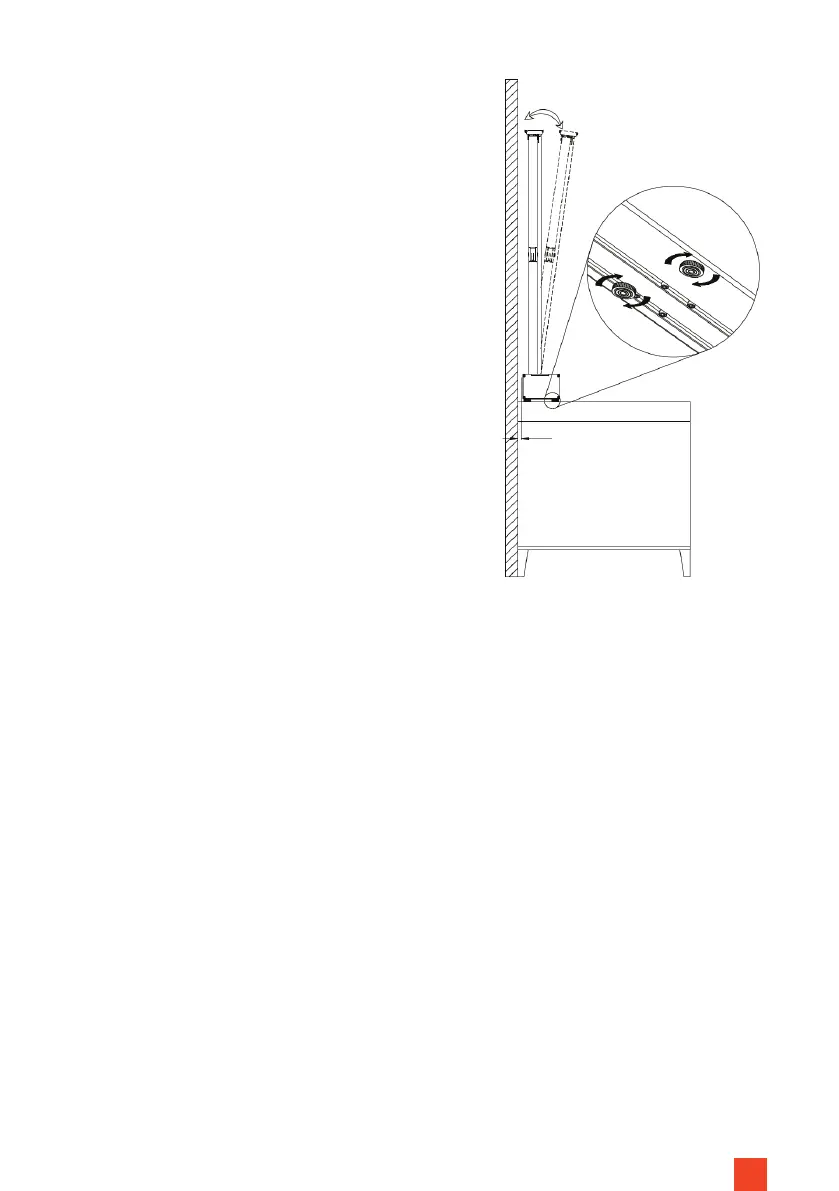
Fig. 6
Now that the screen is in its nal position in-
stalled on the brackets, connect the power
supply to the screen and extend the fabric
completely. Now check the angle between
the screen and your wall and use the Allen key
to tighten the adjusting the adjusting screws
on the two L-brackets until the fabric is opti-
mally straight and parallel to the projection.
In doing so you can adjust the angle up to +/-
1.5° (Fig. 3).