19
04 Geng started
4.4 Reassembling the printhead
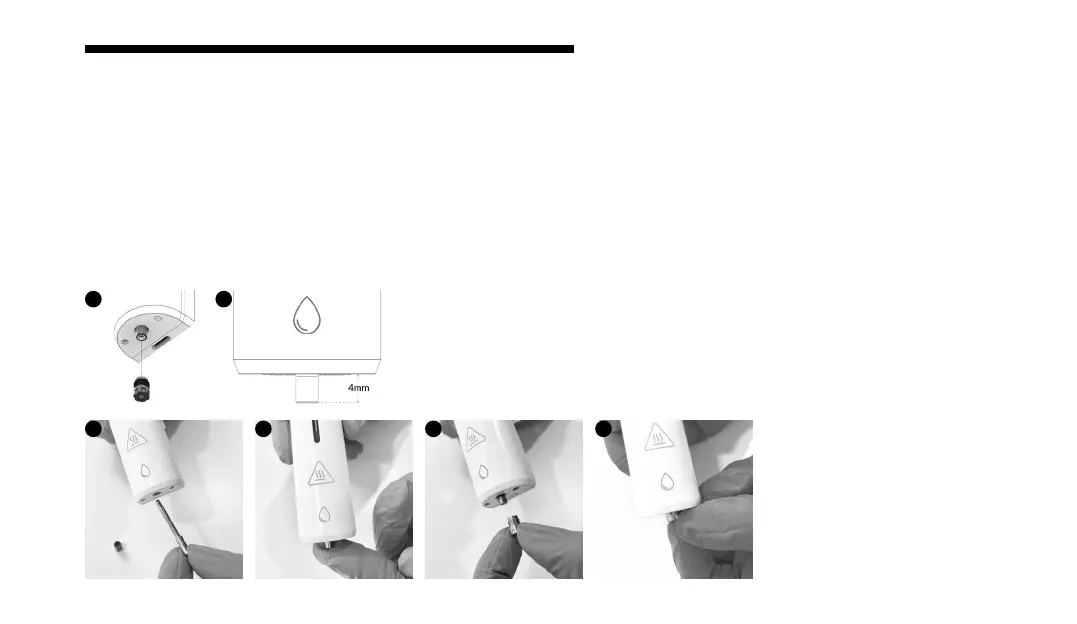
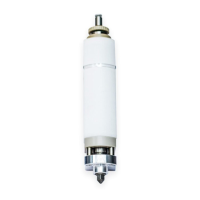
1. Use some force to push the microvalve into the printhead unl approximately four millimeters of the valve are protruding (Figure 8 C, D). Do
not apply pressure on the glass end (Secon 3.2).
2. Screw the threaded nozzle by turning it clockwise unl you feel resistance.
NOTE: It’s normal for a few threads to be visible. Do not use excessive force or tools, but ensure the nozzle is ght, as a loose nozzle can
unscrew during prinng (Figure 8 A, B, E, F).
Figure 8: Assembling the EMD Print-
head. (A) Inserng the microvalve into
the EMD Printhead. (B) Gently push
unl resistance is felt. (C, E) Align and
ghten the nozzle to the printhead. (D,
F) Tighten the nozzle unl approxi-
mately four millimeters of the nozzle
are protruding.
A
B
C D E F