BP'
'
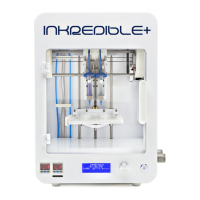
7. The INKREDIBLE 3D bioprinter can be switched on with the on/off button [1].
8. Connect the air tube (provided) to the air compressor and then to the back of the
Bioprinter. Turn on the air compressor and regulate the air pressure to 400 KPa. Note:
Air compressor should be connected to a separate socket (not in the same fuse) to avoid
any electromagnetic interference with the INKREDIBLE Bioprinter. Air pressure should
be set at minimum 200 KPa to have the printhead’s actuators functioning properly.
9. Connect the cartridges with needles to air tubes for Print Heads [2a] [2b] by twisting the
cartridge connectors.
10. Attach the cartridges connected to the air tubes inside the Printheads [2a] [2b].
11. Start off by homing and calibrating the INKREDIBLE bioprinter. The bioprinter can be
calibrated and tuned using the “Home Axes” function in the menu, using the following
sequence (Note: Ensure that the cartridges with needles are placed inside the
printheads prior to initiating this sequence):
To Home Axes the bioprinter:
-Remove all objects from the build plate [7] (
such as well plates, petri dishes etc.
)
-Lower the build plate [7] by simply pushing down at the back of the printbed with your hand
-Press the Control Knob [5] once to enter the “Menu”
-Turn the Control Knob Wheel [5] to select “Prepare Bioprint” and press the Control Knob to
enter
-Turn Control Knob wheel and press “Home Axes”
The INKREDIBLE Bioprinter will now home all axes. The Ph 1 needle should in the middle of
the printbed once the sequence is completed.
Manual adjustment and Calibration of the Z Axis to print in petridish and well plates (should be
performed right after “Home Axes” sequence):
-Place a petridish onto the Build Plate [7]
(there are cuts in the center of the build plate where a
petri dish will fit tightly)
-Press the Control Knob Wheel [5] once to enter the “Menu”
-Turn the Control Knob Wheel [5] to select “Prepare Bioprint” and press the Control Knob to
enter
-Turn the Control Knob Wheel to select “Move Z” and press the Control Knob You have now
entered Manual Z Calibration Mode-On the display you should see:Z: +040.0 (position of Z
axis: 40 mm)