- 5 -
ASSEMBLY INSTRUCTION
PREPARATION: Before assembling, make sure that you will have enough space around the item;
Use the present tooling for assembling; Before assembling please check whether all needed parts
are available.
It is strongly recommended this machine to be assembled by two or more people to avoid possible
injury.
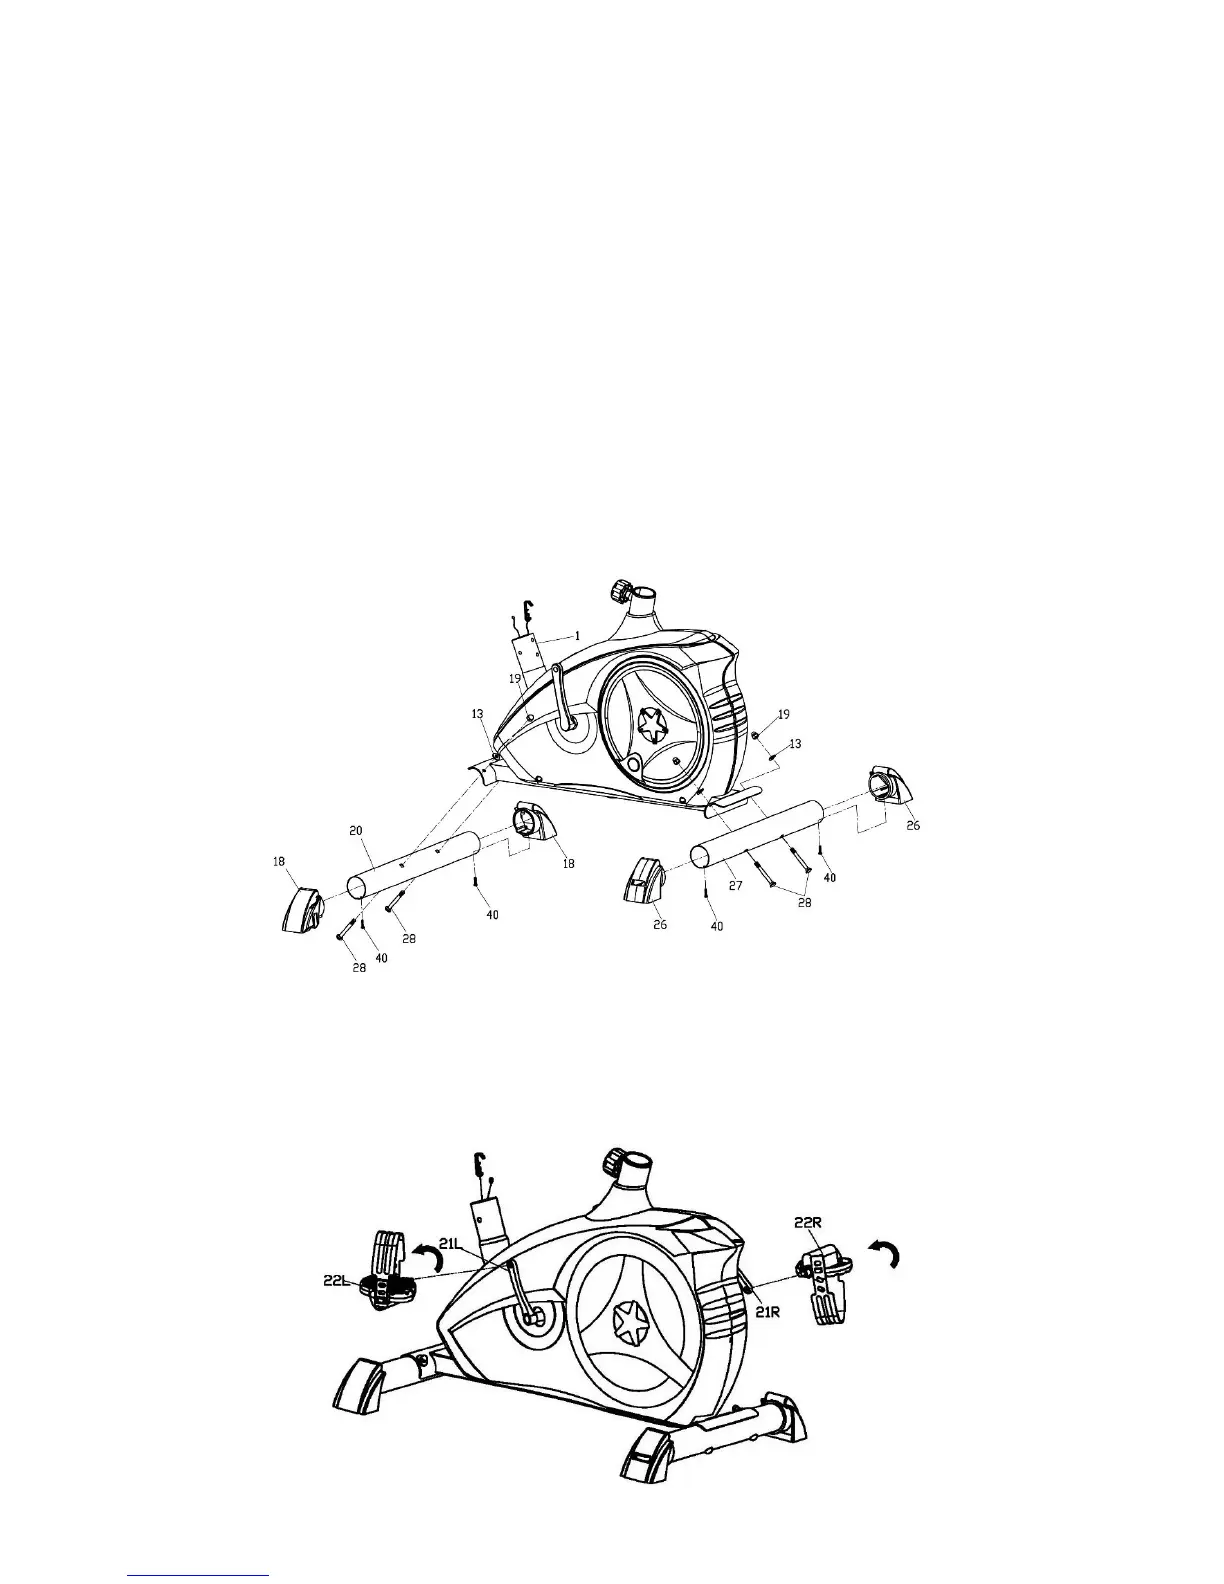
STEP 1
I. Install the front end cap (18) to the front stabilizer (20), and then tighten it with screw (40).
II. Install the leveler end cap (26) to the Rear stabilizer (27), and then tighten it with screw (40).
Note: Please make sure the small hole of the end caps align at the hole of the stabilizers when
install the end caps.
III. Attach the Stabilizers (20 & 27) to the Main frame (1) with the Carriage bolts (28), Arc washers
(13), and Acorn nuts (19) as shown.
Note: The Adjust wheel on the Leveler end cap of the stabilizers can be adjusted to keep the
equipment stable.
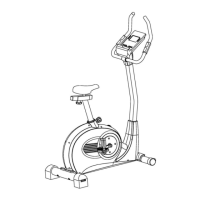
STEP 2
Attach the Pedals (22L/R) to the Cranks (21L/R) respectively, viewed from the rider’s exercising
position. Always make sure the Pedals are securely tightened before any exercise.
Note: Both pedals are labeled L FOR LEFT and R FOR RIGHT.
To tighten turn the Left pedal COUNTERCLOCKWISE and the Right pedal CLOCKWISE.