Do you have a question about the CEN-TECH 57015 and is the answer not in the manual?
Explains the safety alert symbol and DANGER, WARNING, CAUTION levels.
Defines common electrical and battery rating symbols.
Details warnings for eye injury and fire risks.
Covers rain/snow, attachments, cord handling, and damaged equipment.
Guidelines for selecting and using extension cords.
Addresses risks of explosive battery gases and precautions.
Personal protective measures for battery work.
Safety steps for connecting charger to battery in vehicle.
Safety steps for connecting charger to battery outside vehicle.
Recommends safety goggles and gloves for battery work.
Guidelines for charger use, maintenance, and battery types.
Covers user condition, moving, pacemakers, and general caution.
Details voltage, frequency, and output specifications.
Information on cable length and gauge.
Emphasizes reading safety instructions before use.
Instructions for assembly before initial use.
Use only on flooded lead-acid batteries.
Recommends safety goggles and gloves.
Covers terminal cleaning, water levels, and voltage check.
Guidelines for charger positioning away from battery.
Avoid closed areas and battery acid exposure.
Steps to connect the charger to the battery and power outlet.
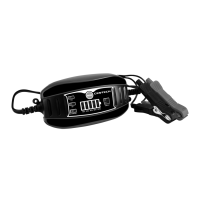
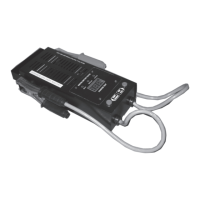
How to select voltage and interpret LED indicators during charging.
Procedure for finishing charge, disconnecting, and storing.
Check for loose hardware, cracks, or damaged wiring before each use.
Wipe external surfaces with a clean cloth after use.
Instructions regarding damaged cords and qualified service.
Solutions for unit not charging or current not reaching full output.
Explanation of Battery Charge Level, Standby, and Fault LEDs.
Details product warranty period, exclusions, and disclaimers.
Steps for returning products for warranty service or refund.
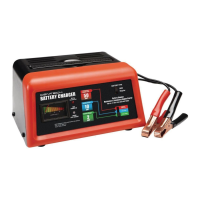
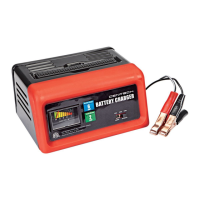
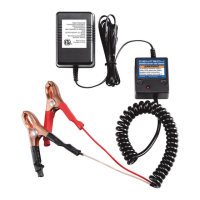
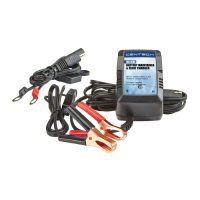
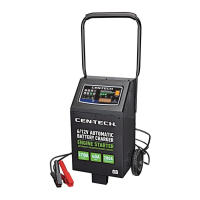
The CEN-TECH 6V/12V 2 AMP, 3-STAGE MICROPROCESSOR CONTROLLED AUTOMATIC BATTERY CHARGER is designed to charge flooded lead-acid batteries, providing a controlled and safe charging process. This device is not intended for use with dry-cell batteries or deep cycle marine batteries. Its microprocessor control allows for a 3-stage charging process, optimizing battery health and longevity.
The primary function of this battery charger is to safely and efficiently charge 6V and 12V lead-acid batteries. It operates with a 2-amp output, making it suitable for maintaining and recharging smaller batteries or for trickle charging larger ones. The 3-stage charging process ensures that the battery receives an optimal charge without overcharging, which can extend battery life. The charger is equipped with various safety features to protect both the user and the battery during operation. It includes indicators for charging status, voltage selection, and fault conditions, providing clear feedback to the user.
Before using the charger, it is crucial to review all safety instructions to prevent serious injury or damage. When preparing to charge, ensure the area is well-ventilated, especially when working with lead-acid batteries, as they generate explosive gases. Always wear ANSI-approved splash-resistant safety goggles and heavy-duty rubber work gloves to protect against battery acid. Clean battery terminals carefully, avoiding contact with eyes. If the battery has removable cell caps, add distilled water to each cell until the acid reaches the level specified by the manufacturer, but do not overfill. For valve-regulated lead-acid batteries, follow the manufacturer's specific recharging instructions.
The charger should be located as far away from the battery as the DC cables permit, and never directly above the battery, as gases can corrode and damage the charger. Avoid dripping battery acid on the charger. Do not operate the charger in a closed-in area or restrict ventilation. Also, never set a battery on top of the charger.
For batteries installed in a vehicle, first, position the AC and DC cables to minimize the risk of damage from the hood, door, or moving engine parts. Keep clear of fan blades, belts, and pulleys. Check the polarity of the battery posts; the positive post (POS, P, +) is typically larger than the negative post (NEG, N, -). Determine which post is grounded to the chassis.
If the vehicle has a negative-grounded system, connect the POSITIVE (RED) clip from the charger to the POSITIVE (POS, P, +) ungrounded post of the battery. Then, connect the NEGATIVE (BLACK) clip to the vehicle chassis or engine block, away from the battery. Avoid connecting to the carburetor, fuel lines, or sheet-metal body parts; instead, connect to a heavy-gauge metal part of the frame or engine block.
For positive-grounded vehicles, connect the NEGATIVE (BLACK) clip from the charger to the NEGATIVE (NEG, N, -) ungrounded post of the battery. Then, connect the POSITIVE (RED) clip to the vehicle chassis or engine block, away from the battery, following the same precautions as above.
When disconnecting the charger, always turn switches to "off," disconnect the AC cord, remove the clip from the vehicle chassis, and then remove the clip from the battery terminal.
For batteries outside a vehicle, check the polarity of the battery posts. Attach at least a 24-inch-long 6-gauge (AWG) insulated battery cable to the NEGATIVE (NEG, N, -) battery post. Connect the POSITIVE (RED) charger clip to the POSITIVE (POS, P, +) post of the battery. Position yourself and the free end of the cable as far away from the battery as possible, then connect the NEGATIVE (BLACK) charger clip to the free end of the cable. Do not face the battery when making the final connection.
Once connections are made, plug the power cord into a properly grounded outlet. If the Fault LED lights up, unplug the charger and recheck cable connections. Press the Mode Button to select the desired voltage (6V or 12V). When a good connection is established, the Voltage and Standby LEDs will light, and the Charging Indicator LEDs will display the charging status. Charging is complete when the 100% Charging Indicator LED is lit. The charger will then enter trickle charge mode, which requires user monitoring. After use, unplug the power cord, disconnect the negative (BLACK) clamp, then remove the positive (RED) clamp. Clean the charger and store it indoors, out of children's reach.
Regular maintenance is essential for the safe and effective operation of the battery charger. Before each use, inspect the general condition of the charger. Look for loose hardware, cracked or broken parts, damaged electrical wiring or cable insulation, and any other condition that might affect its safe operation. If any issues are found, do not use the charger until the problem is corrected.
After each use, wipe the external surfaces of the charger with a clean cloth to remove any dirt or debris.
This charger is not a toy and should be kept out of reach of children. Do not attempt to charge non-rechargeable or defective batteries. Do not charge more than one battery at a time. If the charger requires service, it should be performed by a qualified repair person using identical replacement parts to ensure the safety of the charger is maintained. Avoid using the charger if you are tired or under the influence of drugs, alcohol, or medication, as inattention can lead to serious personal injury. Before moving the charger, disconnect the power supply and battery, then allow the charger to cool. Individuals with pacemakers should consult their physician before use, taking precautions to avoid electromagnetic fields and electrical shock. This includes avoiding operating alone, properly maintaining and inspecting the device, and properly grounding the power cord, potentially with a Ground Fault Circuit Interrupter (GFCI) to prevent sustained electrical shock.
| Battery Voltage | 6V/12V |
|---|---|
| Output Voltage | 6V/12V DC |
| Display | LED Indicators |
| Charging Current | 2A |
| Input Voltage | 120V AC |
| Output Current | 2A |
| Battery Compatibility | AGM, Gel |
| Charging Modes | Automatic |
| Safety Features | Overcharge protection, Reverse polarity protection, Short circuit protection |