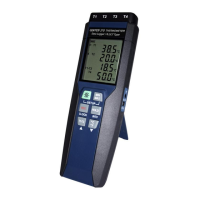
DATALOGGER THERMOMETER
7
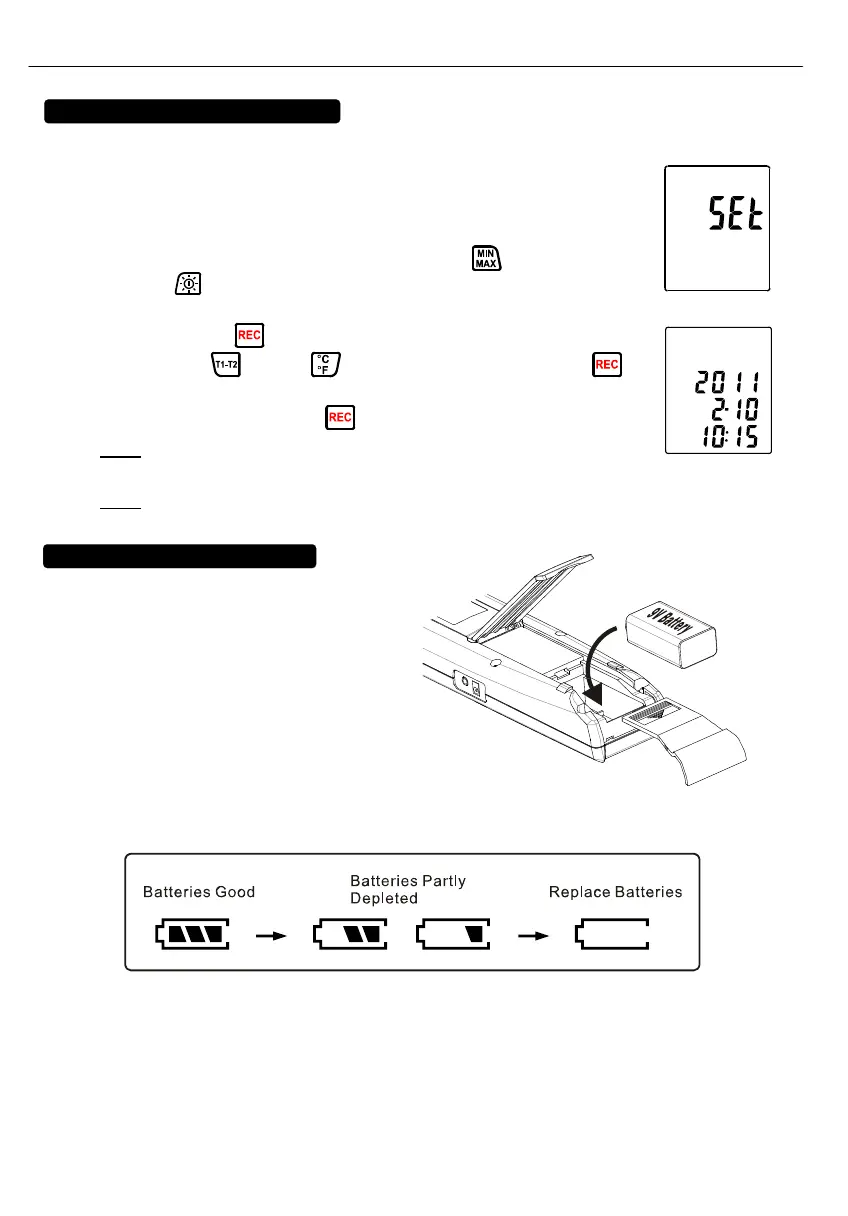
8. SETTING DATE AND TIME
The unit incorporates a clock so that the data logger function can also record the data and time
along with the measurement value in the memory.
8.1 Setting date and time:
(1) Turn off the unit.
(2) Enter SETUP mode by pressing and holding
button and then
press
power button to turn on the unit. “SEt” blinks on the LCD
screen. (see Fig.6)
(3) Press CLOCK (
) button to set clock.
(4) Press ▲ (
) or ▼ ( ) to adjust year, press CLOCK ( )
button to adjust next value (month tdatethourtminute). (see Fig.7)
(5) When finish, press CLOCK (
) button to exit SETUP mode.
Note:
To abort during the process, press power button to exit SETUP
mode.
Note:
An internal backup battery supplies power for the clock.
9. POWER PREPARATION
9.1 Battery Loading:
Remove the battery cover on the back
and insert one 9V battery.
9.2 Battery capacity indicator:
When operating the unit on batteries, periodically check this indicator to determine the
remaining battery capacity.
9.3 AC Adapter Connection:
When the AC adapter is used, insert the plugs of the adapter into the DC9V connector on the
side panel.
Note: When the AC adapter is connected while battery is inserted, the unit will be powered from
the adapter (the AC adapter has priority).
Fig.6
Fig.7