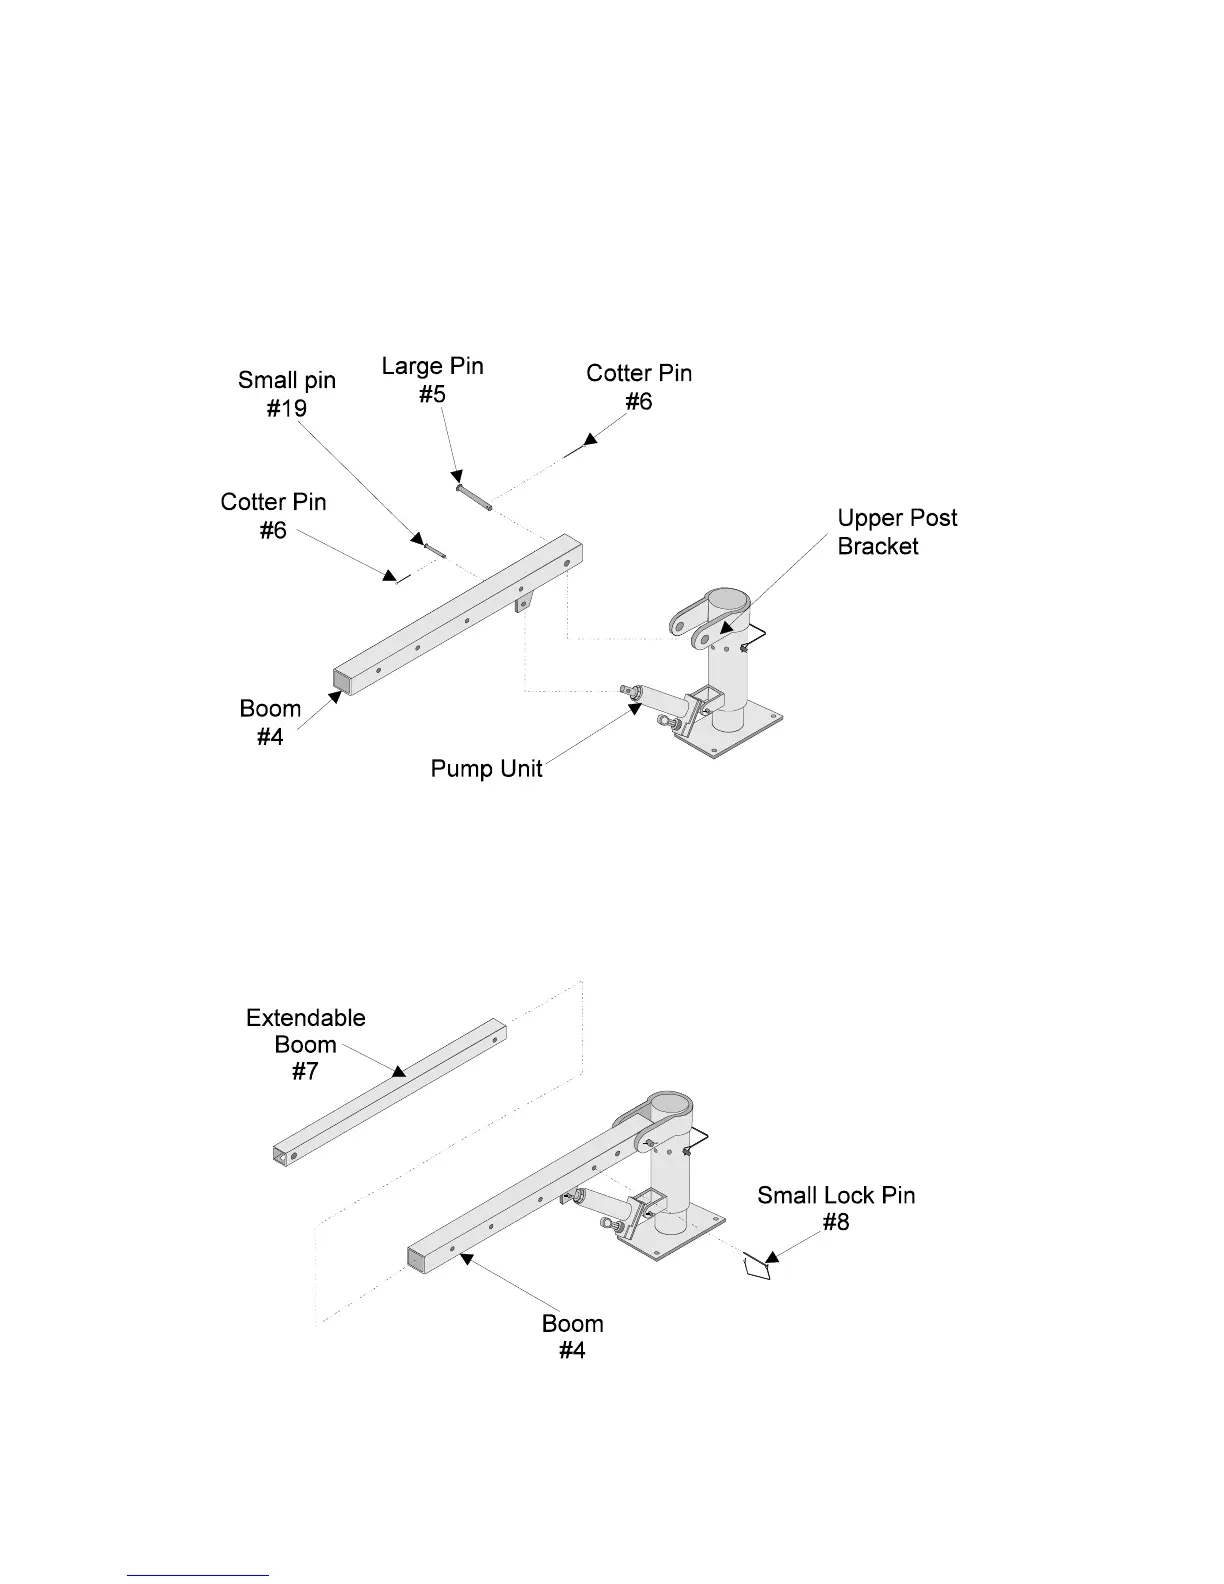
Step 3: Attach the rear end of the BOOM (#4), with its bracket facing down, to the upper
POST bracket using the LARGE PIN (#5) and secure it with a COTTER PIN. See
Figure 3.
Step 4: Connect the PUMP UNIT plunger to the BOOM bracket using the SMALL PIN (#19).
Figure 3 — Boom Assembly
Step 5: Slide the EXTENDIBLE BOOM (#7) into the BOOM so that the end with the oval hole
is facing out and the oval hole is facing down (see Figure 4). Attach it at one of the
extension points using the SMALL LOCK PIN (#8).
Figure 4 — Extendible Boom Assembly
Pg. 5 -- SKU 1647