Do you have a question about the Central Pneumatic 93629 and is the answer not in the manual?
Ensure all parts are included and undamaged upon unpacking.
Wear ANSI approved safety goggles, dust mask, and hearing protection.
Maintain a clean work area to prevent accidents and ensure safety.
Operate within specified air pressure limits; do not use as a grinder.
Keep the work area well-lit and free from flammable substances.
Ensure children are not present in or near the work area.
Store tools securely in a dry location away from children when not in use.
Use the tool for its intended purpose and do not modify it.
Wear appropriate clothing and protective gear; avoid loose items.
Maintain balance and avoid reaching over active tools or hoses.
Always disconnect air supply and release pressure when servicing or storing.
Ensure all adjustment wrenches are removed before applying air pressure.
Ensure throttle is OFF before connecting air and avoid carrying with finger on throttle.
Remain alert, use common sense, and do not operate when fatigued.
Do not operate if impaired by alcohol, drugs, or medication.
Use only clean, dry, regulated compressed air at the specified pressure.
Inspect tools for damage, alignment, and proper function before each use.
Use only identical replacement parts and intended accessories; service by technician.
Perform regular maintenance as outlined; servicing by qualified technician.
Disconnect air supply when moving; carry by handle, avoiding throttle.
Work with an assistant present for safety and assistance.
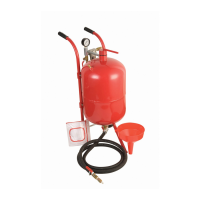
Use an oiler, regulator, and filter; add pneumatic tool oil if no auto oiler.
Be aware of chemical warnings regarding dust from sanding activities.
Manual limitations require operator common sense and caution.
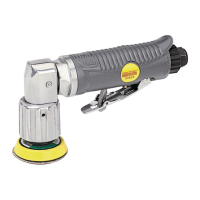
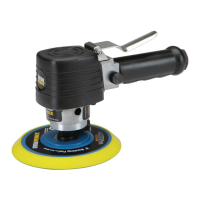
Attach Quick Connector to Air Inlet using thread sealer tape.
Secure smaller workpieces in a vise or with clamps to prevent injury.
Attach a 2" diameter self-adhesive sanding disc to the pad.
Ensure throttle is OFF, then connect the air hose to the tool.
Connect the other end of the air hose to the air compressor system.
Turn on the air compressor and set regulator to 90 PSI.
Hold the tool firmly with both hands for stable operation.
Choose the specific area on the workpiece to be sanded.
Squeeze throttle to turn on the sander, ensuring disc is clear.
Use light pressure on the sander to avoid surface damage.
Always wear safety gear and ensure others do too during operation.
Release throttle, turn off compressor, disconnect hose, and store tool.
Disconnect air, release pressure, clean exterior with damp cloth.
Store safely and ensure all maintenance is done by a qualified technician.
Check throttle, air pressure, leaks, filter, or consult technician for issues.
Use a coarser disc or alternative method if residue removal is ineffective.
| Pad Type | Hook and loop |
|---|---|
| Type | Random Orbital |
| Orbit Diameter | 3/16 inch |
| Average Air Pressure | 90 PSI |
| Hose Size | 3/8 inch |
| Disc Size | 6 inch |
| Free Speed | 10000 RPM |
| Air Inlet | 1/4 inch NPT |
| Pad Size | 6 inch |
| Weight | 3.5 lbs |