EasyManua.ls Logo

Cessna 1971 Super Skymaster - Page 18

Cessna 1971 Super Skymaster
63 pages
Print Icon
To Next Page IconTo Next Page
To Previous Page IconTo Previous Page
Loading...
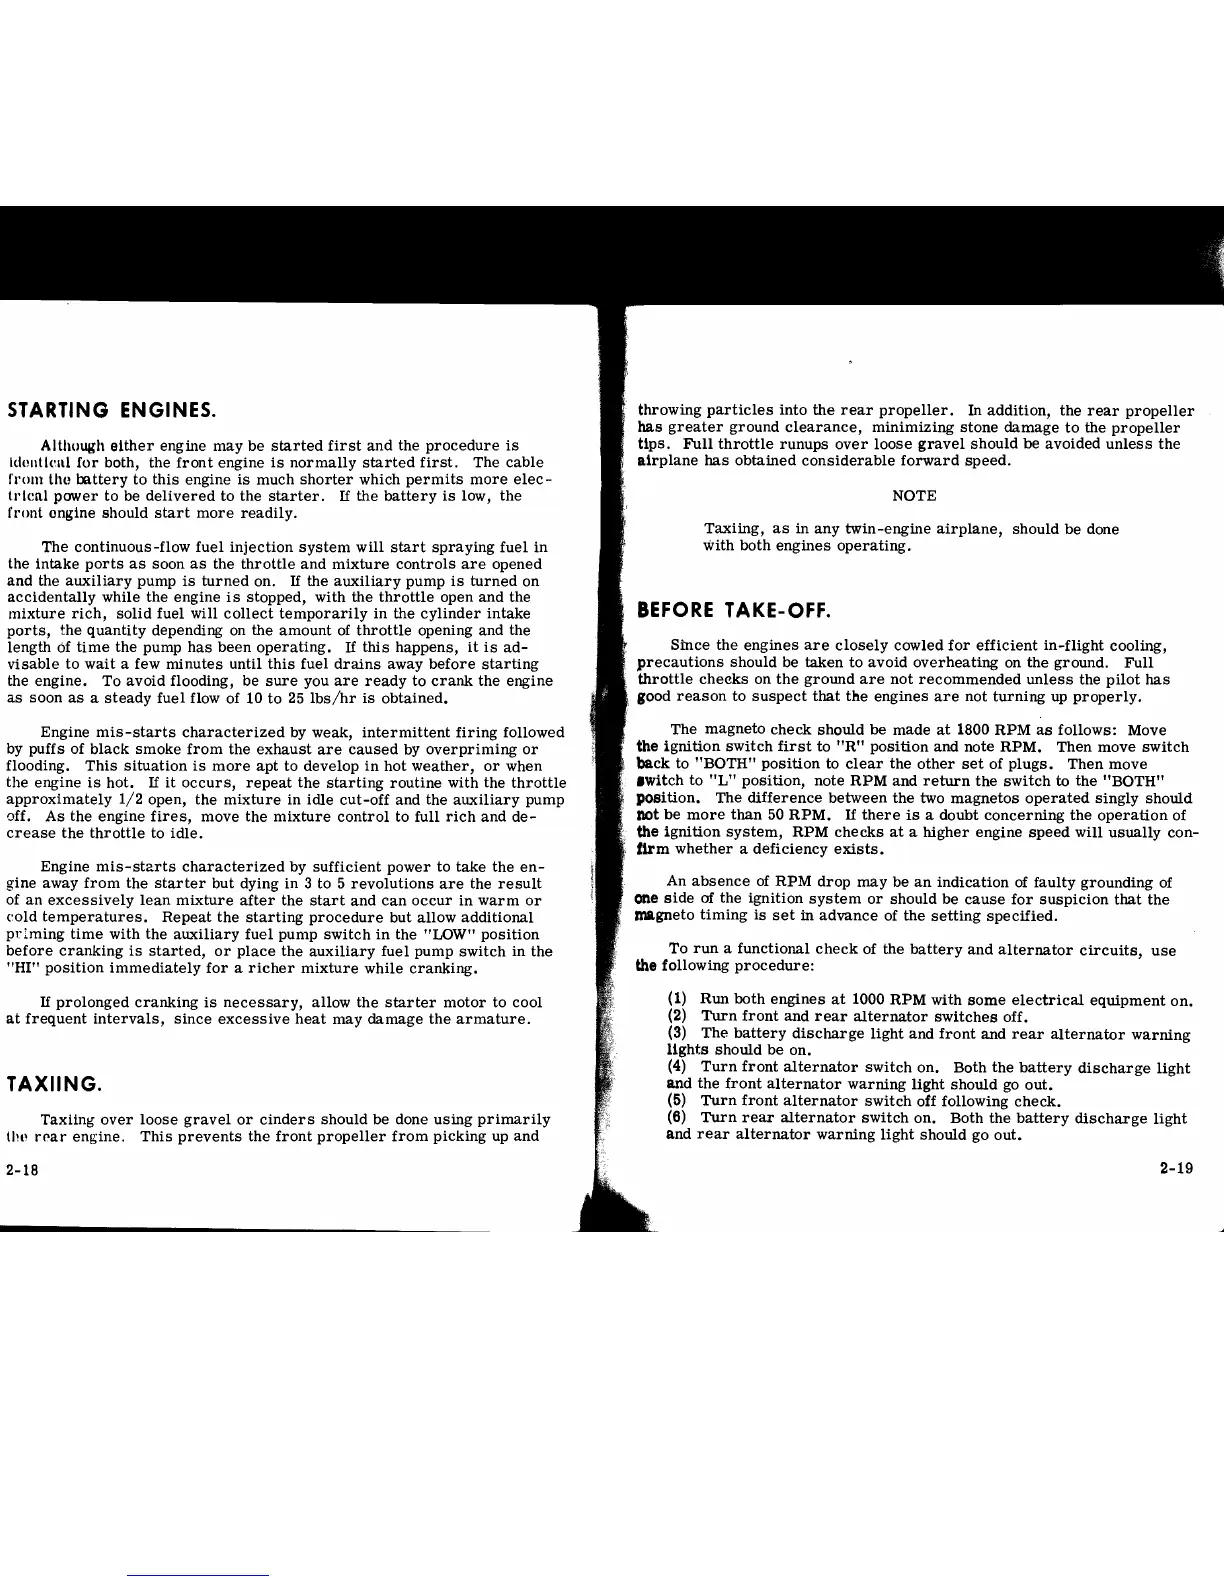
STARTING ENGINES.
Althuugh
either
engine
may
be
started
first
and
the
procedure
is
Idolllkill
for
both, the
front
engine
is
normally
started
first.
The
cable
fl'om thu oo.ttery to
this
engine
is
much
shorter
which
permits
more
elec-
Ideal
power
to
be
delivered
to the
starter.
If
the
battery
is
low, the
front ongine should
start
more
readily.
The continuous-flow fuel
injection
system
will
start
spraying
fuel in
the
intake
ports
as
soon
as
the
throttle
and
mixture
controls
are
opened
and
the
auxiliary
pump
is
turned
on.
If
the
auxiliary
pump
is
turned
on
aCCidentally while the engine
is
stopped, with the
throttle
open
and
the
mixture
rich,
solid
fuel will
collect
temporarily
in the
cylinder
intake
ports,
the
quantity
depending on the
amount
of
throttle
opening and the
length of
time
the pump
has
been
operating.
If
this
happens,
it
is
ad-
visable
to
wait
a few
minutes
until
this
fuel
drains
away
before
starting
the
engine.
To
avoid
flooding, be
sure
you
are
ready
to
crank
the engine
as
soon
as
a
steady
fuel flow of 10
to
25
lbs/hr
is
obtained.
Engine
mis-starts
characterized
by weak,
intermittent
firing
followed
by puffs of
black
smoke
from
the
exhaust
are
caused
by
overpriming
or
flooding.
This
situation
is
more
apt
to develop
in
hot
weather,
or
when
the engine
is
hot.
If
it
occurs,
repeat
the
starting
routine
with the
throttle
approximately
1/2
open, the
mixture
in idle
cut-off
and the
auxiliary
pump
off.
As
the engine
fires,
move the
mixture
control
to full
rich
and
de-
crease
the
throttle
to
idle.
Engine
mis-starts
characterized
by
sufficient
power
to
take
the
en-
gine away
from
the
starter
but dying in 3 to 5
revolutions
are
the
result
of
an
excessively
lean
mixture
after
the
start
and
can
occur
in
warm
or
cold
temperatures.
Repeat
the
starting
procedure
but allow
additional
priming
time
with the
auxiliary
fuel pump
switch
in
the
"WW"
position
before
cranking
is
started,
or
place
the
auxiliary
fuel pump
switch
in the
"HI" pOSition
immediately
for
a
richer
mixture
while
cranking.
If
prolonged
cranking
is
necessary,
allow
the
starter
motor
to cool
at
frequent
intervals,
since
excessive
heat
may
damage
the
armature.
TAXIING.
Taxiing
over
loose
gravel
or
cinders
should
be
done
using
primarily
the
rpar
engine.
This
prevents
the
front
propeller
from
picking up
and
throwing
particles
into
the
rear
propeller.
In
addition,
the
rear
propeller
has
greater
ground
clearance,
minimizing
stone
damage
to
the
propeller
Ups.
Full
throttle
runups
over
loose
gravel
should
be
avoided
unless
the
airplane
has
obtained
considerable
forward
speed.
NOTE
Taxiing,
as
in
any
twin-engine
airplane,
should
be
done
with
both
engines
operating.
BEFORE
TAKE-OFF.
Since
the
engines
are
closely
cowled
for
efficient
in-flight
cooling,
precautions
should be taken
to
avoid
overheating
on the ground.
Full
throttle
checks
on
the
ground
are
not
recommended
unless
the
pilot
has
good
reason
to
suspect
that
the
engines
are
not
turning
up
properly.
The
magneto
check
should
be
made
at
1800
RPM
as
fOllows: Move
the
ignition
switch
first
to
"R"
position
and note
RPM.
Then move
switch
back
to "BOTH"
position
to
clear
the
other
set
of
plugs.
Then
move
.witch
to
"L"
position,
note
RPM
and
return
the
switch
to
the
"BOTH"
pOSition. The
difference
between
the
two
magnetos
operated
singly
should
not
be
more
than
50
RPM.
If
there
is
a doubt
concerning
the
operation
of
the
ignition
system,
RPM
checks
at
a
higher
engine
speed
will
usually
con-
firm
whether
a
deficiency
exists.
An
absence
of
RPM
drop
may
be
an
indication
of faulty
grounding
of
one
side
of
the ignition
system
or
should
be
cause
for
suspicion
that
the
magneto
timing
is
set
in
advance
of the
setting
specified.
To
run
a functional
check
of the
battery
and
alternator
circuits,
use
the
following
procedure:
(1)
Run
both
engines
at
1000
RPM
with
some
electrical
equipment
on.
(2)
Turn
front
and
rear
alternator
switches
off.
(3)
The
battery
discharge
light
and
front
and
rear
alternator
warning
lights
should
be
on.
(4)
Turn
front
alternator
switch
on. Both
the
battery
discharge
light
and
the
front
alternator
warning
light
should
go
out.
(5)
Turn
front
alternator
switch
off following
check.
(6)
Turn
rear
alternator
switch
on. Both
the
battery
discharge
light
and
rear
alternator
warning
light
should go
out.
2-19
2-18
I