EasyManuals Logo

Cessna SKYMASTER 337 Series User Manual

Cessna SKYMASTER 337 Series
414 pages
To Next Page IconTo Next Page
To Previous Page IconTo Previous Page
Page #201 background imageLoading...
Page #201 background image
RIGGING
PROCEDURES
FOR
CESSNA
400
AUTOPILOT
(Type
AF-420A)
USED
ON
1979
337,
T337
AND
P337
MODELS
ONLY
GENERAL.
To
ensure
proper
operation
of
the
400
autopilot
sys-
tem,
the
autopilot's
rigging
should
be
checked
every
200
hours
of
airplane
operation.
AUTOPILOT
RIGGING
PROCEDURES.
Aileron
Rigging.
For
checkout
of
aileron
rigging,
proceed
as
follows:
NOTE
Before
proceeding
with
the
following
proce-
dures,
be
sure
the
aileron
control
system
has
been
rigged
in
accordance
with
instruc-
tions
provided
in
the
basic
airplane's
Service
Manual.
Step
1.
Place control
wheels
in
neutral
position
of
ailerons,
and
secure
control
wheels
in
neutral
po-
sition
by
using
the
control
lock
(P/N
1500027-10).
Step
2.
Remove
access
plates
to
gain
access
to
the
autopilot
equipment
installed
in
the
right
wing.
Step
3.
Ensure that
the
actuator
assembly
(16)
is
securely
bolted
to
the
adapter
(15),
support
assembly
(14A)
and
bracket
(14).
Step
4.
Check
that
the
chain
portion
of
the
chain
and
cable
assembly
(5)
is
closely
centered
on
the
actuator
sprocket
(18).
CAUTION
If
the chain
and
cable
assembly
(5)
is
to
be
replaced,
it is
necessary
to
remove
the
two
chain
guard
posts
(17).
When
chain
guard
posts
are
being
unscrewed
for
removal,
use
caution
to
not
lose
the
locking
washers.
Step
5.
Ensure
that
cable
portion
of
the
chain
and
cable
assembly
(5)
is
properly
routed
thru
pul-
ley
bracket
(19)
and
on
to
pulleys
(23)
and
is
secured
to
pulley
bracket
(19)
as
shown
on
sheet
4.
Step
6.
Ensure
that
the
chain
and
cable
assem-
bly
(5)
and
turnbuckle
(3)
are
secured
to
the
bell-
crank
assembly
(1)
using
bolt
(9),
washer
(8), nut
(6)
and
cotter
pin
(7).
Step
7.
Attach cable
tensiometer
(24)
to
chain
and
cable
assembly
(5).
Tensiometer
should
indi-
cate
20
to
30
lbs.
If
cable
tension
is
above
or
be-
low
20
to
30
lbs.,
make
the
following
adjustments
to
bring
cable
tension
to
the
desired
tension.
a.
Remove
safety
wire
(4)
from
turnbuckle
(3).
b.
If
cable
tension
is
too
high,
loosen
turn-
buckle
(3).
c.
If
cable
tension
is
too
low,
tighten
turn-
buckle
(3).
d.
Reinstall
safety
wire
(4)
on
turnbuckle
(3).
Step
8.
Remove
cable
tensiometer
(24)
from
chain
and
cable
assembly
(5).
Step
9.
Remove
control
lock
securing
the
con-
trol
wheels.
Step
10.
On
control
unit,
pull
out
PULL
TURN
control
and
leave
in
detent.
Center
roll
TRIM
con-
trol.
Set
GYRO
switch,
on
rear
of
control
unit,
to
OUT.
Step
11.
Turn
aircraft
master
switch,
avionics
power switch,
and
autopilot
(ON-OFF)
switch
to
ON
position
and
allow
actuator
to
run
to
electrical
neutral.
Step
12.
After
actuator
has run
to
its
electrical
neutral
position,
turn
autopilot
(ON-OFF)
switch
to
OFF
position.
Step
13.
While
holding
ailerons
in
position
where
actuator
stopped,
insert
screwdriver
into
slot
of
the
potentiometer
adjustment
screw
(located
adjacent
to
actuator
sprocket)
and
disengage
feedback
potentio-
meter
in
actuator
by
twisting
fully
clockwise
and
hold
potentiometer
in
this
position.
Figure
6-1.
Rigging
Procedures
for
Cessna
400
Autopilot
(Type
AF-420A)
Used
On
1979 337,
T337
and P337
Models
Only
(Sheet
1 of
5)
6-2

Table of Contents

Questions and Answers:

Question and Answer IconNeed help?

Do you have a question about the Cessna SKYMASTER 337 Series and is the answer not in the manual?
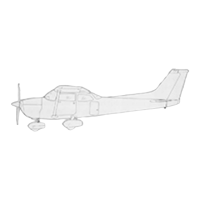
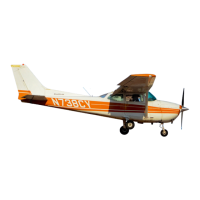
Cessna SKYMASTER 337 Series Specifications

General IconGeneral
ManufacturerCessna
Crew1
Capacity5 passengers
Length9.07 m (29 ft 9 in)
Wingspan11.63 m (38 ft 2 in)
Height2.84 m (9 ft 4 in)
Power Output210 hp (157 kW) each
Maximum Speed322 km/h (200 mph, 174 kn)
Powerplant2 × Continental IO-360-C
Service Ceiling5, 791 m (19, 000 ft)

Related product manuals