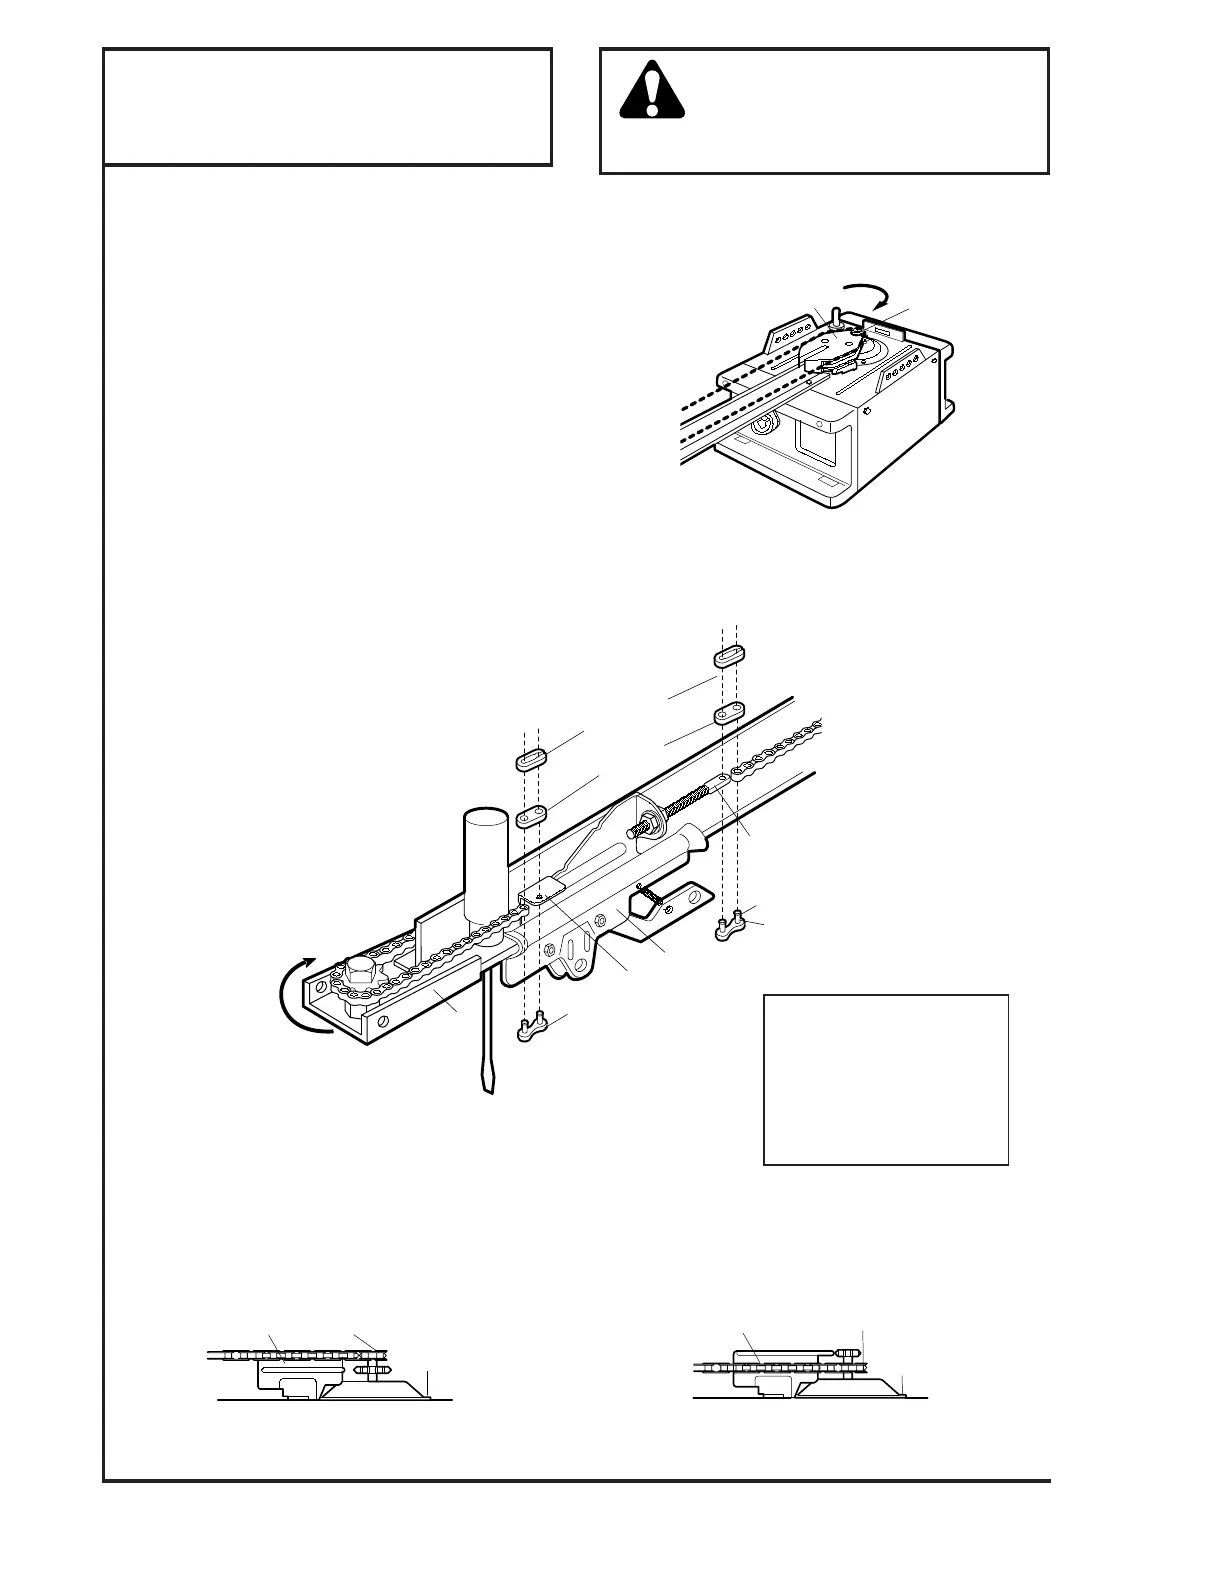
ASSEMBLY STEP 4
MODEL 1120E ONLY
Install the Chain
REPRESENTATIVE DOOR STYLES ARE SHOWN
ON PAGE 13.
DO NOT REMOVE CHAIN FROM CARTON.
• Dispense a few inches of chain from carton and
fasten to trolley with a master link from the
hardware bag. See master link procedure, Figure 1.
Caution: Keep the chain taut during installation
to help prevent kinking.
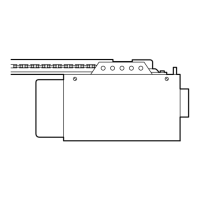
• With trolley against screwdriver, dispense chain
around pulley. Proceed back around the correct
groove in the chain spreader Figure 2. (See
illustrations below of chain installation for 6- and
8-tooth sprocket based on door type.) The
sprocket teeth must engage the chain.
• Continue dispensing chain forward to the trolley,
Figure 3. Make sure the entire length of the chain
is lying on the rail.
• Use the second master link to connect chain to
flat end of threaded shaft. Check to make sure
chain is not twisted.
• Remove the screwdriver.
11
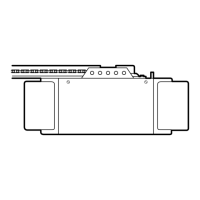
ONE-PIECE DOORS
6-Tooth Sprocket Application (MODEL 1120E)
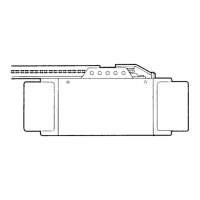
SECTIONAL DOOR WITH CURVED TRACK
8-Tooth Sprocket Application (MODEL 1120E)
(6-tooth sprocket can be used if slower travel speed
is desired.)
Serious injury can result if fingers
become entangled in moving opener
sprocket. Attach sprocket cover securely.
Never operate opener while your hand is
near the opener sprocket.
Figure 1
Figure 2
Figure 3
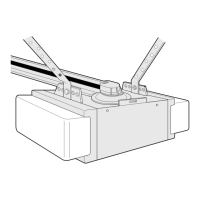
Master Link Procedure
Push pins of master link bar
through chain link and hole in
front end of trolley. Push cap over
pins and past notches. Slide clip-
on spring over cap and onto pin
notches until both pins are
securely locked.
 Loading...