EasyManua.ls Logo

Chamberlain 1355M User Manual

Chamberlain 1355M
40 pages
To Next Page IconTo Next Page
Page #1 background imageLoading...
Page #1 background image
The Chamberlain Group, Inc.
845 Larch Avenue
Elmhurst, Illinois 60126-1196
www.liftmaster.com
Owner’s Manual
Please read this manual and the enclosed safety materials carefully!
Fasten the manual near the garage door after installation.
The door WILL NOT CLOSE unless the Protector System
®
is connected and properly aligned.
Periodic checks of the opener are required to ensure safe operation.
The model number label is located on the front panel of your opener.
GARAGE DOOR OPENER
Model Series 1300
For Residential Use Only
Model 1356M - 1/2HP
Model 1346M - 1/3HP
Model 1355M - 1/2HP
Model 1345M - 1/3HP
®
Question and Answer IconNeed help?

Do you have a question about the Chamberlain 1355M and is the answer not in the manual?

Chamberlain 1355M Specifications

General IconGeneral
TypeChain Drive
Horsepower1/2 HP
Max Door Height7 feet
Smart TechnologyYes
Battery BackupNo
Voltage120V
Frequency60Hz
SecurityRolling Code Technology
Lift CapacityUp to 500 lbs
Remote Controls Included2
Safety FeaturesSafety sensors

Summary

Preparing Your Garage Door

Tools Needed

Lists necessary hand tools for installation and adjustment procedures.

Assembly Step 1: Fasten Rail to Motor Unit

Important Installation Instructions

To Reduce Risk of Severe Injury or Death

Outlines critical safety warnings and instructions for installation to prevent serious harm.

Installation Step 1: Determine Header Bracket Location

Sectional Door and One-Piece Door with Track

Details header bracket placement for sectional and tracked one-piece doors.

Installation Step 2: Install the Header Bracket

Wall Header Bracket Installation

Instructions for mounting the header bracket on a wall.

Installation Step 3: Attach Rail to Header Bracket

Installation Step 4: Position the Opener

Sectional Door or One-Piece Door with Track

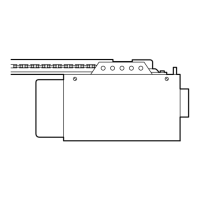
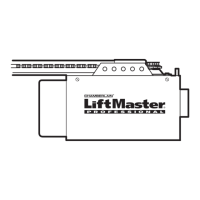
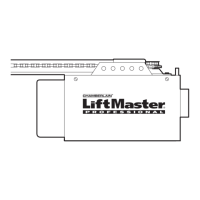
How to position the opener for sectional or tracked one-piece doors.

Installation Step 5: Hang the Opener

Mounting to Structural Supports

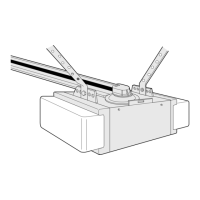
Details how to securely attach the opener to structural supports using hanging brackets.

Installation Step 6: Install the Door Control

Installation Step 7: Install Light and Lens

Installation Step 8: Attach Emergency Release Rope and Handle

Installation Step 9: Electrical Requirements

Permanent Wiring Connection

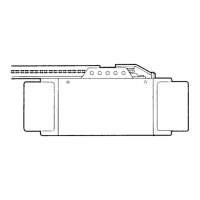
Details how to make a permanent wiring connection to the motor unit.

Installation Step 10: Install The Protector System®

Important Information About the Safety Reversing Sensor

Explains the function and importance of the safety reversing sensor.

Installing Safety Reversing Sensor Brackets

Garage Door Track Installation

Describes mounting sensors directly to the garage door track.

Connecting and Aligning Safety Reversing Sensors

Aligning the Safety Reversing Sensors

Provides steps to align the sensors for proper operation.

Installation Step 11: Fasten Door Bracket

Sectional Doors

Instructions for attaching the door bracket to sectional garage doors.

Installation Step 12: Connect Door Arm to Trolley

Sectional Doors Only

Steps to connect the door arm to the trolley for sectional doors.

Connecting Door Arm for One-Piece Doors

Adjustment Procedures

Details limit adjustments specific to one-piece doors before connecting the arm.

Adjustment Step 1: Adjust UP and DOWN Travel Limits

How and When to Adjust the Limits

Explains when and how to adjust the travel limits for door operation.

Adjustment Step 2: Adjust the Force

How and When to Adjust the Forces

Guides on adjusting the down (close) and up (open) forces for the opener.

Adjustment Step 3: Test Safety Reversal System

Adjustment Step 4: Test Protector System®

Operation: Important Safety Instructions

To Reduce Risk of Severe Injury or Death

Crucial safety warnings and instructions for operating the garage door opener.

Using the Wall-Mounted Door Control

Opening the Door Manually

WARNING

Safety warnings related to manual door operation and potential hazards.

Care of Your Opener

Limit and Force Adjustments

Explains how weather can affect settings and refers to adjustment pages.

Troubleshooting Common Problems

Opener Doesn't Operate from Door Control or Remote

Addresses issues where the opener fails to respond to controls.

Troubleshooting Continued

Door Reverses for No Apparent Reason

Diagnoses why the door might reverse unexpectedly without visible obstructions.

Programming Remote Controls

To Add or Reprogram a Hand-Held Remote Control

Steps to pair a new remote control with the opener.

Programming Keyless Entry PIN

To Set a Temporary PIN

Instructions for setting a temporary access PIN for visitors or service personnel.

Repair Parts

Rail Assembly Parts

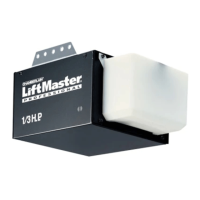
Lists parts for the rail assembly section of the opener.

Accessories

Outside Quick Release

Describes an accessory for manual operation during power failure.

Service and Support

How to Order Repair Parts

Details the process for ordering replacement parts for the opener.

Related product manuals