9
ASSEMBLY STEP 4
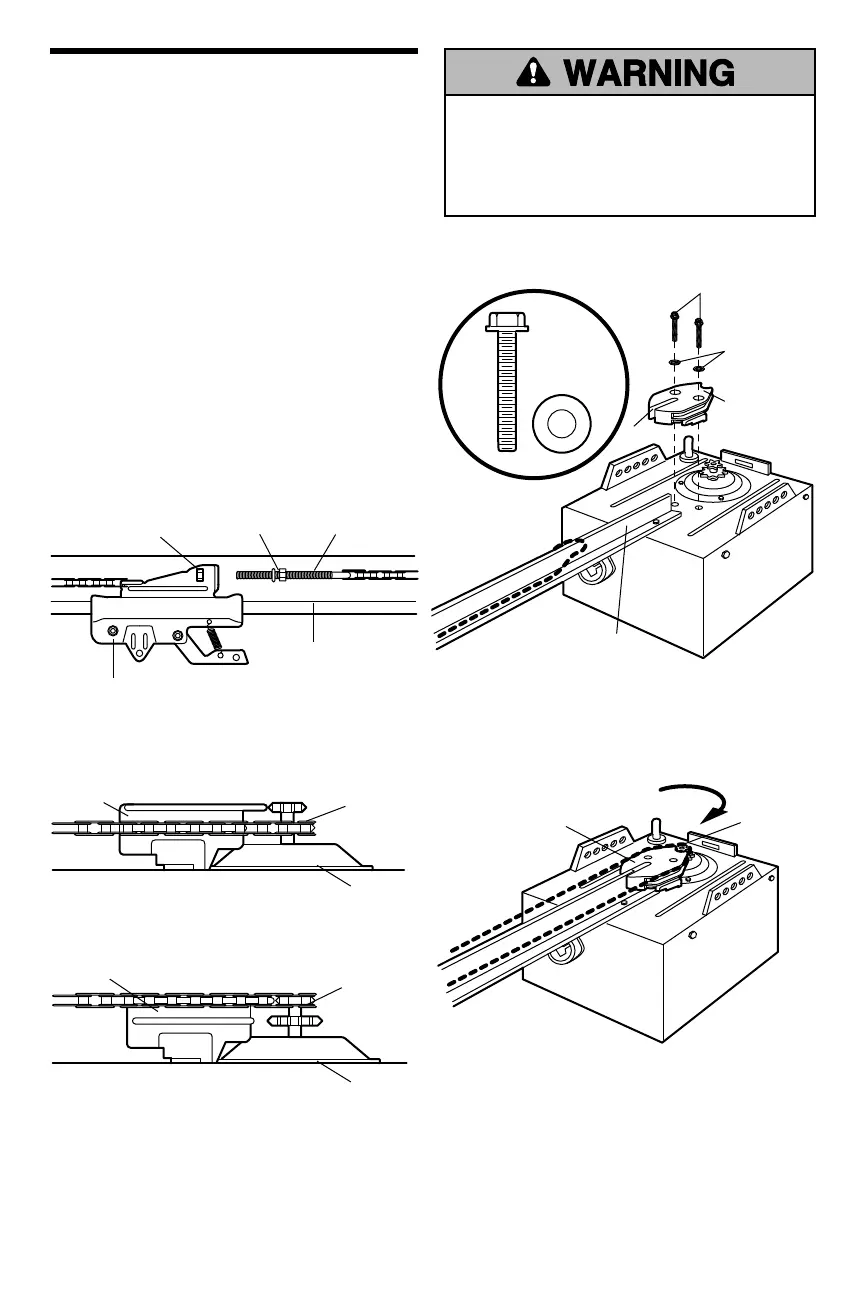
Attach the Chain Spreader and Re-install the
Chain
MODELS 1356M AND 1346M ONLY
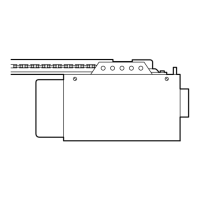
• Line up the holes in the chain spreader with the holes
in the motor unit as shown. The slot in the chain
spreader must fi t over the Rail fl ange (Figure 1).
• Securely fasten the chain spreader with the hardware
provided.
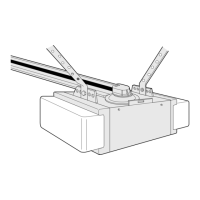
• Remove the trolley threaded shaft from the trolley by
loosening the inner nut and lock washer (Figure 2).
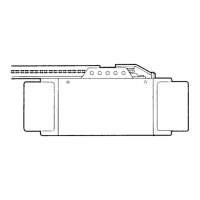
• Guide the chain around the selected groove in the
chain spreader (to engage either the 8-tooth sprocket
or the 6-tooth sprocket) as shown (Figure 3).
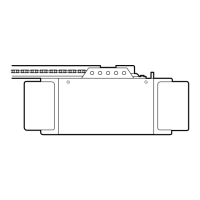
• Continue dispensing the chain forward to the trolley
(Figure 4). Reconnect the trolley to the trolley threaded
shaft. Proceed to Assembly Step 5 for chain tightening
instructions.
To avoid possible SERIOUS INJURY to fi ngers from
moving garage door opener:
• ALWAYS keep hand clear of sprocket while operating
opener.
• Securely attach sprocket cover BEFORE operating.
Figure 2
Outer Nut
Trolley
Inner Nut
and Washer
Trolley Threaded
Shaft
Rail
Figure 3
Chain
Spreader
Chain
Spreader
8-Tooth
Sprocket
6-Tooth
Sprocket
Motor Unit
Mounting
Plate
Motor Unit
Mounting
Plate
Figure 1
USE ONLY
THIS TYPE
AND SIZE
SCREW
#8x1" Hex Screw
Washers
Chain Spreader
Rail Flange
Slot
Figure 4
Install Chain In
This Direction
Sprocket
Chain Spreader