EasyManua.ls Logo

Chamberlain POWER DRIVE 248735S 3/4 HP User Manual

Chamberlain POWER DRIVE 248735S 3/4 HP
40 pages
To Next Page IconTo Next Page
Page #1 background imageLoading...
Page #1 background image
The Chamberlain Group, Inc.
845 Larch Avenue
Elmhurst, Illinois 60126-1196
www.chamberlain.com
GARAGE DOOR OPENER
Model 248735S 3/4 HP
For Residential Use Only
Owner’s Manual
Please read this manual and the enclosed safety materials carefully!
Fasten the manual near the garage door after installation.
The door WILL NOT CLOSE unless The Protector System
®
is connected and properly aligned.
Periodic checks of the opener are required to ensure safe operation.
The model number label is located on the left side panel of your opener.
®
Question and Answer IconNeed help?

Do you have a question about the Chamberlain POWER DRIVE 248735S 3/4 HP and is the answer not in the manual?
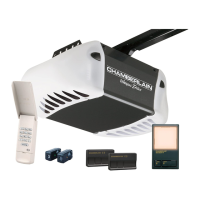
Chamberlain POWER DRIVE 248735S 3/4 HP Specifications

General IconGeneral
BrandChamberlain
ModelPOWER DRIVE 248735S 3/4 HP
CategoryGarage Door Opener
LanguageEnglish

Summary

Assemble Rail and Install Trolley

Install Rail to Motor Unit and Idler Pulley

Important Installation Safety Instructions

General Installation Safety Warnings

Crucial safety warnings to reduce the risk of severe injury or death during installation.

Determine Header Bracket Location

Selecting Header Bracket Position

Guides on selecting the correct position for the header bracket based on door type and clearance.

Install the Header Bracket

Wall Header Bracket Mounting

Instructions for securely attaching the header bracket to the wall structure.

Ceiling Header Bracket Mounting

Procedure for mounting the header bracket to the ceiling structure.

Attach Rail and Position Opener

Attach Rail to Header Bracket

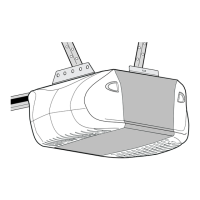
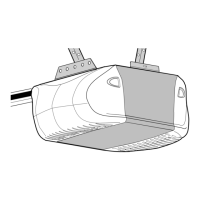
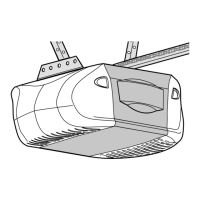
Connects the garage door opener rail to the previously installed header bracket.

Position the Garage Door Opener Unit

Guides for correctly positioning the motor unit based on door type and height.

Hang the Opener

Secure Opener to Structural Supports

Details on using hanging brackets to securely mount the opener to garage supports.

Install the Door Control

Install Lights and Emergency Release

Electrical Requirements and Wiring

Install The Protector System® (Safety Sensors)

Mounting Safety Reversing Sensors

Crucial steps for mounting the safety reversing sensors.

Installing Safety Reversing Sensor Brackets

Connect and Align Safety Sensors

Fasten the Door Bracket

Connect Door Arm to Trolley

One-Piece Door Arm Assembly and Adjustment

Adjust Travel Limits

Adjusting UP and DOWN Travel Limits

How to set the points where the door stops when moving up or down.

Adjust Door Force

Test and Adjust Down (Close) Force

Regulates the power needed to close the door, ensuring proper reversal.

Test and Adjust Up (Open) Force

Regulates the power needed to open the door, ensuring it stops correctly.

Test Safety Reversal and Protector Systems

Test Safety Reversal System

Verifies the door reverses upon contact with an obstruction.

Test Protector System (Safety Sensors)

Ensures the safety sensors are functioning correctly to prevent closing on obstructions.

Opener Operation and Safety

General Operation Safety Guidelines

Critical safety guidelines for operating the garage door opener.

Troubleshooting Garage Door Opener Problems

Opener Diagnostic Codes

Program Remotes and Keyless Entry PINs

Add or Reprogram Hand-held Remotes

Steps to pair new or existing remote controls with the garage door opener.

Manage Keyless Entry PINs

Related product manuals