EasyManua.ls Logo

Chamberlain Security+ 4640 User Manual

Chamberlain Security+ 4640
40 pages
To Next Page IconTo Next Page
Page #1 background imageLoading...
Page #1 background image
The Chamberlain Group, Inc.
A DUCHOSSOIS ENTERPRISE
845 Larch Avenue
Elmhurst, Illinois 60126-1196
Garage Door Opener
Models 4640, 4640-2, & 4640-2K
1/2 HP
For Residential Use Only
Complies with UL 325
regulations effective
January 1, 1993
®
Owners Manual
Please read this manual and the enclosed safety materials carefully!
Fasten the manual near the garage door after installation.
The door WILL NOT CLOSE unless the Protector System
¨
is connected and properly
aligned.
Periodic checks of the opener are required to ensure safe operation.
The model number label is located on the back of your opener.
®

Table of Contents

Question and Answer IconNeed help?

Do you have a question about the Chamberlain Security+ 4640 and is the answer not in the manual?

Chamberlain Security+ 4640 Specifications

General IconGeneral
Horsepower1/2 HP
Drive SystemChain Drive
Battery BackupNo
Wi-Fi CapableNo
Compatible with MyQNo
Remote ControlYes
Buttons3
LightingYes
CompatibilityCompatible with most garage doors

Summary

Safety Information, Precautions, and Tools

Test Door Balance and Binding

Procedure to check door balance and binding before opener installation.

Installation Tool Requirements

List of essential tools for assembling and installing the garage door opener.

Carton Inventory

Hardware Identification Guide

Assembly Hardware Components

Fasteners and components for assembling the opener rail and main unit.

Installation Hardware Components

Fasteners and components for mounting the opener and its accessories.

Sectional Door Installation Overview

One-Piece Door Installation Overview

Rail Assembly Procedure

Assemble the Rail Sections

Instructions for connecting rail sections, ensuring alignment and proper fit.

Rail to Power Unit Assembly

Fasten Rail to Power Unit

Connecting the rail assembly to the opener's power unit with screws and nuts.

Install the Trolley on Rail

Sliding the trolley onto the rail and ensuring correct orientation.

Final Assembly and Safety Warnings

Attach Rail Brackets to Rail

Securing the rail brackets to the assembled rail ends.

Critical Installation Safety Instructions

Critical safety instructions to follow before proceeding with opener installation.

Installation Step 1: Header Bracket Location

Installation Step 2: Header Bracket Mounting

Mount Header Bracket to Wall

Mounting instructions for attaching the header bracket to the wall structure.

Mount Header Bracket to Ceiling

Mounting instructions for attaching the header bracket to the ceiling structure.

Installation Step 3: Connect Rail to Header Bracket

The Protector System® (Safety Reversing Sensor)

Safety Reversing Sensor Functionality

Details on how the safety reversing sensor works and its critical role.

Installation Step 4: Safety Reversing Sensor Mounting

Install Sensor Brackets on Track/Wall/Floor

Procedures for mounting sensor brackets on door track, wall, or floor.

Installation Step 5: Position the Opener Unit

Position Opener for Sectional Door

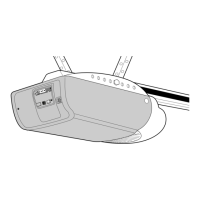
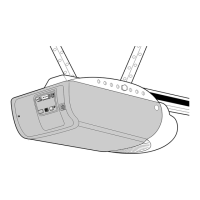
How to position the opener using a 2x4 for sectional doors with tracks.

Position Opener for One-Piece Door

How to position the opener for one-piece doors without tracks.

Installation Step 6: Hang the Opener Unit

Secure Opener to Structural Supports

Fastening the opener using hanging brackets and hardware to ensure stability.

Installation Step 7: Door Control and Wiring Connections

Install Wall-Mounted Door Control

Mounting the multi-function door control to the wall or junction box.

Connect Opener Wiring System

Routing and connecting wires for the door control and safety sensors to the opener.

Installation Step 8: Electrical Requirements

Installation Step 9: Safety Reversing Sensor Alignment

Align Safety Reversing Sensors

Adjusting sensor alignment for correct beam detection.

Installation Step 10: Install Lights and Lens

Installation Step 11: Attach Manual Release Handle

Installation Step 12: Fasten Sectional Door Bracket

One-Piece Door Bracket Installation

Installation Step 13: Connect Door Arm to Trolley

Connect Sectional Door Arm to Trolley

Attaching the straight and curved door arm sections for sectional doors.

One-Piece Door Arm & Travel Limits

Assemble One-Piece Door Arm

Connecting the straight and curved arm sections for one-piece doors.

Adjust One-Piece Door Travel Limits

Adjusting UP and DOWN travel limits for one-piece doors.

Adjustment Step 1: Travel Limit Settings

Adjust UP and DOWN Travel Limits

Fine-tuning the door's open and close travel points.

Adjustment Step 2: Force Adjustment Settings

Test and Adjust Down (Close) Force

Ensuring the door reverses correctly when encountering resistance during closing.

Test and Adjust Up (Open) Force

Ensuring the door stops properly when encountering resistance during opening.

Adjustment Step 3: Protector System Test

Adjustment Step 4: Safety Reverse System Test

Important Safety Instructions

Opener Care and Routine Maintenance

Routine checks and maintenance for optimal opener performance.

Opener Maintenance Schedule

Recommended periodic checks and lubrication for the opener.

Operation of Your Garage Door Opener

Multi-Function Door Control Operation

Using the push bar, light, and lock features of the door control.

Receiver and Remote Control Programming

Troubleshooting Common Opener Problems

Repair Parts Catalog

Rail Assembly Replacement Parts

List of parts related to the opener's drive rail assembly.

Installation Component Parts

List of parts used for mounting and connecting the opener.

Opener Internal Assembly Parts

Available Accessories for Your Opener

Chamberlain Service and Support Information

How to Order Replacement Parts

Procedures and information required for ordering replacement parts.

Chamberlain Limited Product Warranty

Details of the product's one-year limited warranty and motor lifetime warranty.
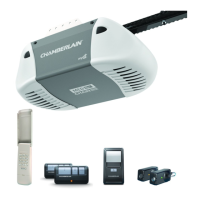
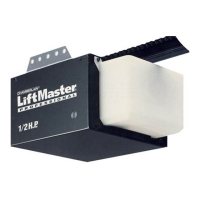
Related product manuals