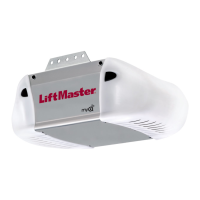
Do you have a question about the Chamberlain LiftMaster Security+ 311 and is the answer not in the manual?
Explains safety symbols (Warning, Caution) and their meanings in the manual to ensure safe operation.
Steps to ensure the garage door is ready and balanced for opener installation, including disabling locks.
Identifies door type, height, and garage area conditions for proper opener installation, noting potential needs.
Connects rail sections and attaches the idler pulley bracket to the front of the rail assembly.
Guides installation of the chain/cable and securing the sprocket cover for safe operation.
Essential safety guidelines to follow before and during opener installation to prevent injury or death.
Identifies the correct mounting position for the header bracket on the wall or ceiling based on door type.
Details the installation and alignment of safety reversing sensors for safe door operation and obstruction detection.
Instructions for securely attaching the door bracket to the garage door, including reinforcement needs for lightweight doors.
Sets the open and close points for the garage door opener's travel to ensure proper door movement.
Regulates the amount of power needed to open and close the door safely, preventing interruptions or damage.
Verifies the opener's ability to reverse upon encountering an obstruction, a critical safety feature.
Explains how to operate the opener using remotes, wall controls, and other methods for daily use.
Offers solutions for common issues encountered with the garage door opener, covering operation and maintenance.
Step-by-step guide to program new or existing remotes to operate the garage door opener.
Instructions for adding, reprogramming, or changing keyless entry PINs for secure access.
Lists available parts for repair and replacement, including part numbers and how to order.
Outlines the terms and conditions of the product's limited warranty coverage and exclusions.
| Type | Garage Door Opener |
|---|---|
| Horsepower | 1/2 HP |
| Compatibility | Compatible with most garage doors |
| Frequency | 315 MHz |
| Battery Backup | No |
| Max Door Height | 7 ft |
| Security Features | Security+ Rolling Code Technology |
| Security Technology | Security+ |
| Maximum Door Height | 7 ft |



 Loading...