
V
Virginia SalazarJul 28, 2025
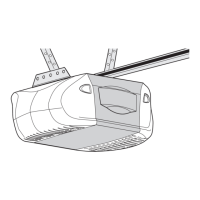
Why does my Chamberlain Liftmaster Security+ 3900PLD Garage Door Opener open and close by itself?
- QquinnwayneJul 28, 2025
Your Chamberlain Garage Door Opener might be opening and closing by itself because of several reasons. First, ensure that all remote control push buttons are off. If the issue persists, remove the bell wire from the door control terminals and operate the door using the remote only. If this resolves the problem, the single button control station may be faulty and needs replacement, or there could be an intermittent short on the wire between the control console and the motor unit. Alternatively, try clearing the memory and reprogramming all remote controls.