Do you have a question about the Chamberlain WD832KD and is the answer not in the manual?
Lists all required hand tools for assembly and installation of the garage door opener.
Details specific requirements and considerations for installing on sectional garage doors.
Outlines installation specifics, including track and no-track options for one-piece garage doors.
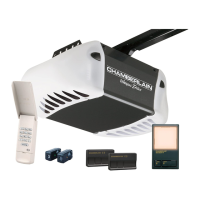
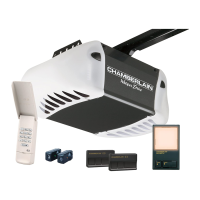
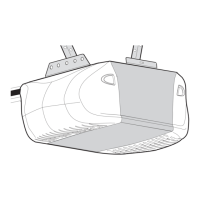
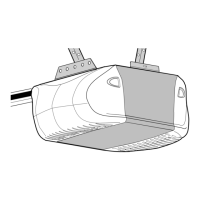
Details all parts included in the garage door opener package, with visual identification.
Lists all hardware specifically required for the assembly process of the opener.
Lists all hardware specifically required for the installation process of the opener.
Instructions for connecting the rail sections and preparing for trolley installation.
Details how to securely attach the assembled rail to the motor unit.
Instructions for correctly installing the idler pulley onto the rail assembly.
Guides on how to install the drive belt and secure the belt cap retainer.
Instructions for properly adjusting the belt tension for optimal opener operation.
Crucial warnings to prevent severe injury or death during the installation process.
Guides on finding the correct position for the header bracket based on door type and clearance.
Instructions for mounting the header bracket securely to a wall structure.
Instructions for mounting the header bracket securely to a ceiling structure.
Details on how to connect the rail assembly to the header bracket using provided hardware.
Guidance on positioning the opener for sectional doors, including track clearance.
Guidance on positioning the opener for one-piece doors, considering door height.
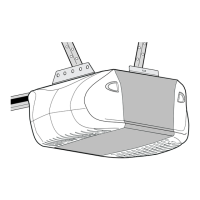
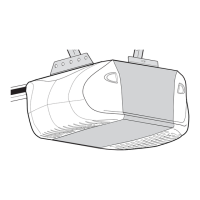
Instructions on how to securely hang the opener unit to structural supports for safety.
Guides on mounting and wiring the wall-mounted door control panel for opener operation.
Instructions for installing the light bulbs and lenses into the opener unit.
Guides on attaching the emergency release rope and handle to the trolley mechanism.
Details on electrical connections, grounding, and wiring requirements for powering the opener.
Instructions for installing and aligning the safety reversing sensors for safe door operation.
Guides for attaching sensor brackets to the garage door track as the preferred method.
Instructions for attaching sensor brackets to a wall structure.
Instructions for attaching sensor brackets to the floor structure.
Detailed steps for aligning the safety sensors to ensure proper beam transmission and operation.
Common issues and solutions for the safety reversing sensors, including indicator light problems.
Instructions for attaching the door bracket to sectional garage doors, including reinforcement needs.
Instructions for attaching the door bracket to one-piece garage doors, considering different door materials.
Guides on connecting the door arm sections and attaching them to the trolley for sectional doors.
Instructions for assembling and connecting the door arm for one-piece doors, including travel limit adjustments.
Guides on setting the upper and lower travel limits for the garage door opener to stop at correct positions.
Instructions for adjusting the force required to open and close the garage door safely and effectively.
Procedures for testing if the door reverses correctly upon striking an obstruction, ensuring safety.
Instructions for testing the proper functionality of the safety reversing sensors.
Essential safety rules to follow when operating the garage door opener to prevent injury.
How to operate the opener using remotes, door controls, and the automatic safety features.
Details on the push button, light, and lock features of the wall-mounted door control panel.
Steps to manually disconnect the trolley from the opener mechanism for door operation.
Steps to reconnect the trolley to the opener mechanism after manual operation.
Refers to specific pages detailing limit and force adjustments for optimal opener performance.
Provides a recommended schedule for monthly and yearly maintenance tasks for the opener.
Instructions on how to safely and correctly replace the battery in the remote control transmitter.
Addresses issues where the door fails to close or the opener lights blink, often related to sensors.
Solves problems where remotes fail to operate the garage door opener, checking for lock mode or programming issues.
Diagnoses and resolves cases where the door reverses unexpectedly during travel, often due to limits or force settings.
Explains why the opener lights may remain on and how to manage this feature's behavior.
Troubleshoots a humming motor unit and potential trolley issues, suggesting belt tension or limit checks.
Explains the meaning of LED flash codes on the motor unit for diagnosing specific opener malfunctions.
Step-by-step guide to program or reprogram remote controls to operate the garage door opener.
Instructions for clearing all previously programmed remote control codes for security or setup changes.
Guides on setting up or changing a Personal Identification Number (PIN) for the keyless entry system.
How to change a known PIN for the keyless entry system without needing a ladder.
Instructions for creating a temporary PIN for visitor or service personnel access.
Lists and visually identifies parts specific to the rail assembly section of the opener.
Lists and visually identifies parts used during the opener installation process.
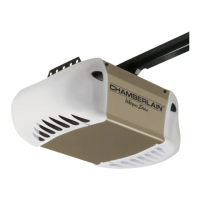
Lists and visually identifies all internal components of the motor unit assembly.
Details optional remote controls and keyless entry systems for enhanced convenience.
Describes optional multi-function door controls and motion detectors for the opener.
Lists optional rail extensions and brackets for safety sensor installation.
Provides contact phone numbers and website for Chamberlain service and technical support.
Instructions on what information is needed when ordering specific repair parts for the opener.
Details the terms and conditions of the product's limited warranty, including exclusions.
| Type | Chain Drive |
|---|---|
| Horsepower | 1/2 HP |
| Battery Backup | No |
| Remote Control | Yes |
| Voltage | 120V |
| Frequency | 60 Hz |
| Remote Controls Included | 2 |
| Max Door Height | 7 feet |
| Safety Features | Safety Sensors |
| Lighting | 100-watt (bulb not included) |
| Warranty | 1-year |