EasyManua.ls Logo

Chamberlain Whisper Drive Security+ WD962KCD User Manual

Chamberlain Whisper Drive Security+ WD962KCD
84 pages
To Next Page IconTo Next Page
Page #1 background imageLoading...
Page #1 background image
The Chamberlain Group, Inc.
845 Larch Avenue
Elmhurst, Illinois 60126-1196
www.chamberlain.com
GARAGE DOOR OPENER
Model WD962KCD
For Residential Use Only
Owner’s Manual
Please read this manual and the enclosed safety materials carefully!
Fasten the manual near the garage door after installation.
The door WILL NOT CLOSE unless The Protector System
®
is connected and
properly aligned.
Periodic checks of the opener are required to ensure safe operation.
The model number label is located on the left side panel of your opener.
®
®

Table of Contents

Question and Answer IconNeed help?

Do you have a question about the Chamberlain Whisper Drive Security+ WD962KCD and is the answer not in the manual?

Chamberlain Whisper Drive Security+ WD962KCD Specifications

General IconGeneral
TypeGarage Door Opener
Horsepower1/2 HP
Smart Home CompatibleYes
Security FeaturesSecurity+ 2.0
Battery BackupYes
Voltage120V
Motor TypeDC
Drive TypeBelt Drive
Wi-Fi CapableYes
Max Door Height7 ft
Remote Control3-button remote included
Smart Home CompatibilityWorks with MyQ, Alexa, Google Assistant
WarrantyLifetime motor warranty
LightingDual 100W bulb capacity

Summary

Owner's Manual

Introduction

Safety Symbol and Signal Word Review

Review of safety symbols and signal words used in the manual.

Preparing Your Garage Door

Tools Needed

Planning

Sectional Door Installations

Guidelines for planning sectional garage door opener installation.

One-Piece Door Installations

Carton Inventory

Hardware Inventory

Assembly Step 1: Assemble the Rail and Install the Trolley

Assembly Step 2: Fasten the Rail to the Motor Unit

Assembly Step 3: Install the Idler Pulley

Assembly Step 4: Install the Belt and Attach the Belt Cap Retainer

Assembly Step 5: Set the Tension

Installation

Important Installation Instructions

Critical safety and procedural guidelines before starting installation.

Installation Step 1: Determine the Header Bracket Location

Installation Step 2: Install the Header Bracket

Installation Step 3: Attach the Rail to the Header Bracket

Installation Step 4: Position the Opener

Installation Step 5: Hang the Opener

Installation Step 6: Install the Control Console

Installation Step 7: Install the Battery Backup

Installation Step 8: Install the Lights

Installation Step 9: Attach the Emergency Release Rope and Handle

Installation Step 10: Electrical Requirements

Installation Step 11: Install The Protector System® (Safety Sensors)

Installing the Brackets

Mounting and Wiring the Safety Reversing Sensors

Aligning the Safety Reversing Sensors

Installation Step 12: Fasten the Door Bracket

One-Piece Doors

Installation Step 13: Connect Door Arm to Trolley

All One-Piece Doors

Adjustment Step 1: Program the Travel Limits

Adjustment Step 2: Setting the Force

Adjustment Step 3: Test the Safety Reversal System (Safety Sensors)

Adjustment Step 4: Test The Protector System®

Operation

Important Safety Instructions

Critical safety guidelines for operating the garage door opener.

Using Your Garage Door Opener

Using the Wall-Mounted Door Control

Motion Detecting Console Features

Discusses console operation, light features, and lock function.

Care of Your Opener

Maintenance Schedule

Recommended maintenance tasks for the garage door opener.

The Remote Control Battery

To Open the Door Manually

Disconnect the Trolley

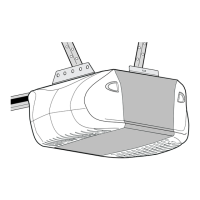
Procedure to manually disconnect the trolley for door operation.

To Re-connect the Trolley

Steps to reconnect the trolley after manual operation.

Battery Backup

Operating Instructions

How to test and use the battery backup system.

Having a Problem? (Troubleshooting)

Diagnostic Chart

Programming

To Add or Reprogram a Hand-held Remote Control

Instructions for programming remote controls to the opener.

To Erase All Codes From Motor Unit Memory

Steps to delete all stored remote control codes.

To Add, Reprogram or Change a Keyless Entry PIN

Repair Parts

Rail Assembly Parts

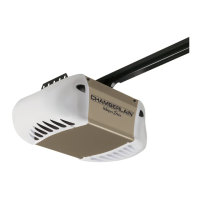
List of parts for the rail assembly.

Installation Parts

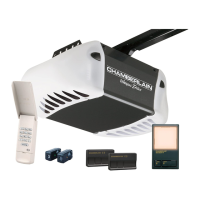
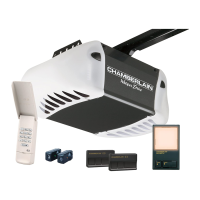
List of parts required for installation.

Motor Unit Assembly Parts

Accessories

Chamberlain® Service Is On Call

How to Order Repair Parts

Chamberlain® One-Year Limited Warranty

Related product manuals