Do you have a question about the Chamberlain WD962KEV and is the answer not in the manual?
Explains safety symbols and signal words used in the manual for user safety and hazard identification.
Details checks for door balance, binding, sticking, and seal to ensure safe opener operation.
Lists additional items that may be needed for installation, such as wood, brackets, or reinforcement.
Illustrates and lists the tools required for the installation process.
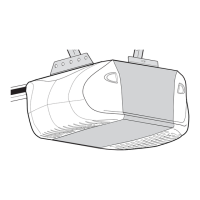
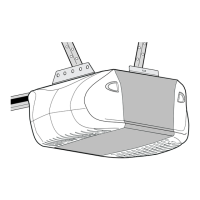
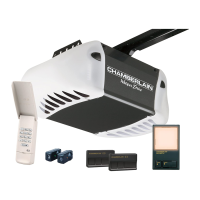
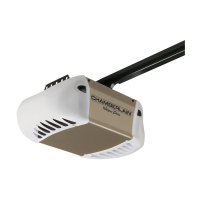
Lists and illustrates all parts included in the garage door opener carton for assembly and installation.
Lists and describes hardware components required for the assembly of the garage door opener.
Lists and describes hardware components required for the installation of the garage door opener.
Lists and describes hardware components required for the installation of the door control unit.
Guides users through assembling the rail and trolley components of the garage door opener.
Provides instructions on how to securely attach the assembled rail to the garage door opener unit.
Details the process of installing the pulley onto the front rail of the garage door opener assembly.
Guides users on how to install and connect the drive belt to the trolley and sprocket.
Instructs on how to properly tension the belt and install the protective sprocket cover.
Emphasizes the importance of reading and adhering to all safety warnings and instructions provided.
Stresses that the opener must be installed only on a properly balanced and lubricated garage door.
Advises disabling all locks and removing ropes before installation to prevent entanglement.
Specifies the required installation height for the garage door opener, at least 7 feet above the floor.
Details the proper placement of the wall-mounted door control for safe and convenient access.
Outlines the procedure for testing the safety reversal system after installation is complete.
Restricts the Timer-to-Close feature to be used only with sectional doors.
Guides on how to determine the correct mounting location for the header bracket.
Provides instructions for installing the header bracket on the wall or ceiling.
Details how to connect the garage door opener rail to the previously installed header bracket.
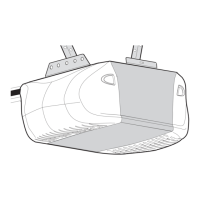
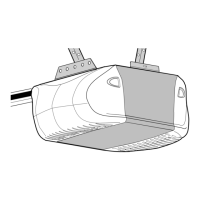
Guides on how to safely position the garage door opener unit onto a ladder or support.
Explains how to securely hang the garage door opener unit from structural supports using hanging brackets.
Provides instructions for installing the light bulbs into the garage door opener unit.
Details how to attach the emergency release rope and handle for manual door operation.
Guides on installing the door bracket onto the garage door, including reinforcement needs.
Instructs on connecting the door arm sections to the trolley and door bracket.
Details the physical installation steps for mounting the door control unit on the wall.
Provides instructions on wiring the door control unit to the main garage door opener unit.
Guides on attaching entrapment and safety reversal test labels to the wall and door.
Explains how to install and align the safety reversing sensors for safe operation.
Provides instructions for wiring the safety reversing sensors to the garage door opener unit.
Details the two options for connecting electrical power to the garage door opener.
Guides on verifying the proper alignment and functionality of the safety reversing sensors.
Provides steps to verify that the door control has been wired correctly to the opener.
Explains how to program the open and close travel limits for the garage door opener.
Details how to test the safety reversal system to ensure it functions correctly upon contact.
Outlines the procedure to test the safety reversing sensors' functionality.
Provides step-by-step instructions for installing the battery backup unit.
Presents essential safety instructions to reduce the risk of severe injury or death during operation.
Features for enhanced convenience, including alerts, timed closing, and smart connectivity.
Details the safety reversing sensors that detect obstructions for safe operation.
Features related to energy efficiency, lighting, and operational aspects.
Guides on how to activate and operate the garage door opener using various controls.
Explains the function and operation of the battery backup system.
Instructions for synchronizing the door control to the garage door opener for activation.
Explains how to use the push bar on the control panel to open or close the door.
Details how to use navigation buttons on the Smart Control Panel for selections and programming.
Describes how to program compatible remote controls, keyless entry, or MyQ™™ accessories.
Explains the lock feature to prevent activation from remote controls for added security.
Details the Timer-to-Close feature, its settings, and usage restrictions.
Explains the automatic light feature that turns on lights based on motion or sensor activation.
Details how to set and adjust the Timer-to-Close feature intervals and activation.
Explains how to activate and deactivate the lock feature for security.
Describes how to change the duration of the garage door opener lights and control light features.
Explains how to activate and deactivate the motion sensor for the opener lights.
Guides on using the Smart Control Panel screen and navigation buttons for setup and features.
Explains how to access and configure features like Clock Setup, TTC, Lock, and Program.
Details how to adjust settings such as Temperature, Language, Light Settings, and Contrast.
Steps to program or reprogram remote controls and keyless entry using the motion-detecting panel.
Steps to program or reprogram remote controls and keyless entry using the smart control panel.
Instructions on how to program a remote control using the learn button on the garage door opener.
Details procedures for erasing all remote control, keyless entry, and MyQ™™ device memory.
Guides on how to disconnect the trolley from the drive mechanism for manual door operation.
Explains how to reconnect the trolley after manual operation, enabling automatic control.
Lists monthly maintenance tasks for ensuring proper operation and safety of the opener.
Outlines annual maintenance tasks, including lubrication and battery testing.
Provides instructions and warnings for replacing the remote control battery.
Lists diagnostic codes and corresponding symptoms for identifying opener malfunctions.
Provides solutions for common problems based on diagnostic codes and symptoms.
Addresses common operational issues such as beeping, remote control problems, and door closing failures.
Lists part numbers for components related to the rail assembly.
Lists part numbers for components used during the installation process.
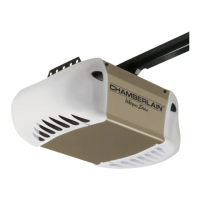
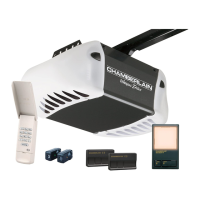
Lists part numbers for the main garage door opener unit components.
Accessories that aid in installation, such as extensions and mounting brackets.
Various remote controls and keypads for operating the garage door opener.
Accessories that integrate with MyQ™™ technology for remote control and monitoring.
Accessories for specific functions like parking assistance, surge protection, and battery backup.
Provides contact details for installation, service, and repair part orders.
Details the five-year limited warranty for the garage door opener product.
Outlines the lifetime limited warranty for the motor and belt components.
Specifies the one-year limited warranty for the battery backup system.
| Model | WD962KEV |
|---|---|
| Max Door Height | 7 feet |
| Smart Technology | MyQ Technology |
| Battery Backup | Yes |
| Connectivity | Wi-Fi |
| Drive Type | Belt Drive |
| Horsepower | 1/2 HP |
| Safety Features | Safety sensors |
| Lighting | LED |
| Security | Security+ 2.0 Rolling Code |
| Operating Voltage | 120V AC |
| Warranty | Lifetime Motor and Drive, 5-Year Parts |