NOISE DIFFUSER
7
For quiet operation during vacuuming, install the noise diffuser into the blower port by
inserting the locking end of the diffuser into the blower port and turning clockwise to lock into
n eliminates the need for the three wire grounded power cord and
rounded power supply system.
place.
POLARIZED PLUG
To reduce the risk of electrical shock, this appliance has a polarized plug (one with the blade wider than the
other). This plug will fit in a polarized outlet only one way. If the plug does not fit fully in the outlet, reverse
the plug. If it still does not fit, contact a qualified electrician to install the proper outlet. Do not change the
plug in any way. Double insulatio
g
DR
-
ACUUM OPERATION
DRY VACUUM
WARNING: BE SURE TO READ, UNDERSTAND, AND APPLY INFORMATION, ENTITLED ‘SAFETY
INSTRUCTIONS & WARNINGS’. DO NOT VACUUM IN AREAS WITH FLAMMABLE GASES, VAPORS,
OR EXPLOSIVE DUSTS IN THE AIR. FLAMMABLE GASES OR VAPORS INCLUDE BUT ARE NOT
LIMITED TO; LIGHTER FLUID, SOLVENT TYPE CLEANERS, OIL-BASE PAINTS, GASOLINE,
ALCOHOL OR AEROSOL SPRAYS. EXPLOSIVE DUSTS INCLUDE BUT ARE NOT LIMITED TO;
COAL, MAGNESIUM, GRAIN OR GUN POWDER. TO REDUCE THE RISK OF HEALTH HAZARDS
FROM VAPORS OR DUST, DO NOT VACUUM TOXIC MATERIALS.
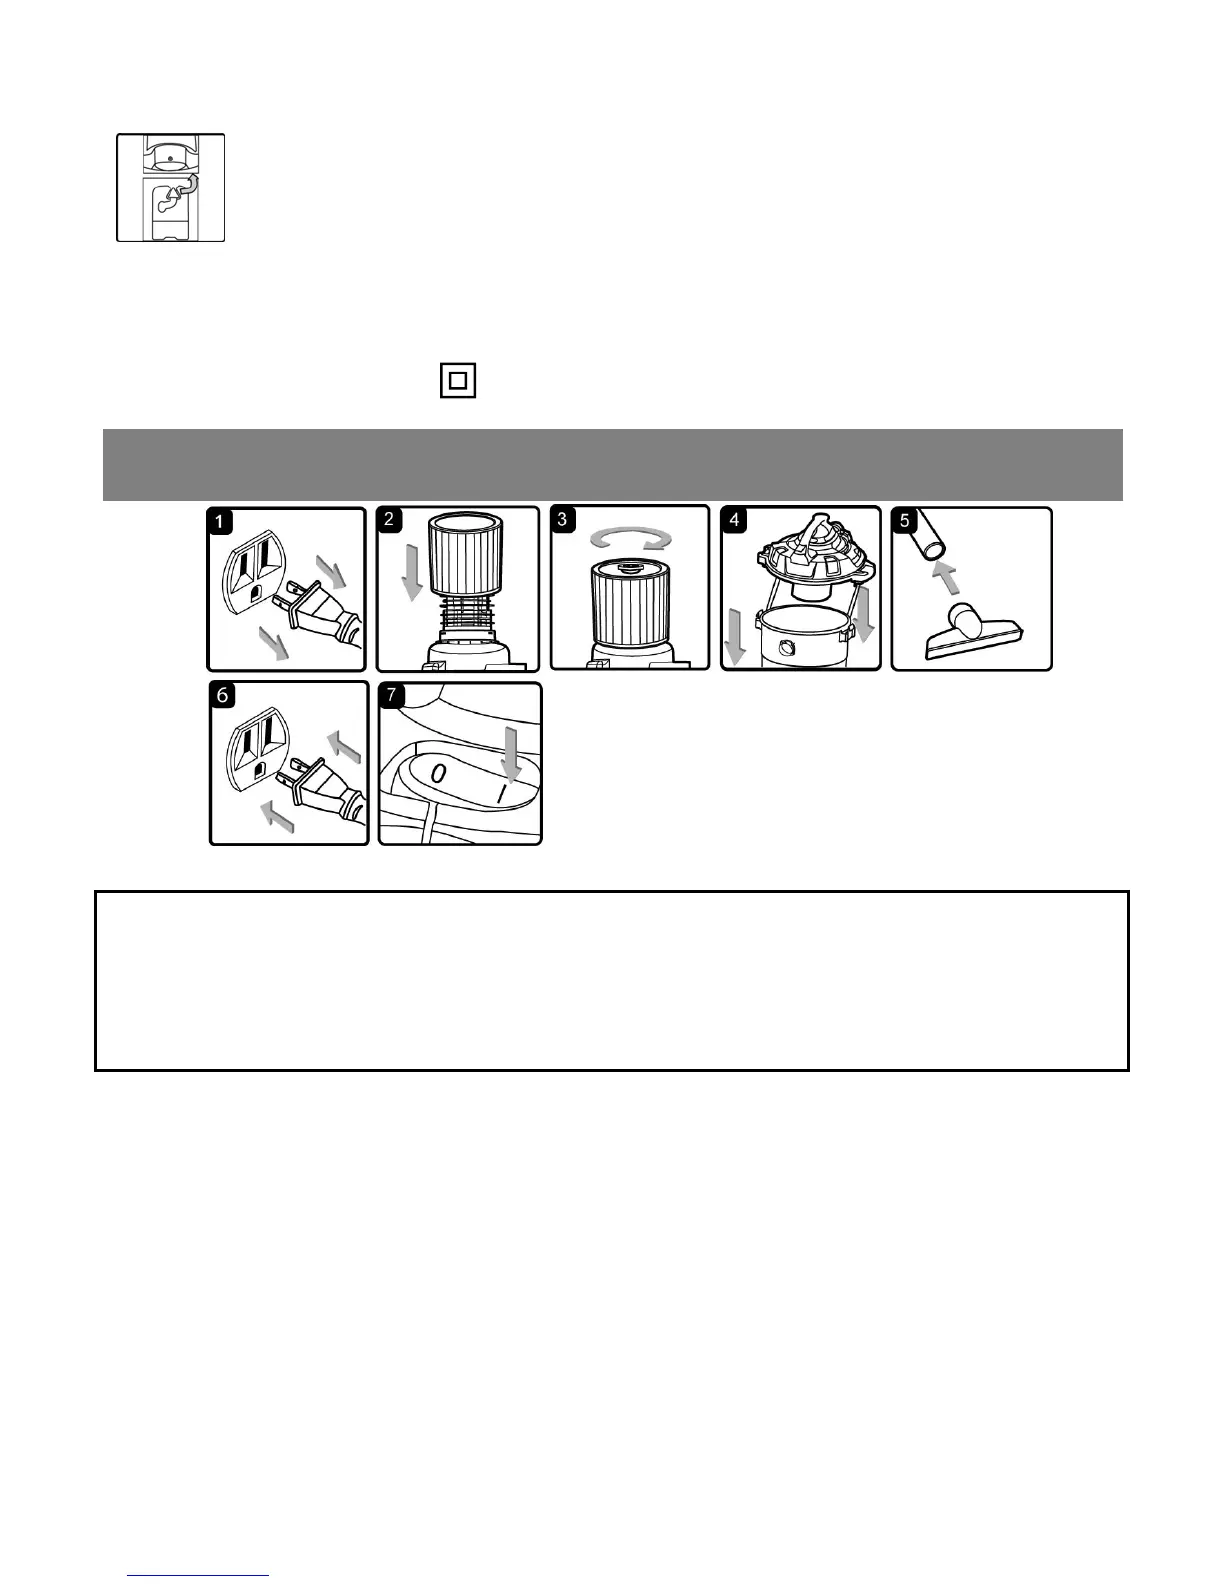
1. Verify that the power cord is disconnected from the outlet. (fig. 1)
2. In order to prepare your vacuum for dry vacuuming, verify that the cartridge filter is securely mounted.
Make sure the filter is pushed in until it stops against the power head. (fig. 2) (Your Wet/Dry Vac comes
r retainer on top of cartridge filter and tighten down by turning the retainer handle clockwise.
r head back on the container, aligning the top section with the latches, and snap into
ort and lock in place. Push the required attachment
. 5)
ompleted vacuuming, flip the switch to the ‘O’ OFF position and unplug the power cord
with the cartridge filter pre-installed, if not see page 10 for installation instructions.)
3. Place filte
(fig. 3)
4. Place the powe
place. (fig. 4)
OPERATING INSTRUCTIONS: DRY VACUUMING
5. Insert the locking end of the hose into the vacuum p
onto the free end of the hose or extension. (fig
6. Plug in the power cord into the outlet. (fig. 6)
7. Turn the motor on by flipping the switch to the ‘I’ ON position. (fig. 7)
8. Once you have c