ASSEMBLY
6
ASSEMBLY GUIDE
Part Qty .
B3– Hinge, RH 1
B4– Hinge, LH 1
B7– Handle 1
Fasteners
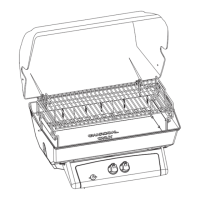
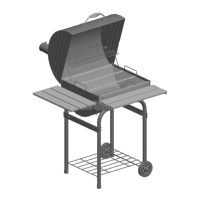
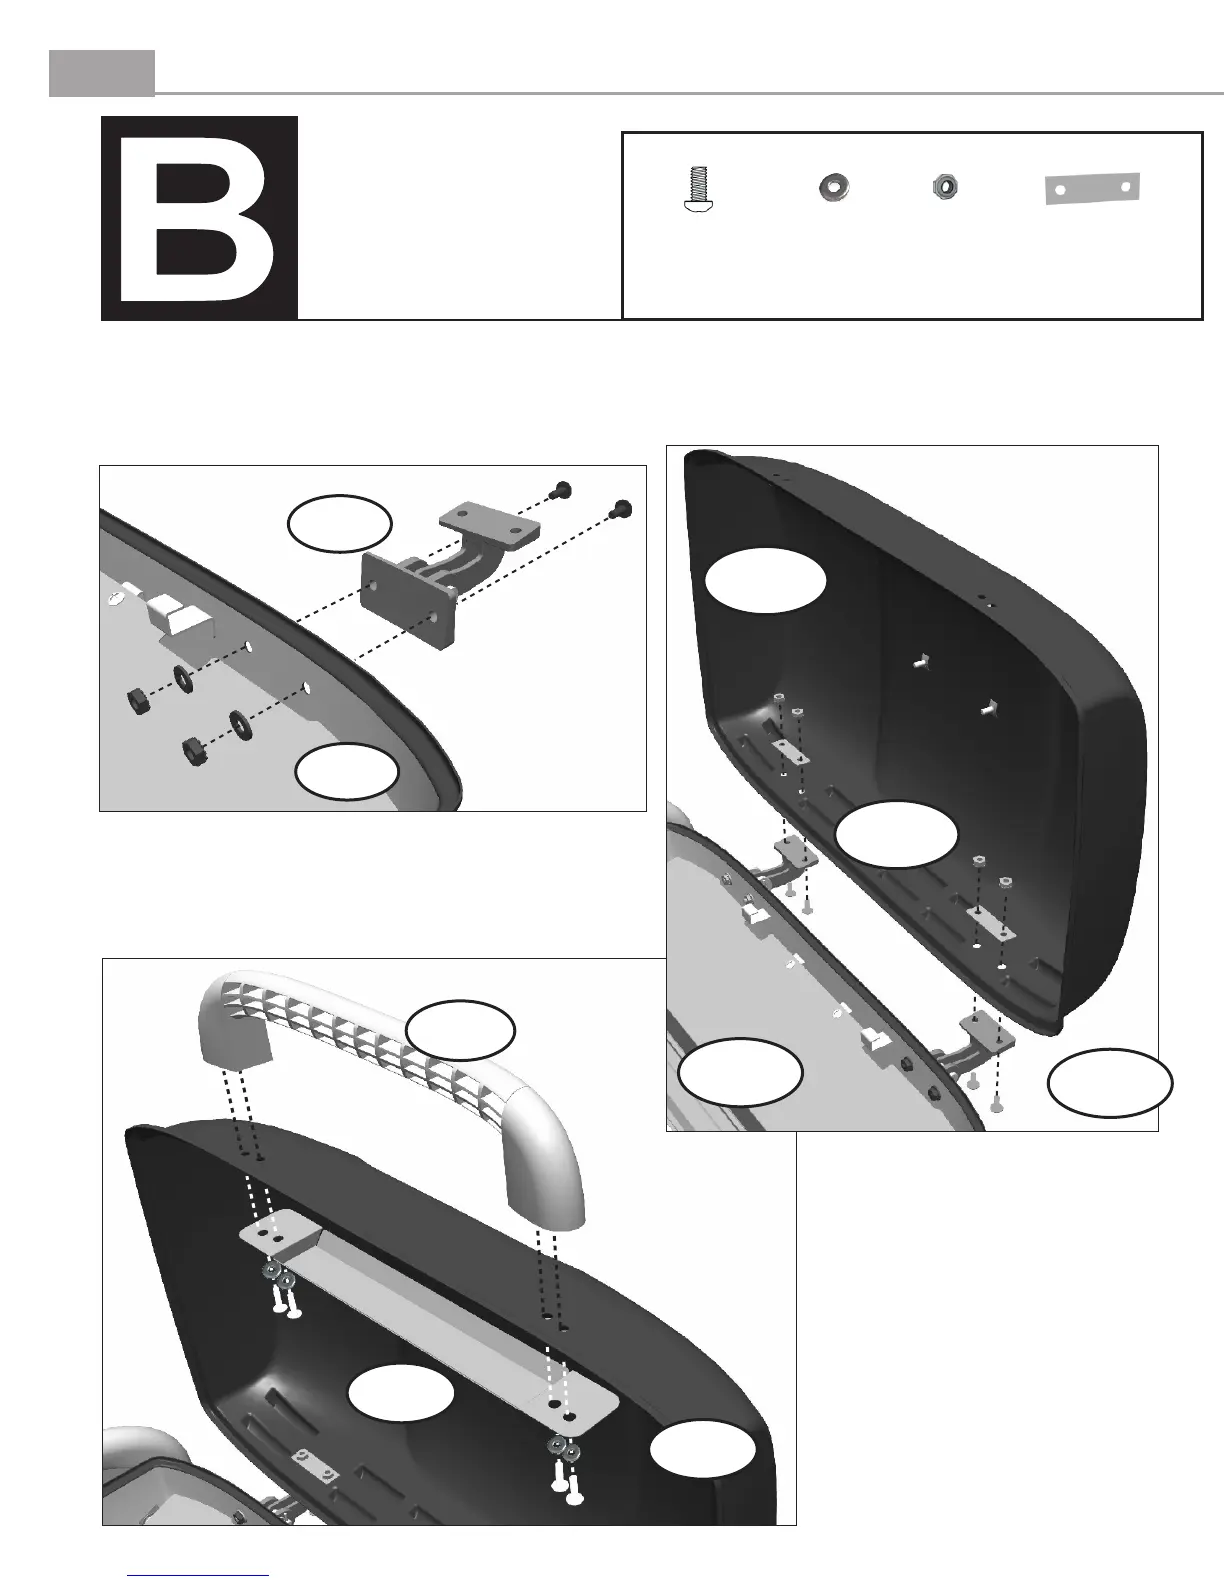
Step 1 - Attach the Hinges (LH and RH) (B3 & B4) to the
Firebox Bottom by aligning the screw holes on the bottom of
the grill with the corresponding holes in the hinges. Secure
with 2 each #10-24x1/2" screws, 2 fiber washers and 2 #10-24
nuts as shown.
.
(qty 8)
Fiber Washer
(qty 2)
Spacer for Lid
GRILL Assembly
LH side shown,
RH side similar.
Step 2 - Attach the Grill Lid (B5) to the Hinges by
aligning the screw holes on the grill lid with the
corresponding holes in the hinges. Secure with 2 each #10-
24x1/2" screws, 1 spacer and 2 #10-24 nuts as shown.
B5
B7
B6
B5
B2
B2
(qty 8)
10-24 Nut
B5– Grill Lid 1
(qty 12)
screw
10-24 x 1/2"
Step 3 - Attach the Heatshield (B6) and Handle (B7) to
the Grill Lid (B5) by aligning the screw holes in the handle
and heatshield with the corresponding holes in the Grill Lid.
Secure with 4 10-24 x 1/2" Screws and 4 fiber washers. Do not
over tighten the screws.
B6– Heat Shield 1
B4
B3
B4
 Loading...