12
7. Firebox Assembly
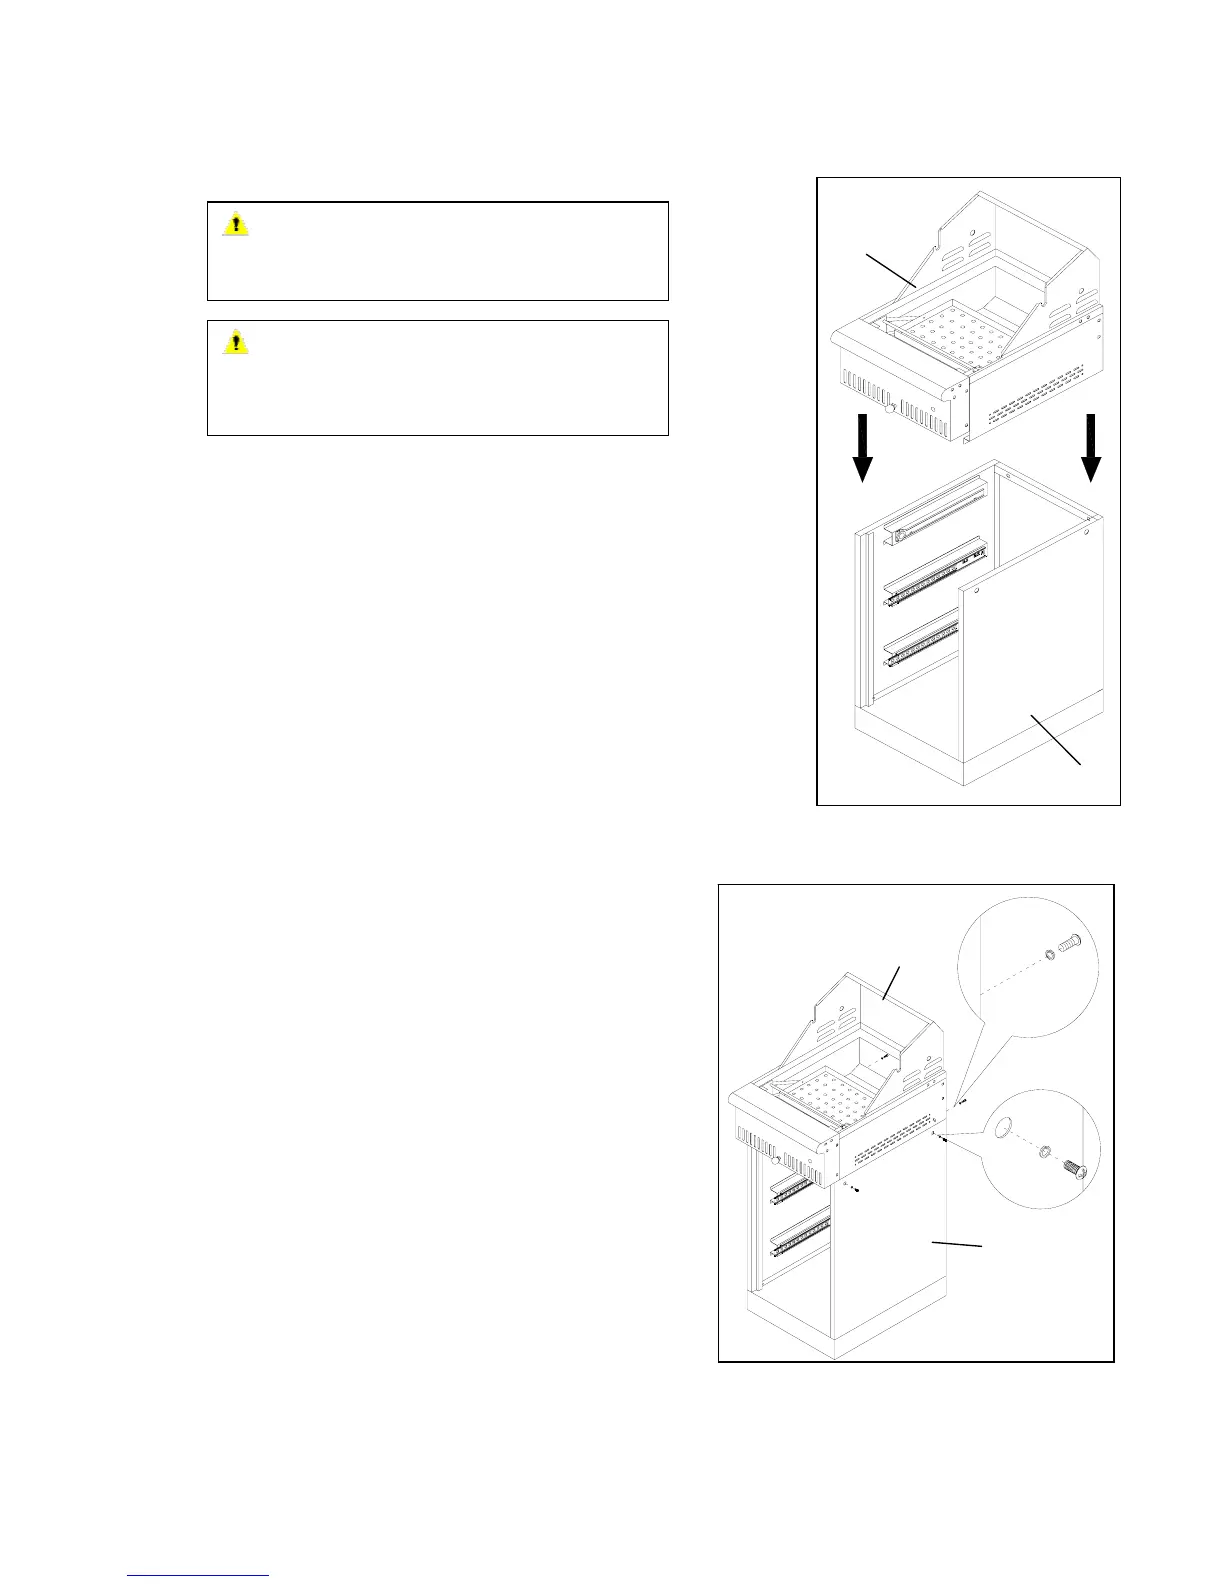
Remove the firebox assembly (I) from the carton
and carefully place onto the grill cart shown in Fig. 8
Note: Take care when moving the firebox assembly as
the bottom flanges can be bent ,which would misalign
the holes.
Attach the firebox assembly (I) to the grill cart using four
1/4-in. x 15-mm truss head screws (BB) and four 1/4-in.
locking washers (GG).
Note: Two screws and two washers for each side of cart
as shown in Fig.9.
Secure the back of firebox using two 1/4-in. x 15-mm
truss head screws (BB) and two 1/4-in. locking washers
(GG) as shown in Fig. 9.
Note: To secure all the above screws from outside to
inside.
Fig. 8
CAUTION The firebox assembly is heavy and
will require two or more people to lift and position
onto grill cart. Failure to do so may result in back i
njury.
CAUTION Please have one person to hold the
cart steady while attaching the firebox onto grill
cart. Failure to do so may result in injury.
I
Cart grill
4X
Fig. 9
2X
I
Cart



 To Next Page