MAINTENANCE OPERATION
EN
| Intelect
®
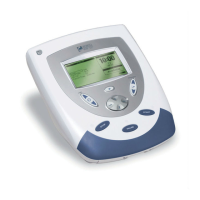
Legend 2 - Service Manual DOMESTIC 24
5.1. GENERAL
1) The following information is intended to help in
troubleshooting the major components of the
INTELECT LEGEND 2 at “Board Level” only.
These tests are FACTORY standard testing
procedures and methods, used at the end of
manufacturing before shipment of any INTELECT
LEGEND 2.
2) Due to the complex nature of the technology utilized
by ENOVIS, the recommended troubleshooting
techniques are built to determine “Bad Board” and
board replacement only. No board component level
troubleshooting is recommended/authorized nor
will information or parts be supplied by ENOVIS.
Any board component level troubleshooting
performed will be at sole risk and liability of the
Service Technician performing such
troubleshooting techniques.
3) Once an electronic board has been determined as
bad, refer to the appropriate Removal and
Replacement Section of this Manual for proper
replacement.
5.2. Special Tools, Fixtures, & Materials
Required
1) Some of the tests require the use of special tools and
fixtures. These will be listed at the test section where
they are required. Testing with any other special
tool or fixture other than those stated could give
wrong readings or test results. Always perform the
tests exactly as stated to ensure accurate results.
2) Some of the special tools or fixtures required may be
obtained through ENOVIS Service Department.
3) Scope and other standard test equipment settings
will be detailed for every test section to help in
performing the test with FACTORY standards and
ensure proper readings.
4) Troubleshooting and repair of INTELECT LEGEND 2
and Accessories must be performed only by
authorized technicians trained and certified by
ENOVIS.
5.3. EQUIPMENT REQUIRED
1) Oscilloscope and Probes
2) ESTI-2 Load Test Fixture or G16 test load box
3) MD box (for leakage current test)
4) Digital Multimeter
5) STIM lead wires (Accessory)
6) Ultrasound Applicator (Accessory)
7) Ohmic Instruments UPM DT 10 or DT 100
Ultrasound Power Meter
8) Degassed Water (<5 ppm) for Ultrasound Power Meter
5.4. RECIPE FOR DEGASSED WATER
Boil Distilled Water for 30 minutes
Place water in a non-porous container and
immediately close hermetically
Allow to cool to room temperature of approximately
70 °F (21 °C) May be refrigerated to aid cooling time
NOTE :
Do not use Tap water or Distilled water in the
Ultrasound Power Meter. Use only Degassed Water in
order to obtain correct test results. The chart below
illustrates the oxygen content of Degassed, Tap and
Distilled Water.
5.5. FULL FUNCTIONAL TESTS
Perform the tests found in this section to check Full
Functionality of new Intelect Legend 2 and
accessories.
Before releasing the device to the end-user, the Final
test must be done, passed at 100 % and registered in
the doc (Page 59 and 62)
5.6. US CALIBRATION REQUIREMENTS
The US Applicator has been calibrated during the
manufacturing process and doesn't need any
calibration during the product life.
BUT the replacement of some parts in the
applicator requires a calibration after repair.
Refer to page 25 for more information.
The calibration must be performed only by a repair
center trained and equipped with a US power
meter
.
A measurement of the power output is mandatory
after repair (Final Test)
For US Applicator Operation refer to page 47
WATER TYPE
ppm of Oxygen
Degassed per recipe
Less than 5 ppm
Tap Water
Up to 35 ppm
Distilled Water
Up to 20 ppm
 Loading...