This document outlines the procedures for installing and removing memory modules (DIMMs) in Check Point 6000 and 7000 series appliances. It serves as an installation guide for users looking to upgrade or replace memory in these network security devices.
Function Description:
The primary function of this document is to guide users through the process of replacing or upgrading the memory in their Check Point 6000 and 7000 series appliances. These appliances are network security devices, and memory is a critical component for their operation, impacting performance and capacity. The document provides detailed instructions and diagrams to ensure that the memory replacement process is performed correctly and safely. It covers various models within the 6000 and 7000 series, including base, Plus, and Turbo versions, and specifies the appropriate DIMM configurations for different memory capacities (e.g., 8 GB, 16 GB, 32 GB, 64 GB).
Usage Features:
The manual is structured to facilitate easy and safe memory installation and removal. Key usage features include:
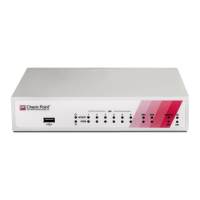
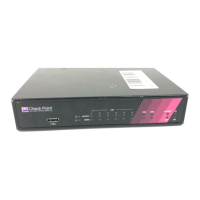
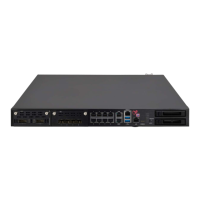
- Appliance Compatibility: The document clearly lists all applicable appliance models, including 6200, 6400, 6500, 6600, 6700, 6800, 6900, and 7000 series, ensuring users can quickly determine if the guide is relevant to their specific device.
- Preparation Guidelines: Before any physical work begins, the document emphasizes crucial preparation steps. These include shutting down the appliance, unplugging power cables, ensuring a clean and level work environment, and having physical access to the appliance's interior. This focus on pre-installation steps is vital for safety and to prevent damage to the device.
- Memory Kit Contents: It specifies the expected contents of a Check Point memory kit, which typically includes the installation guide itself, the memory DIMMs, and an ESD grounding strap. This helps users verify they have all necessary components before starting.
- ESD Protection: A critical safety feature highlighted is the use of an ESD (Electrostatic Discharge) grounding strap. The document provides specific instructions on where to attach the ESD strap for different appliance models (e.g., unpainted chassis point for 6500, ESD grounding plug for other models) to protect sensitive electronic components from static damage.
- Clear Removal Instructions: The process for removing the top cover of the appliance is detailed with numbered steps and an illustrative diagram. This includes unscrewing cover screws, pulling the cover back, and lifting it off. This visual aid is particularly helpful for users who may not be familiar with the physical layout of the appliance.
- DIMM Configuration Diagrams: For each specific appliance model (e.g., 6200/6400/6600/6700 Base, 6500, 6800, 6900 Base, 6900 Plus, 7000 Base, 7000 Plus), the document provides clear "Top View" diagrams of the CPU and memory slots. These diagrams are crucial for understanding the default memory configuration and how to populate slots for upgrades to different capacities (e.g., 16 GB, 32 GB, 64 GB).
- Slot Identification: The diagrams clearly label memory slots (e.g., A0, A1, B0, B1 or 1, 2, 3, 4, 5, 6, 7, 8), and tables specify which DIMMs to use and which slots to populate for each upgrade scenario. This eliminates guesswork and ensures correct installation.
- Visual Cues for Sockets: The document explains that memory sockets in 6000 appliances are colored black and blue, while 7000 appliances use blue sockets. It also provides visual representations of "Memory socket with DIMM installed" and "Memory socket without DIMM installed" to help users identify the current state and target slots.
- Step-by-Step DIMM Removal and Installation: Both removal and installation of DIMMs are broken down into easy-to-follow numbered steps, accompanied by detailed illustrations. These illustrations show the correct hand placement for handling DIMMs, how to press retaining clips, and how to align and insert the modules.
- Important Handling Notes: Throughout the DIMM handling sections, "Important" notes emphasize critical precautions, such as only touching the rear corners of the DIMM to avoid damaging the heat sink or other components, and ensuring no leftover parts remain inside the appliance. It also highlights that DIMMs are not symmetrical and provides guidance on aligning them correctly using the notch.
- Post-Installation Verification: After physical installation, the document provides instructions on how to verify the memory configuration using the appliance's Command Line Interface (CLI). Users are guided to enter Expert mode and run the
free -g -o command, with an example output provided for a 6500 appliance with 16 GB of memory. This step is essential to confirm that the new memory is recognized and functioning correctly.
- Troubleshooting Note: A "Note" explains that the
freeutility output might show a slightly different total memory than the actual installed memory due to address space considerations, providing context for potential discrepancies.
Maintenance Features:
While primarily an installation guide, the document implicitly supports maintenance by:
- Preventive Measures: The strong emphasis on ESD protection and careful handling of components serves as a key maintenance feature, preventing damage during upgrades or replacements. By following these guidelines, users reduce the risk of needing further repairs.
- Clear Disassembly/Reassembly: The detailed instructions for removing and replacing the appliance cover are essential for any internal maintenance task, not just memory replacement. This foundational knowledge is transferable to other hardware maintenance activities.
- Hardware Identification: The diagrams and slot labeling help users accurately identify memory slots and understand the physical layout of the appliance's motherboard, which is useful for future maintenance or troubleshooting.
- Verification of Changes: The CLI verification step allows users to confirm that the memory upgrade or replacement was successful, ensuring the appliance is in a correct and operational state after maintenance. This helps in early detection of any installation issues.
- Documentation for Future Reference: As a comprehensive guide, it serves as a valuable reference for future memory-related maintenance, ensuring consistency and correctness in procedures over time.
- Safety First: The repeated warnings about sharp metal parts and the recommendation that only experienced personnel perform these tasks underscore a commitment to safety, which is a core aspect of responsible maintenance.