Rear hub - complete service
A complete service on the R45 rear hub should be performed periodically (every one
to two years), or if foreign debris is detectable in the oil and/or the grease looks hard or
dry. Also use this process to replace any worn or broken parts within the hub assembly.
A complete service involves a thorough cleaning, inspection and relubrication of small
parts and hub bearings. An R45 Hub Service Tool is required for this procedure.
Rear hub basic disassembly
Remove skewer, cog lock ring and cassette from hub.
Loosen 2.5mm hex bolt on adjusting clamp and then unscrew it until it is loose on
axle.
Wrap shop rag around adjusting clamp and use adjusting clamp to pull R45 QR
insert directly out of non-driveside aRemove it from axle. [Tech Tip: if adjusting clamp
is difficult to remove, first insert a 5mm hex key into drive side axle end to keep axle
stationary. Then insert a 2.5mm hex key into hole on adjusting clamp adjacent to
2.5mm hex bolt. Use 2.5mm hex key as a lever to unscrew adjusting clamp.]
Remove axle from the main hub assembly by pushing it through from the non-
driveside. [Tech note: The outboard driveshell bearing of the Shimano-compatible
R45 may or may not remain on the axle as it is pushed out of the hubshell assembly.
It will be remain on the axle in the Campagnolo-compatible version.]
Remove driveshell by holding hubshell or wheel in one hand and with other hand
pull driveshell straight out of hubshell assembly.
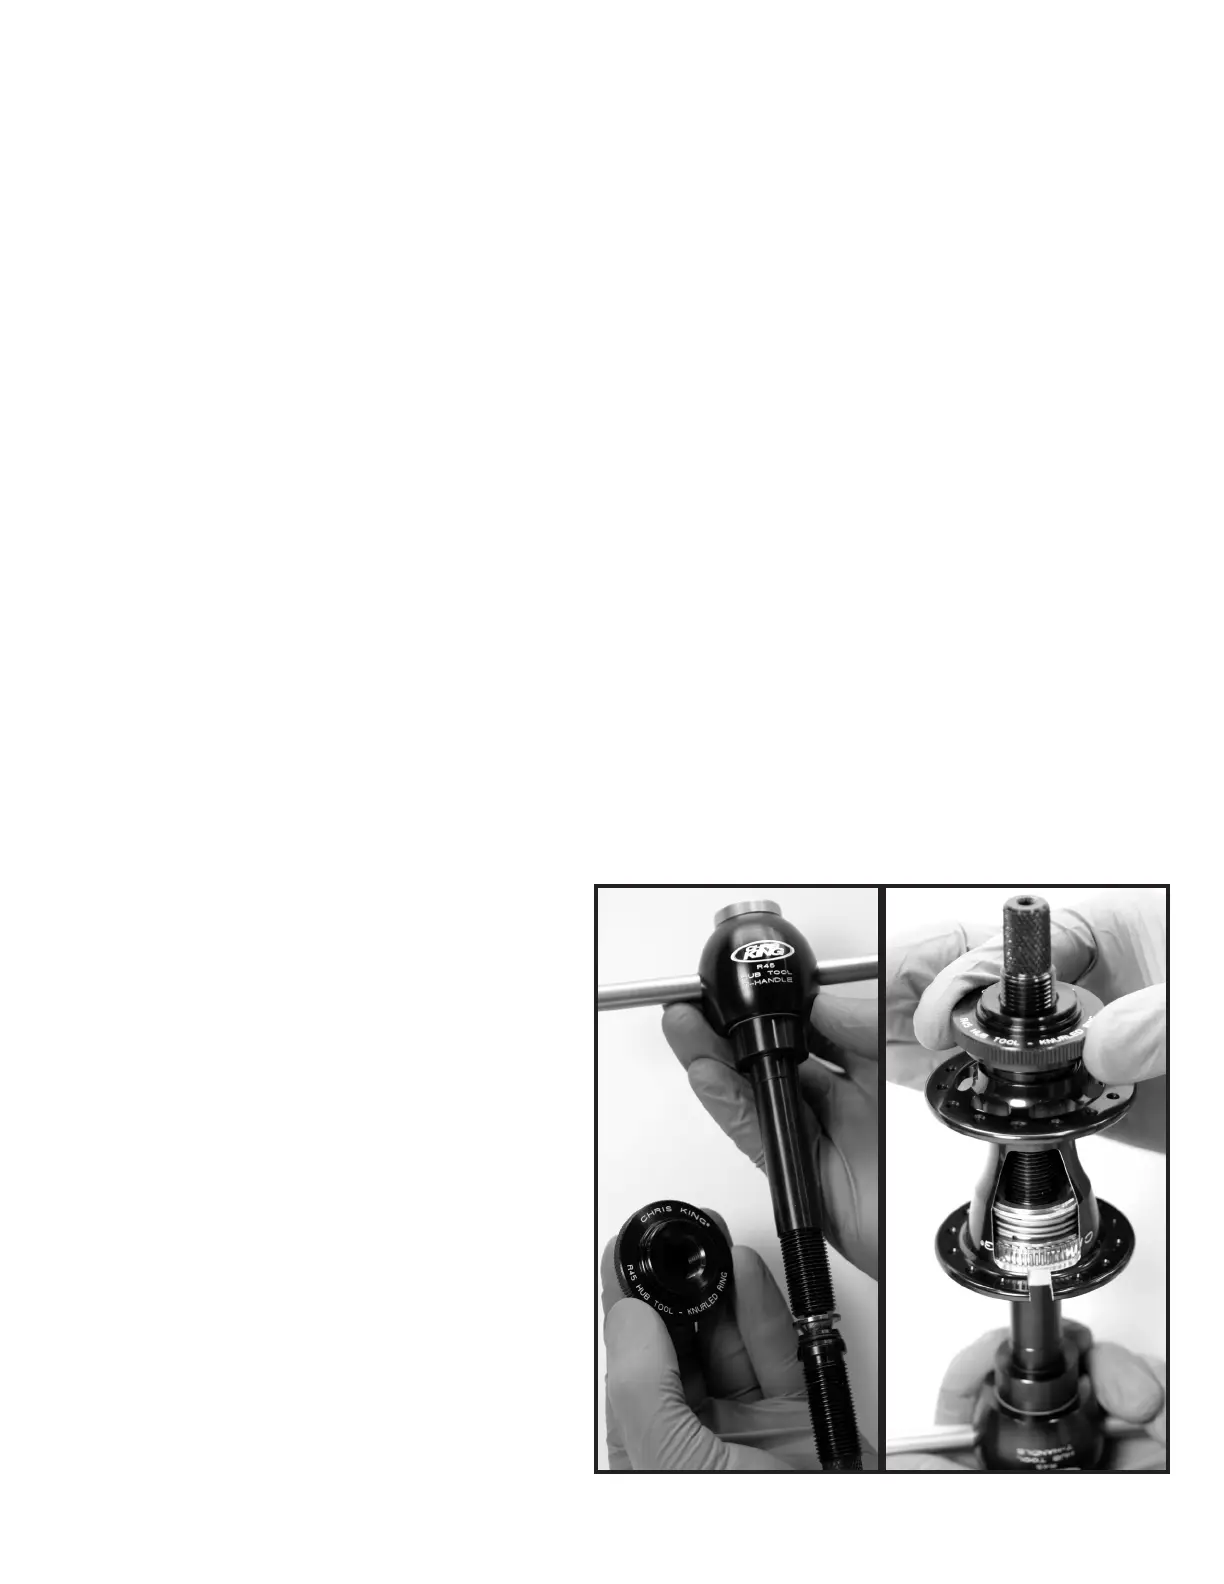
R45 tool setup for rear small hubshell bearing removal
Slide small split ring onto extension shaft with laser marked side facing towards knurled
end of extension shaft. Slide cone onto extension shaft with narrow end facing split
ring. Thread extension shaft onto T-handle until assembly is snug, but split ring is not
expanded.
Insert T-handle assembly into
driveside of rear hubshell.
Thread knurled ring onto extension
shaft, with the laser marked side
facing away from the T-handle, until
it is half way onto the extension
shaft
Move hubshell toward knurled ring
until knurled ring sits flush with
small hubshell bearing.
Turn extension shaft clockwise
until tight to fully expand split ring
behind small hubshell bearing
Invert T-handle so that hubshell
falls onto expanded small split
ring.
Turn knurled ring clockwise until it
sits tightly against small hubshell
bearing.
Using a hammer, tap strike plate
on T-handle to remove small
hubshell bearing and the inner seal behind it.
1.
2.
3.
4.
5.
1.
2.
3.
4.
5.
6.
7.