Front hub - basic service
Follow these instructions to clean and relubricate front hub bearings, and to set bearing
preload.
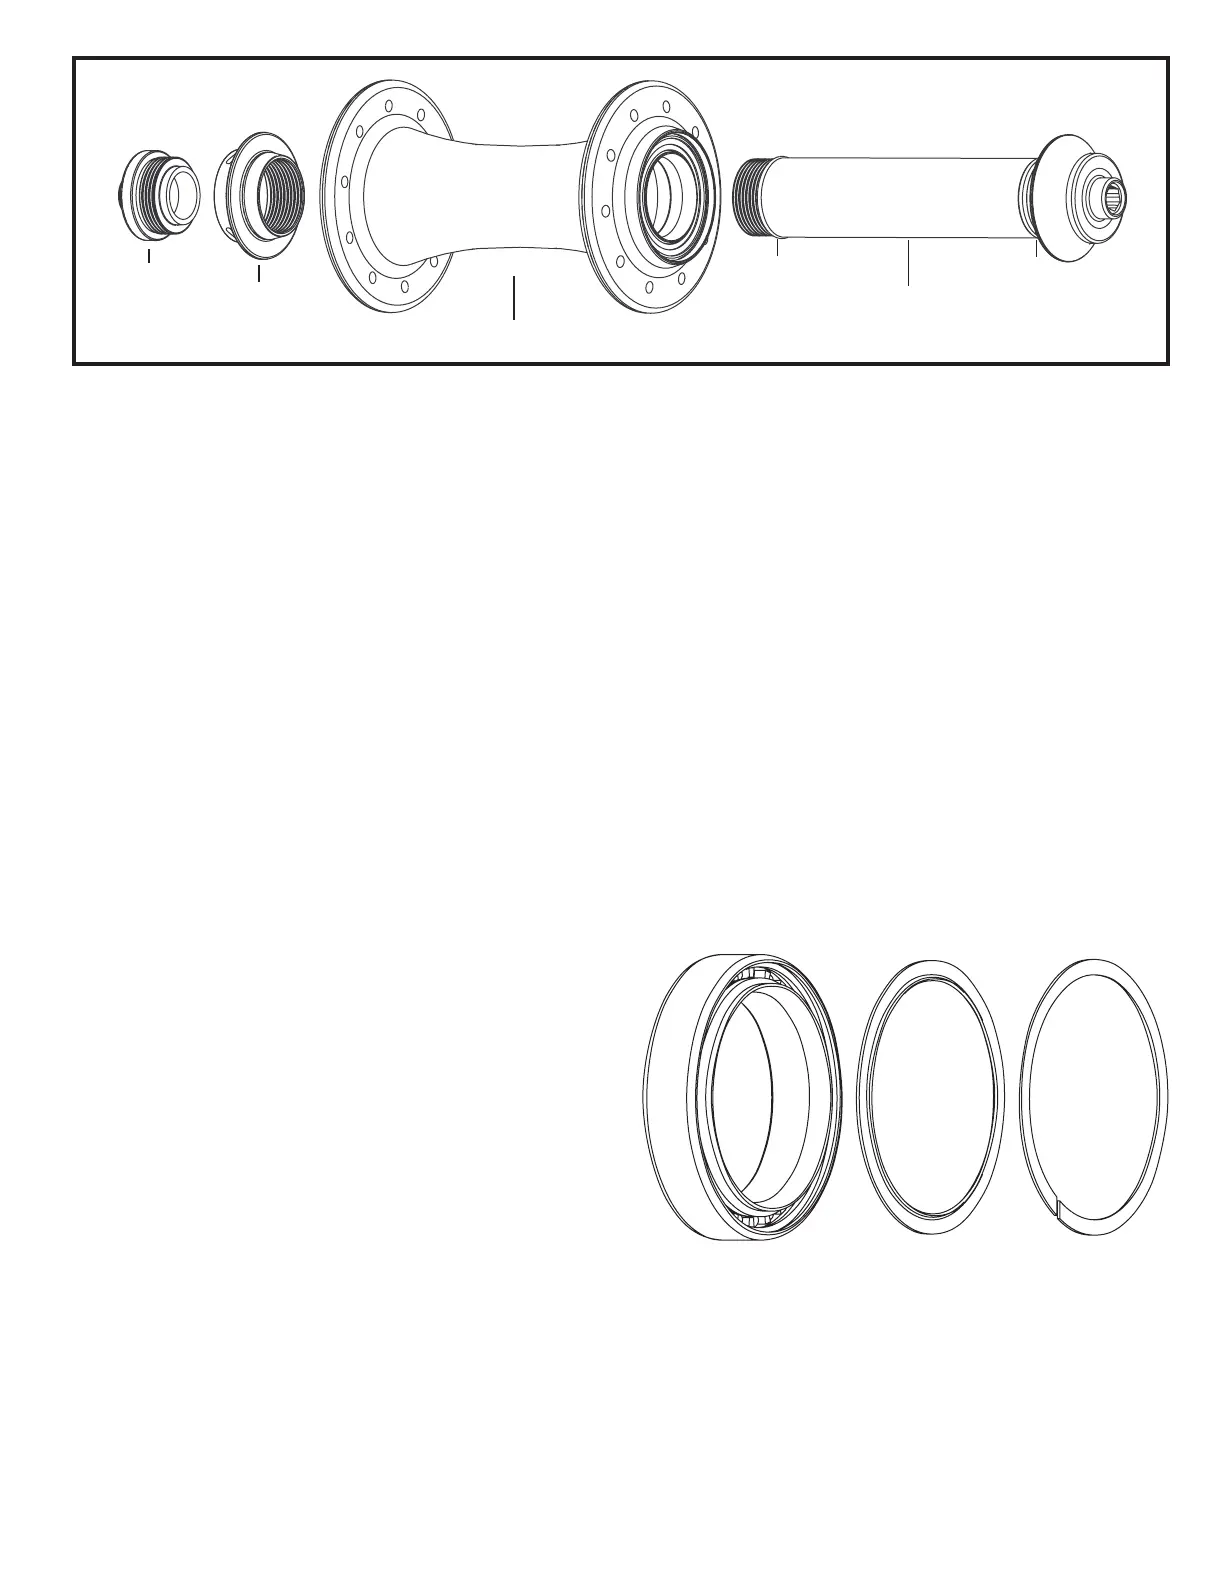
Front hub disassembly
Remove axle skewer from hub
Secure “L”-shaped 5 mm hex key in vice with shorter end of “L” facing up
With adjusting cone facing up, insert hub axle onto 5 mm hex key so that hub can
sit freely on vice.
Insert 5 mm hex key into adjusting cone-side of hub
Turn hex key counter clockwise to loosen axle end and adjusting cone from main
axle assembly. Unscrew until both items are free from main axle.
Unscrew axle end from adjusting cone.
Slide main axle from hubshell assembly
Both front hub bearing assemblies can be now be accessed for cleaning and
relubrication.
Proceed to “Service of the bearings” section.
Complete removal of front hub bearings
requires the R45 Hub Service Tool. Refer to
“Complete Service” for procedure. Front hub
bearings do not need to be fully removed
unless they are damaged and require
replacement.
Service of the bearings
Chris King sealed bearings have removable
snap rings that hold the rubber seals in
place.
Carefully, using a very small screwdriver,
pick, or penknife, remove the snap ring by inserting tool into split of snap ring. Gently
work one end of the snap ring toward bearing center until it is out of its groove.
Follow the ring around with the tool until the snap ring is completely dislodged.
Lift and remove exposed rubber seal to access the interior of the bearing.
Thoroughly flush the bearing with a light solvent-based spray lubricant (e.g.,
WD-40™).
1.
2.
3.
4.
5.
6.
7.
8.
9.
1.
2.
3.
O-ring
front main
axle assembly
adjusting
cone
axle end
front hubshell assembly
O-ring
Bearing
Assembly
Rubber Seal
Snap Ring