Rear hub
adjustment
The R45 rear hub features
an adjusting clamp and
bearing spacer spring that
maintain proper bearing
preload and seating.
Secure “L”-shaped 5
mm hex key in vice
with shorter end of “L”
facing up
With non-driveside
facing up, insert hub
onto 5 mm hex key
so that hub can sit
freely on vice. If vice
is not available, place
the hub or wheel onto
a flat, firm surface with
the non-driveside
facing up.
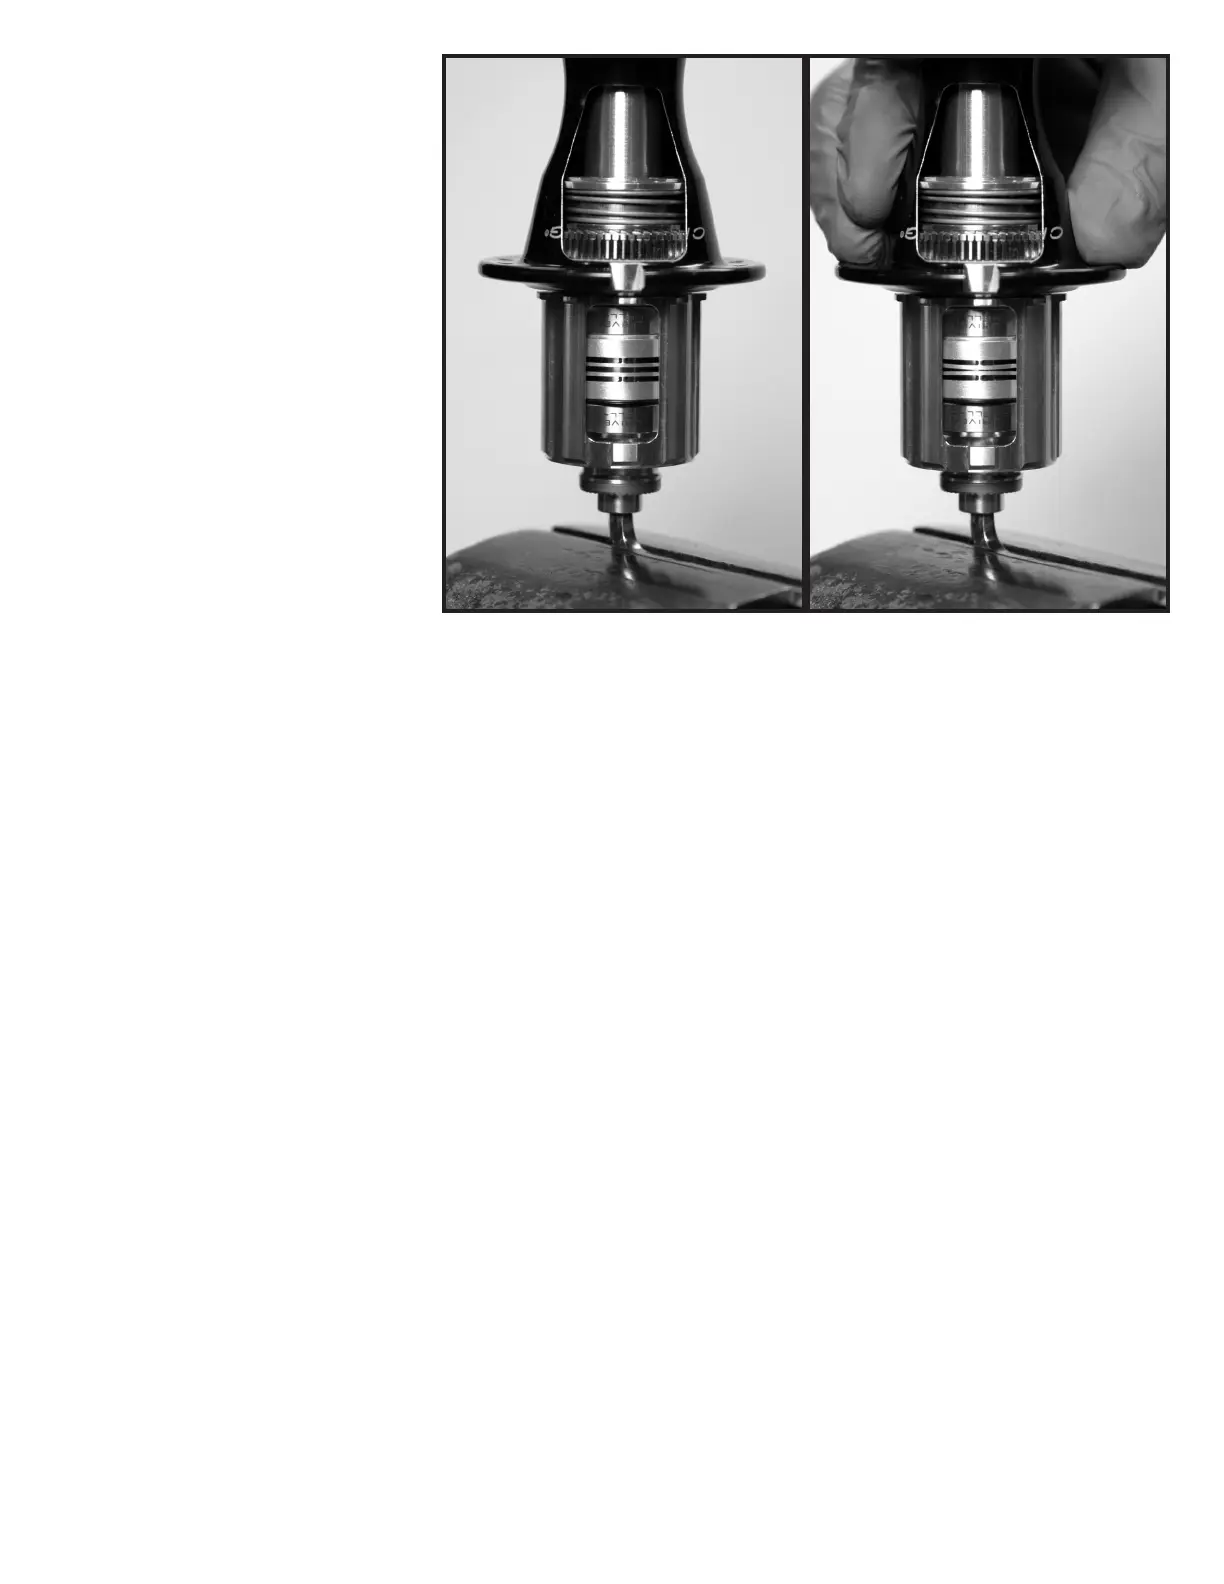
P u s h d o w n w a r d
o n t h e h u b s h e l l .
Thi s c ompresse s
the bearing spacer
spring in the drive shell and ensures proper bearing seating. See photos below.
While maintaining firm downward pressure on the hubshell, tighten the adjusting
clamp onto axle until it stops against bearing. Do not overtighten.
Once adjusting clamp is in position, tighten adjusting clamp hex bolt to 10 inch-
pounds (1.1 Nm) using a 2.5mm hex key.
Double check adjustment by attaching wheel to bicycle frame. Check for bearing
play or binding, and readjust adjusting clamp if needed.
Note: Correct adjustment of the rear hub is necessary for proper engagement of
the RingDrive. If the hub is run loose, the RingDrive may not engage properly and
could lead to permanent damage of the internal parts.
1.
2.
3.
4.
5.
6.
Note bearing spacer spring before being compressed
(left), and while under compression (right). Proper bearing
preload can be set only while spacer spring is under
compression.