16
5.4.3 Installation of connection kit
Use parts and components specied for installing the installation components.
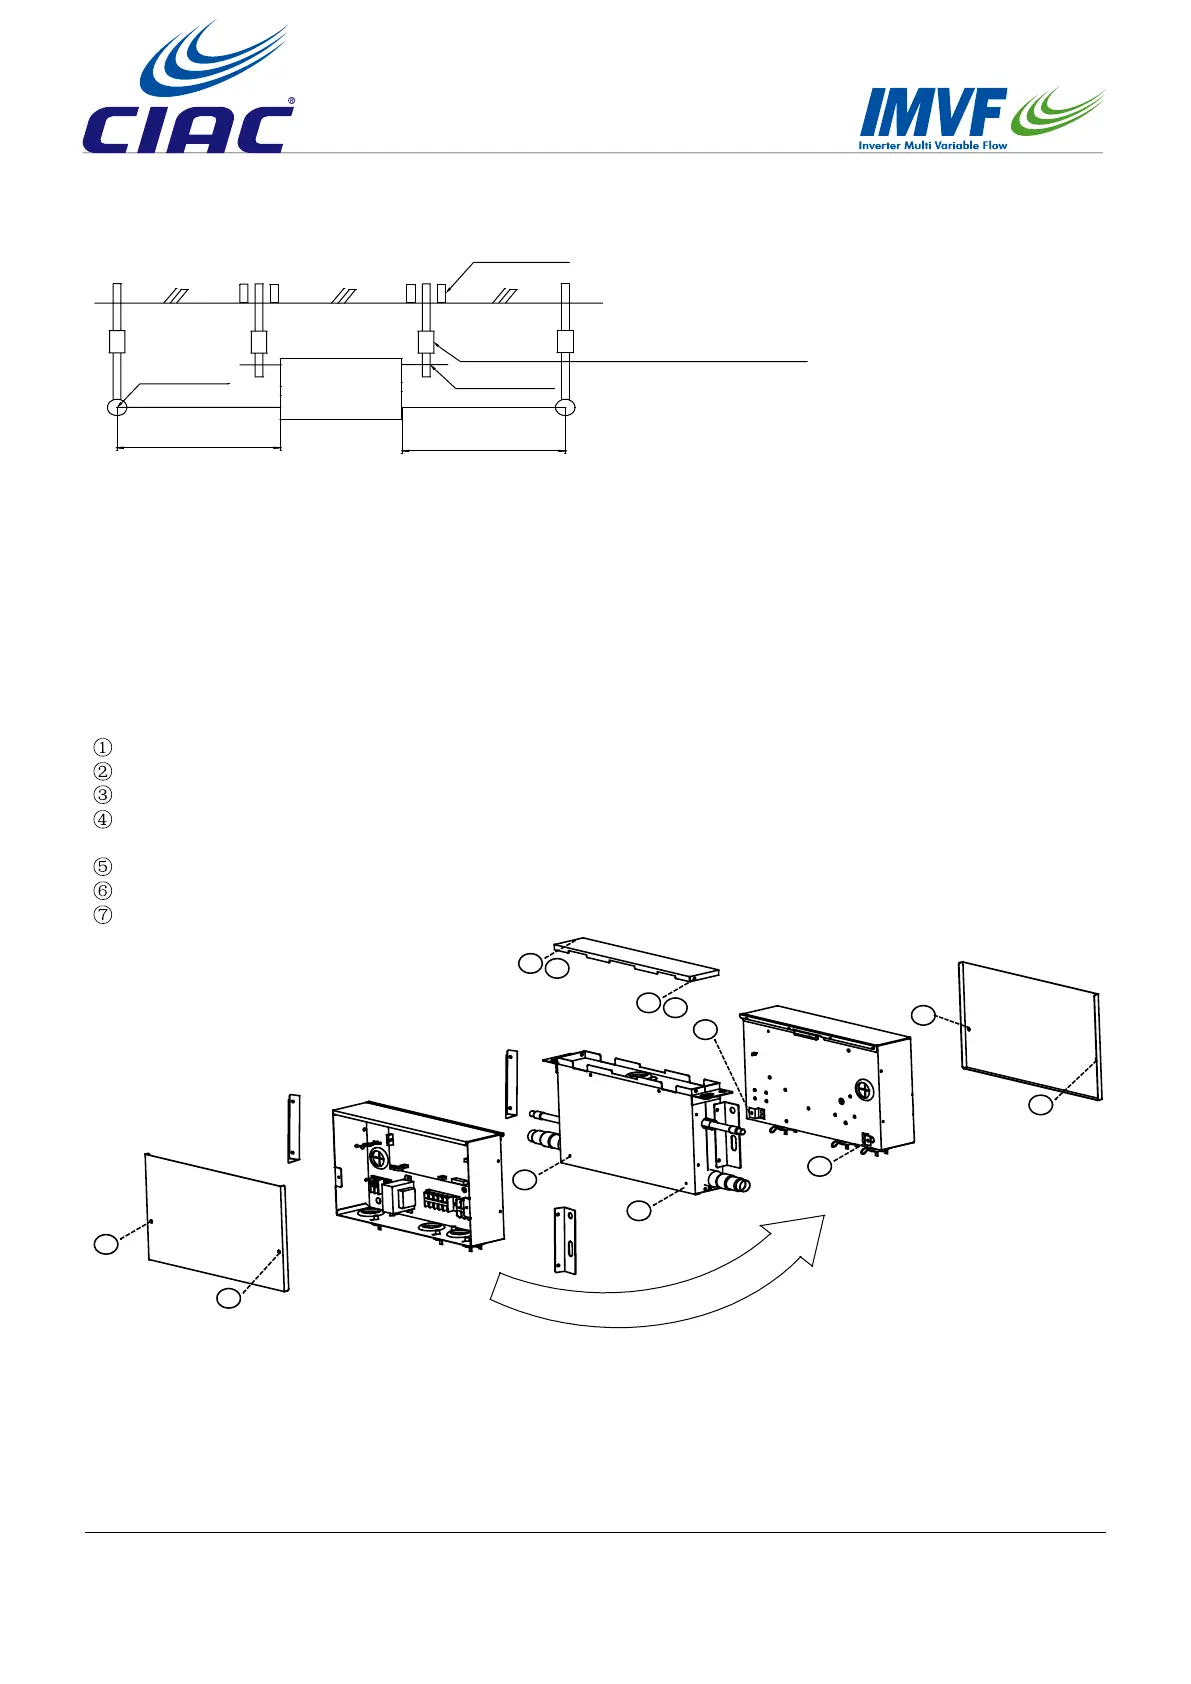
(1) Change the installation direction of electric box according to requirements following the steps below; (see
Fig.1)
Remove the cover of the electrical appliance box; (2 screws)
Remove the electrical appliance box; (2 screws)
Remove the top plate; (4 screws)
Change the outgoing direction of wiring (electric valve coil) between the equipment and the electrical appliance
box;
Rotate 180° to install the top plate;
Install the electrical appliance box;
Install the cover of the electrical appliance box.
Fig.1
④
Electrical appliance removal
1
1
3
3
2
2
5
5
7
7
6
6
Thick cement plate
Foundation bolt
Long nuts or turnbuckle
Lifting bolt
Connection
kit
Lifting tools
Less than 1m
Less than 1m
Note: All the parts in the gure are purchased locally.
See the Fig.1 & Fig.2 to install the lifting bolts and hoisting tools.
• Use the lifting bolts with the size of M8~M10
• Press insert for new settings. Press hole in anchor if set. Ensure that it can sufciently withstand the weight of
the connection kit before installation.
Fig.2