REact30-8010v1.0.docx - 6 - 03/2023
Installation onto valves
The actuator can be fitted onto the valve in any position. The coupling is designed with a standard M12 connection thread.
The length of the pillars or yoke type must be specified when ordering an actuator.
Installation with yoke
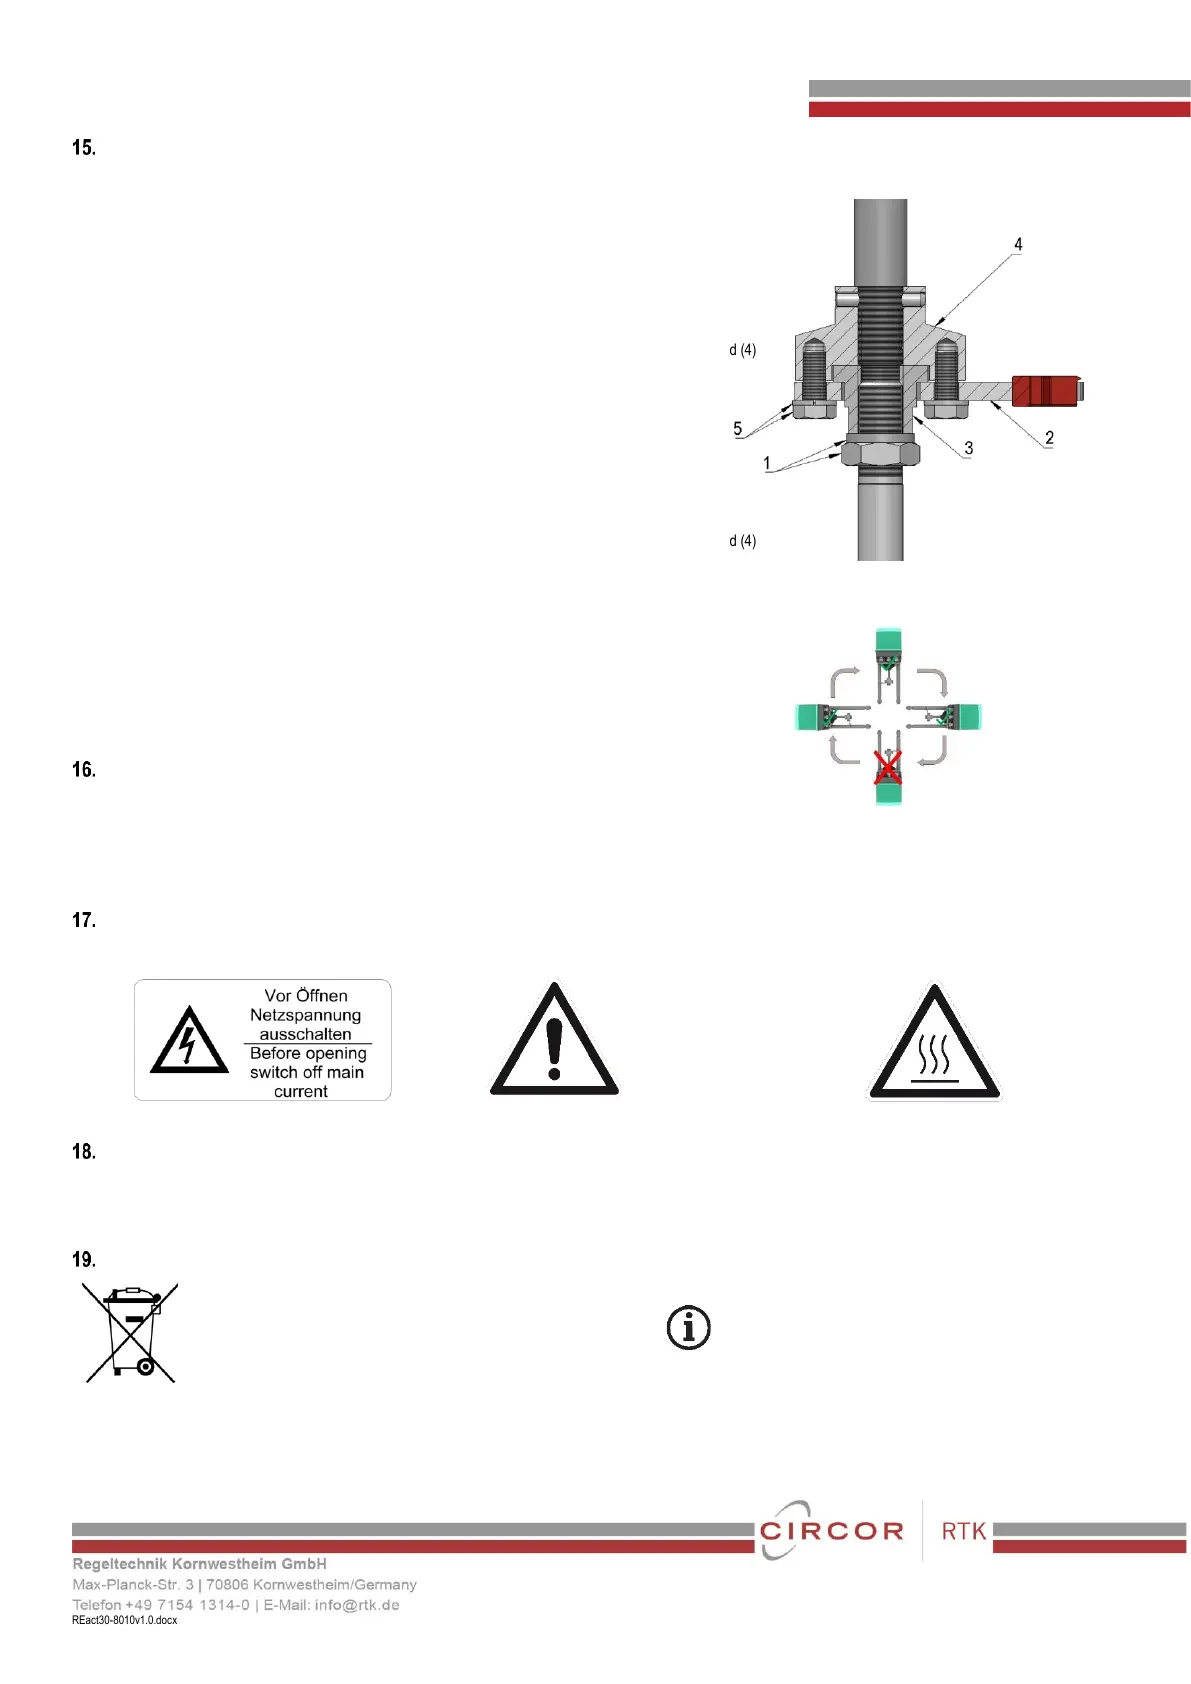
• Screw DIN 439 M12 nut and spring washer onto the valve plug stem (1)
• Place parallel guide over the valve plug stem (2)
• Screw the bushing stud onto the valve plug stem (3)
• Install the yoke with 2 M14x40 bolts nuts and spring washers onto the actuator
• Attach the actuator/actuator spindle to the valve and adjust the position to lay flat on the bushing stud (4)
• Connect the parallel guide to the actuator coupling with 2 x M6x14 bolts and spring washers (5)
• Adjust the actuator for stroke according to installation instructions
Installation with pillars
• Screw in the required pillars
• Screw DIN 439 M12 nut and spring washer onto the valve plug stem (1)
• Place parallel guide over the valve plug stem (2)
• Screw the bushing stud onto the valve plug stem (3)
• Attach the actuator/actuator spindle to the valve and adjust the position to lay flat on the bushing stud (4)
• Connect the parallel guide to the actuator coupling with 2 x M6x14 bolts and spring washers (5)
• Adjust the actuator for stroke according to installation instructions
Permitted mounting positions:
Vertical upright position
Horizontal position with the pillars stacked
• Install the actuator to leave adequate room for manual operation(Fig.10).
• Also leave approx. 130 mm clearance to the top of the body for removal(Fig.10).
Operation conditions
• max. altitude 2000 m above sea level
• max. 95% working humidity
• Power supply ±10%
• Overvoltage category II
• Contamination level II
Hazard warnings