CIRRUS AIRPLANE MAINTENANCE MANUAL MODELS SR22 AND SR22T
24-30
Page 61
Serials 22-0002 thru 22-1601, 22-1603 thru 22-1643,
22-1645 thru 22-1662
EFFECTIVITY:
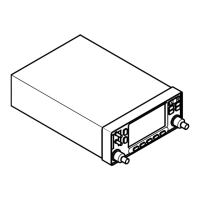
AB.Ammeter Select Switch - Serials 22-0002 thru 22-1601, 22-1603 thru 22-1643, 22-1645 thru 22-
1662 (See Figure 24-308)
(1) Removal - Ammeter Select Switch
(a) Set BAT 1, BAT 2, and AVIONICS switches to OFF positions.
(b) Pull BAT 2 circuit breaker to the OFF position.
(c) Remove engine cowling. (Refer to 71-10)
(d) Disconnect battery 1. (Refer to 24-30)
(e) Remove MFD. (Refer to 31-60)
(f) Remove screws and washers securing low-volts annunciator to instrument panel.
(g) Identify and disconnect all wires from low-volts annunciator and select switch.
(h) Remove nut and washer securing ammeter select switch to instrument panel. Remove
low-volts annunciator and ammeter select switch from instrument panel.
(i) To disconnect switch, use a solder gun and remove solder from each terminal.
(2) Installation - Ammeter Select Switch
(a) Identify corresponding wires and place heat shrink tubing into position. Solder all wires to
corresponding terminal on select switch.
(b) Install screws and washers securing low-volts annunciator to instrument panel.
(c) Place ammeter select switch into position and secure with washer and nut.
(d) Install MFD. (Refer to 31-60)
(e) Connect battery 1. (Refer to 24-30)
(f) Install engine cowling. (Refer to 71-10)
(g) Reset BAT 2 circuit breaker.
(h) Perform Operational Test - Ammeter Select Switch. (Refer to 24-30)
(3) Operational Test - Ammeter Select Switch
(a) Set ammeter switch to “BATT”.
(b) Ammeter should read 0 to -10 amps.
(c) Turn on large electrical loads (landing light, nav lights, pitot heat, etc.) to ensure more
amps are drawn when larger electrical loads are introduced.
(d) Verify ammeter indicates an increased discharge.
(e) Set ammeter switch to “ALT1” and “ALT2”.
(f) Ammeter should read “0” in both positions.
01 Jan 2012
 Loading...