Installation instruction
Siemens Remote Service COIT-000.812.04.02.02 Seite 5/14 Siemens AG
Rev. 02 02-02 CO SGK Medical Solutions
&RQQHFWLQJ3RZHUDQG7XUQLQJWKH5RXWHU2Q
You can verify your installation by checking the appropriate LEDs during the installation process if you
switch the router on before making any network connections.
Follow these steps to connect the router to the power supply and turn it on:
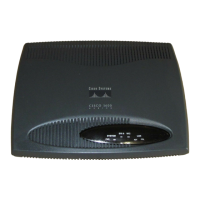
6WHS Connect the DC power cable (included with the router) from the power supply to the DC power
input on the rear panel of the router. (Figure 1)
6WHS Connect the female end of the cable to the male receptacle of the power supply.
6WHS Connect the male end of the power cable to the power outlet.
6WHS On the rear panel of the router, turn the power ON by setting the switch labeled I / O to the I
position.
6WHS Slip the wire clip over the power cord to ensure that the power cord remains attached to the
router, as shown in Figure 1.
6WHS Check the following LEDs:
• The SYSTEM PWR LED (front panel)---On if power is being supplied to
router.
• The SYSTEM OK LED (front panel)---On while router software is
operational. (This LED first blinks and then remains on continuously.)
• The OK LED (rear panel, next to Flash PC card slot)---On if the Flash
memory card is installed correctly.
)LJXUH
 Loading...